Tuesday 29 October 2013

A Tour Of Our New Kitchen

kitchen tour
On friday we made our big move, it was a really exciting day!  I've finally finished unpacking boxes and our house is now starting to feel more like a home! 

My first priority was getting the kitchen sorted. It is my favourite room. Luckily the decoration was all already lovely, so all I really needed to do was a bit of cleaning and carefully choose where I was going to put all of our things!
retro kettle and toaster set green
I am so pleased with this Morphy Richards kettle and toaster set from Argos. I think the toaster looks a bit like a vintage radio! I love the colours and have decided that I am going to base the colour theme of the kitchen around them.  I'm going with cream, retro/pastel green, and  a hint of black to match the cooker and fridge.
tour of my kitchen
I had some vouchers for Next from when I left work, so I bought a drainer to match my kettle and toaster! Because for some reason we didn't have a draining board fitted. But actually this looks much prettier don't you think?
leisure cooker
I love my new 'Leisure' cooker.  It's so big! And it has an awesome hot plate which you can use to cook steaks or pancakes. I'm looking forward to trying that out!
my new kitchen
We picked a black Beko fridge freezer from Argos to match the cooker, and I think it was a really good choice, great value compared to a lot that we had seen. (Even if they did deliver it a 7:10am!) I'm also loving the cream bin we chose from Dunelm Mill, if there is such a thing as loving a bin?

A lot of things in the kitchen are second hand or given to us from relatives. Our awesome John Lewis knife set used to belong to Chris' cousin, but he kindly passed them on to us when he bought himself a new set. He also gave us some great pots and pans.  My 'pasta' tin holding the utensils next to the cooker once belonged to my Auntie Margaret, as did the washing machine. The blue tea set in the picture above was bought from a charity shop, and the  (faux) vintage radio next to the sink was found at a carboot sale, which I then painted.
cookery books
I didn't realise I had so many cookery books! It's lovely to be able to have them all out though.
kitchen-diner tour
I'm so glad this kitchen has enough room for a dining table, I think it makes it much more sociable! I bought my table from a car boot sale for £5! (It was the end of the day and the man didn't want to take it home again!) I painted the legs and sanded down the top. It is great because it extends so I can fit more people around it. You might remember that I made over the chairs in this post. The candlestick holders were given to me by my granny.

The light fittings were left from the previous owner, they are really pretty and they sure are bright!

My bureau came from the dump and was only £20. It just needed a lick of paint and then it was beautiful! It is definitely my favourite piece of furniture.  I wasn't quite sure where to put it, but it ended up in the kitchen and it may well stay there! I might make it my crafty corner as it is such a light room, and I will probably end up doing lots of crafts on the dining room table anyway. Maybe I just need a little table in the corner to put my sewing machine on.
window seat
I love that the windowsill  is big enough to use as a seat, and handy too since we don't have many chairs at the moment! You can't really tell from these pictures, but this window actually looks out onto a small woodland area at the front of the house. 
kitchen decor
And here are some lovely cards we were sent! The lady who lived in the house before left us a card, a bottle of fizz and 2 bunches of flowers, it was a lovely welcome!
The only thing we need to do in terms of decoration is get some nice green/cream blinds to match my colour theme. We're also hoping to get a dishwasher soon, as my parents are buying a new one, so we can have their old one. I'm quite excited about that as it will mean less washing up, yay!

I am so pleased with my new kitchen, I think I will be spending a lot of time in here!


 Laura xXx

Disclaimer - I was gifted the Morphy Richards toaster and kettle set from Argos, but I genuinely love them to bits!


Read More

Wednesday 23 October 2013

Our New House

our new house
I'm finally moving into my very own house! (Yes thats a little drawing of it above) We get the keys on friday and I have to say I am super duper excited!

The last few days have mostly consisted of; organising life insurance, house insurance, ringing gas, electric, water and telephone companies, packing things away, making list of things we need, and generally not sleeping much through all the excitement and stress!

You might remember this post in March, when we had just put an offer in on a house.  We actually got the whole way through the process on our side, when we found out that our seller wasn't doing so well, and actually hand't even found anywhere to move to. Knowing that this would probably take him 3 months even if he found somewhere immediately, we decided to go and look at some other properties to keep our options open. Also, the more we thought about it, the more concerned we were that the house might not be big enough for us long term, and we would have to move if our family happened to grow!

Anyway, the day we found out, we went to look at a house which was quite a lot more than we had set out in our original budget. I think I pretty much fell in love as soon as I walked into the kitchen. It was a really good size and was decorated nicely too, and it had a beautiful cooker. One of my main priorities when we started looking at houses was that there was room enough in the kitchen to sit down and socialise. The other house didn't have this, but this one certainly did! I could just imagine it!

As we viewed the rest of the property there was nothing that really put me off.  All of the rooms were painted white, and the downstairs had floorboards, which was exactly what I wanted to do to the other house. The bathroom and shower room were both lovely and you could really tell that the owner looked after everything well.

After we left, we decided to go and look at some other houses at a similar price, just to check there wasn't anything we liked better. There wasn't! We went to see 3 other properties, and the whole time I was just concerned that we would miss out on the other one if we waited too long. So we went back to view the property for a second time, and I loved it just as much, if not more! We also found out that the owener had found somewhere she wanted to move to, but she would have to rent first, which meant there would be no chain, perfect for us!

So a week later we put in an offer, unfortunately that was rejected, but we put in a second one and it was accepted! Hurrah! Up until this point I don't think I quite believed it was going to happen, since it went wrong on the last house, but now it is official, only 2 days to go!

I am really excited to show you around the house once we get in, and hopefully it won't be long before I have lots of DIY's on the go! I can't wait! 

Sorry for the radio silence for the next few days, I promise I will have lots of lovely posts for you soon!

Laura xXx
Read More

Thursday 17 October 2013

Easy DIY Halloween Mask Tutorial

DIY HALLOWEEN MASK TUTORIAL
As Halloween is fast approaching (cue scary photo of me above), I thought I would take the opportunity to share a Halloween mask DIY that takes only the most basic supplies! If you ever find yourself in a hurry to make an outfit, then check your crafty cupboard to find it bare, this one is for you!

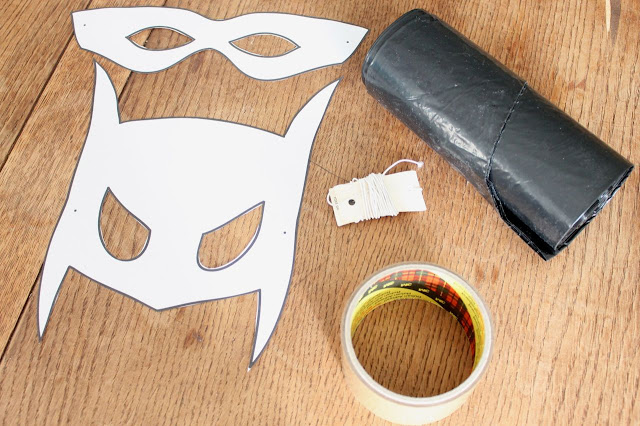
I've drawn out 3 mask designs for you which you can choose from. Download thebatman mask hereand thecat and bandit masks here

All you need to do is print out your favourite onto plain A4 paper, cut out along the black lines, then grab the following supplies;

  • A Black Bin-bag
  • Packaging Tape
  • Scissors
  • Elastic/ribbon
  • Pen

Supplies for halloween maskStart by opening the bin-bag out flat onto the table. Then cover an area big enough to fit your mask in, with tape going vertically. Once this is done we need to make it thicker, so we are going to repeat the same process but this time place the tape horizontally. Keep layering until you feel that it is thick enough. I used 3 layers on mine, but they could have done with a couple more.
Halloween mask DIY
Once you think it is thick enough cut out the taped area. The side of the bag that we didn't tape to will fall away and you can just discard this.

Then draw around your mask template and cut out.
Halloween mask templates
templates for halloween mask
When you turn it over you should have something that looks like one of the below;

easy halloween cat mask template

easy batman mask template diy


easy bandit/superhero mask template diy
Then simply add your elastic or ribbon, throw on a bin bag cape and you are good to go! 
Batman mask diy
batman mask diy
I hope you enjoyed that little Halloween themed DIY. What are your plans for this Halloween?

Laura xXx

Read More

Tuesday 15 October 2013

Alphabet Dates - D is for Don't go out!

alphabet date - d
What a miserable day sunday was! Yucky rain but a perfect excuse to make our 4th alphabet date 'don't go out!" Although we actually did because we decided we should buy a couple of 2 player games, and an extra console for Chris's X-box, which he got for his birthday recently. We braved the dismal (I know, clutching at straws) weather to go into town and visit Game, but rushed back quickly so that we could play.
Letter D - Alphabet dates
After much deliberation in the shop we settled on 2 rather different games.  Resident Evil, because we like zombies and we like the films, and the Simpsons Game, for a more lighthearted option!

We also decided to treat ourselves to a healthy Boots meal deal for consumption during the games. (I'm really upset that none of this begins with the letter D)
boots meal deal
quicheedamame beans
Alphabet dates, simpsons game
We started off with The Simpsons which was pretty entertaining, but actually quite difficult for what it is. 

I think we both preferred The Resident Evil game, although it took a while for me to stop cowering behind Chris's character when I heard zombie noises. It turns out that there is a button you can press which makes you just follow the other character, which was useful for me since I was having trouble walking and looking in the right direction at the same time! It was alright until Chris stopped walking, then my character just ran round him in circles which apparently he found to be quite distracting! 

Anyway, I'm getting quite good at killing zombies now, and it has put me properly in the mood for the new series of Walking dead. Woohoo! 

Next time it will be letter E, now that is a tricky one. Any thoughts?

 Laura xXx


Read More

Friday 11 October 2013

DIY Honeycomb Shrinky Dink Earrings


DIY honeycomb earrings using shrinky dink plastic
The other day I showed you my DIY gemstone jewellery tutorial using shrinky dink plastic. Well I also made some honeycomb earrings, but I didn't feel they fitted with that post, so here is a little bonus.

I am really pleased with these because they are a little bit different and they are inspired by my admiration of honey bees! If you don't remember why I like bees you may want to take a look at a couple of my very early posts here and here
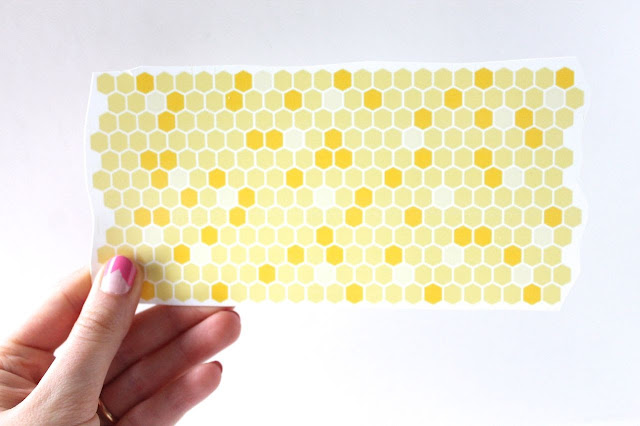
honeycomb pattern
Anyway, the method to make these is really easy. I found a honeycomb pattern online and printed it out onto the shrinky dink plastic. I debated about what shapes to cut out, but in the end I went for the traditional hexagon.  I put them together in the same way I did the earrings in this postDIY honeycomb shrinky dinky plastic earrings
What do you think? Do you like them?  Shrinky dink plastic is so versatile, I love the stuff!

Laura xXx
Read More

Wednesday 9 October 2013

Snail Mail Collective - Back to School

snail mail collective

You might remember that last month I took part in The Snail Mail Collective, well I enjoyed it so much I decided to do it again! This month I was paired with D'Ann from Mismatched Simplicity. D'Ann is a lovely Texan girl with a passion for books, cups of tea, food and travel to European destinations amongst other things!

Post Swap - snail mail collectiveWe found we had lots to talk about, not least weddings, as D''Ann recently got married! (take a look at how gorgeous her vintage heirloom dress is here, and her amazing wedding here) And of course my special day is drawing closer by the second. No need to Panick! I am making progress though, you can see my latest update here.

Our theme this month was 'Back to School'. D'Ann sent me some lovely stationary in an autumnal theme, and some little fox place settings, aren't they cute!? harry potter post card
D'Ann is also rather fond of Harry Potter, and is still awaiting her acceptance letter to Hogwarts!  She sent me this postcard of a rather little Harry and Ron being studious.  I have never really gotten into Harry Potter, but I think it is something I would like if I did. I enjoy being absorbed into fantasy worlds and can become quite obsessive!  Lord of the Rings and Game of Thrones are my favourites, I like all the little details about how their worlds work.  Anyway, I think I am going to give Harry Potter a shot, I'd really like to visit Harry Potter Studios and I guess I will appreciate it more if I know a little bit more about it! So that is definitely on my reading list now!

You can see everyone's link up's from September's Snail Mail Collective here.

Laura xXx


Read More

Monday 7 October 2013

An AMAZING Sewing Machine - Janome 525S Review

Janome 525s sewing machine review
A little while ago it was my Mum's birthday. I really didn't know what to get her, I was stuck. I'm not supposed to buy her chocolates because 'it will make her fat', and I can't buy her anything big (or even medium sized) as she lives in a dinky little cottage, and she won't have anywhere to put it.

Ugh, what to get her! Then I stumbled across The Amazings and saw this course for freehand embroidering your own necklace using dissolvable fabric.  I remembered having a conversation with my Mum when Kirsty Allsop used dissolvable fabric to make something pretty in one of her TV programmes. I was pretty sure that my Mum had even gone out and bought the fabric and the special foot for her machine, so I thought it would be something fun she could do, which didn't take up space or make her fat, hurrah!

As I made the purchase I noticed that I was also being entered into a draw to win a sewing machine up to £300. I thought something like 'ooh, it would be nice if I won that', then promptly forgot about it.

But, guess what? I did win it! Amazings, you are amazing!

This absolutely made my day because my old Singer hasn't been working properly for months, the tension has been completely out, and I had to pretty much ground to a halt where sewing is concerned. It has been on my to do list to take it to a specialist to get it fixed for ages, but I have never gotten around to it, and actually I would have probably ended up paying more than it was worth, so just as well!

I will be sad to say goodbye to my Singer, but I got to choose any machine I wanted for under £300, so I decided to do some research. As it turns out, Singer aren't all that hot any more, as people on twitter told me, and the reviews confirmed. Apparently they sold the Singer name in the 90's, and the machines just aren't the same quality.
Janome sewistEverywhere I looked it seemed, people were pointing me in the direction of Janome. I had a look at the most expensive Janome machines I could afford, but they were all computerised, and I felt I wanted something a bit simpler. Then I found this beauty, the Janome 525S, which is actually only £229. All the reviews were great, PLUS it was the machine the contestants used on The Great British Sewing Bee AND it was voted Which Best Buy!

To Top it off, after I had made my decision  I noticed it had made an appearance in this months Molly Makes magazine, and coincidentally elsewhere in the magazine The Amazings were also mentioned. Weirdly enough, the illustration accompanying this article was drawn by talented lady Emma Block, who is one of the lovely friends I have met through blogging. Talk about fate huh!
janome review
On tuesday, beautiful Janine the Janome arrived (named accidentally by Rachel)! I excitedly took her out of her box and sat down to read the instructions. Usually I wouldn't bother with instructions, I would be too impatient, but I decided I wanted to look after Janine, and make sure I was doing everything right! And guess what, I learnt a heck load more than I would have done otherwise! I found her secret storage compartment, I learnt how change the foot over (which was super easy peasy), to sew on a button and make a button hole, and how to re-wind the bobbin without unthreading the machine! janome button hole
She sews really easily, although I did have a few issues initially with the top thread getting caught up inside the bobbin casing every time I finished stitching, but that seems to have stopped now and it was probably something I was doing wrong.
janome sewing machine review
I'm really excited to start sewing up a storm! The first project I have in mind is to make new curtains and cushion covers for the camper van, so I will let you know how that goes!

I'm keen to learn to sew clothes as well, and I know there are some online courses you can take, so I might give that a go at some point. I'm just so excited!

Have you used a Janome machine before? What are your thoughts on them?

And have you checked out The Amazings yet? If you want to learn new crafty skills it is definitely the place to go!

Laura xXx


Read More

Friday 4 October 2013

DIY Shrinky Dink Jewellery Tutorial - Diamonds are a girls best friend!


shrinky dink diy jewellery tutorial
Remember a little while back when I made Game Of Thrones sigil badges out of shrinky dinks? Well I'm at it again, but this time I am making fancy jewellery!

It is true what they say. Diamonds ARE a girls best friend! And so are crystals and emeralds and sapphires, anything pretty really. BUT who says they have to be real? If you cant afford a selection of jewellery with real diamonds and other gem stones, (lets face it, who can?) then why not make your own for super cheap?  They are pretty darn easy to make too! So today I am going to show you how you can quickly knock up your own gemstone earrings, necklace and brooch!
Before you start you will need to find some gem stone shapes which you like, and can print out. I downloaded most of the diamond/gemstone/crystal shapes from mini-eco. Aren't they so pretty! I love all of Kate's Tutorials, they are fantastic, you can check them out here. I copied the image onto my computer and coloured each gem stone shape separately.

Emerald Brooch


DIY shrinky dink diamond brooch tutorial


You will need:
  • Shrinky Dink Printable Paper - print out 1 gemstone (mine measured  approx 6cm by 5cm at its widest points before being cooked.)
  • An Oven
  • A Brooch Back
  • Superglue


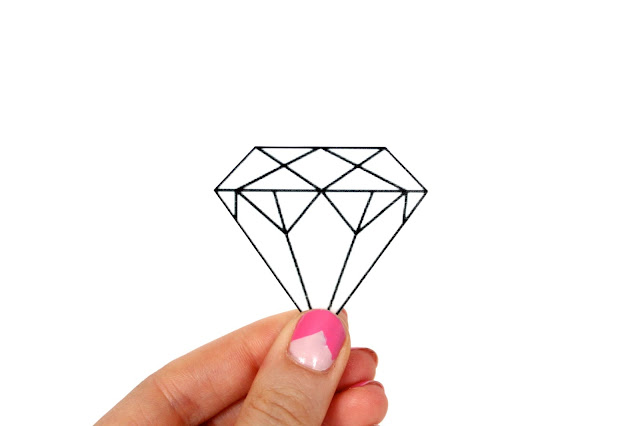
Print out your gemstone onto the shrinky dink paper, and cut it out carefully. Bear in mind before you print that it will shrink quite considerably, and the colour will also darken. Follow the instructions on your packet to get the best results. Here is what mine looked like before I had cooked it...

shrinky dink diamond...and here is what it looked like afterwards. Quite a difference right? So make sure you are printing it big enough for your brooch back to fit on. Once you have cooked it, all you need to do is glue on the brooch back with the super glue, (be careful not to get it on your fingers!) and you're done!diamond shrinky dink diy

Diamond Earrings

shrinky dinky diamond earrings diy tutorial
You will need:

  • Shrinky Dink Printable Paper- print out 2 diamonds -  (measuring approx 5.2cm by 4.8cm at the widest points before being cooked)
  • An Oven
  • Earwire hooks with spring and ball (or dangly earrings to you and me)
  • 4 small jump rings
  • A hole punch
  • Tweezers

shrinky dinky diamond
Start off by printing and cutting out your gemstone shape again, but this time you are going to punch a hole in it at the top so that we can attach the earring. It is easier if you have a single hole punch, but it could be done with a normal one if needed.
diy shrinky dinks
Then, bake it as before, and when it is done you can attach the earring.  I found that I needed to attach 2 jump rings, as when I only attached one the diamond was facing sideways rather than forwards. I don't have any proper jewellery making equipment, so I just made do with a pair of tweezers. You will need to bend each jump ring to hook it on, then bend it back once it is attached, and I found that was the easiest way to do it.
diy shrinky dink diamond earrings

Gemstone Necklacediy shrinky dink diamond and gem stone necklace tutorial

You will need:

  • Shrinky Dink Printable Paper-print out 5 gemstones (the diamond in the middle measured 5.2cm by 4.8cm before it went in the oven)
  • An Oven
  • A piece of chain
  • 6 jump rings
  • A hole punch
  • Tweezers


shrinky dink diamond necklace
Follow the same steps as with the earrings, but instead of punching one hole at the top, you will need to punch one hole on either side of each gem before baking.  Once cooked simply attach a jump ring to either end of your chain, then attach the gems to each other until both ends of the chain are linked up.
diy shrinky dinky diamond necklace tutorial
I hope you enjoyed my Shrinky Dink DIY'S today. I do have one more I would like to share with you, but I will save that for another day. If you do give this a go I would love to see your results!

Laura xXx


Read More
Related Posts Plugin for WordPress, Blogger...
Powered by Blogger.

© 2011 Wrapped Up In Rainbows, AllRightsReserved.

Designed by ScreenWritersArena