Saturday 31 August 2013

August Review

In Life

The 31st of August marks exactly 1 year since Chris and I got engaged! I can't believe how quickly the time has flown by, it is crazy! I guess now it is seriously time to get to work on the wedding planning. Eek!
My friends moved into their house which is just down the road from where we will be living. I am itching to move into our new place now, I just can't wait! I have been doing a bit of a stock check, seeing what items we have and what we need. I've been to the shops to buy a few things, we now have lovely new bedding, a sieve, a potato masher, a dustpan and brush and an ironing basket! I get immense pleasure out of packing all of these things away neatly in a box ready to be used once we move in. It must be nesting or something!

What We Watched

Worlds End - Classic Simon Pegg and Nick Frost movie. Not as good as Sean of the dead but still great!
Kick Ass 2 - I was blown away by this film. Go see it!
Dear John - This is the kind of thing I end up watching on the TV when Chris is out gigging. I never used to like soppy romances, but I think I must be going soft in my old age because I quite enjoy them now.
Waterworld - Chris told me I needed to see this. It was pretty good. I love the concept that the world is now covered in water!
Grown Ups - Yep, this was quite funny!

What I Read

The zombie survival guide by Max Brooks - I had been wanting to read this for a while but actually found it a bit disappointing. I'm not sure what I was expecting though, it did a pretty good job of covering all bases. I think maybe, for me, zombies just aren't as entertaining in print. I need to see the action happening on a screen.
Dash and Lily's book of dares - A sweet book about a couple of teenagers that get to know eachother through a notebook. I think this is maybe meant for younger readers than me, I liked the concept but the book didn't really wow me.


In Blog Land

One giveaway finished and another began! If you haven't entered yet, you can still win this awesome Kenwood Blender worth £119.99!


My Favourite Posts

Read More

Friday 30 August 2013

A day in the life ... Victorious festival

hms victory
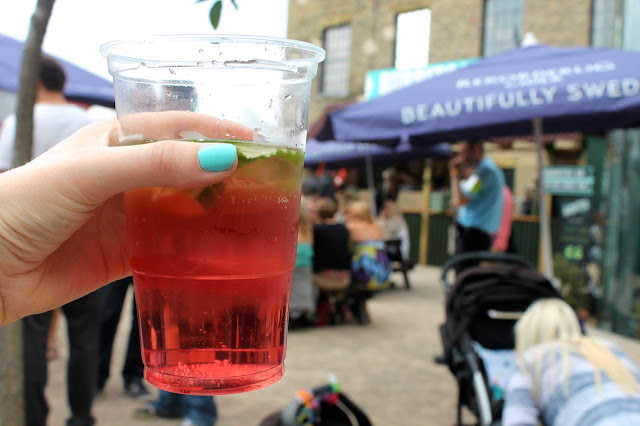
Last weekend my friend Becky and I spent the day at Victorious Festival in Portsmouth. We actually didn't see many bands, we were quite happy taking in the atmosphere, drinking cider and mojitos, and going on a free tour of the HMS Victory! Having said that we did catch Reef's classic 'Place your hands', tune!

It was a really good value day out at only £15 a ticket, so if you are near the area next year, I would definitely recommend it! Here are some pictures I took of the day...victorious festival boutique garden
cider mojito
buskers stage
ice cream
victory
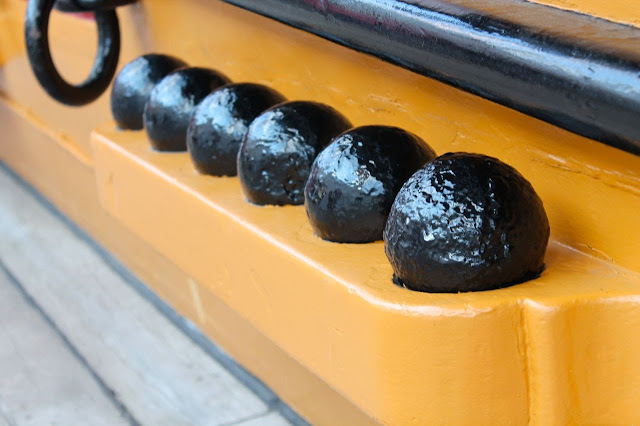
canons
canon balls
fudge
hot dog
vintage suitcases
photo booth
We even managed to find a free Photo Booth! Now you probably know how much I love photo booths if you have ever read my wedding blog, so this was very exciting!  There was an interesting array of props, hence why I appear to be some sort of spectacled tennis player, and Becky is a cross between a Blues Brother and Mickey mouse.

What a fun day! Have you been to any events recently that are worth sharing?

Laura xXx


Read More

Thursday 29 August 2013

Super Awesome Kenwood Blender Giveaway!!!

Win this beautiful Kenwood blender!


Today I am seriously excited to announce a competition in association with Argos, who will be giving away this gorgeous Kenwood blender to one of my lucky readers!  Keep reading to find out how to enter!

First off though, I'd just like to share some of my favourite items from the Argos catalogue. Honestly, I didn't realise that Argos had gotten so stylish! I am loving all of the bright coloured utensils and appliances they have at the moment. Check out that fridge! Have you ever seen one that colour before?   Did you know that they now have a Habbitat range too? It's pretty awesome. It's giving me lots of ideas for our new house!

My favourite Argos products
Find all of these items at the Argos Website

Anyway, back to the matter in hand. If you fancy winning this Kenwood Blender which is worth £119.99, all you need to do to enter is follow me on Twitter. You can also gain extra entries by tweeting about the giveaway, following me on Facebook, following me on Instagram, and leaving a comment on this post.

Please use the Rafflecopter widget below to enter.


a Rafflecopter giveaway

I can't wait to announce the winner! Just so you know, I am going to be incredibly jealous of whoever snags this prize! My blender works a treat, but this one looks so pretty!

Good luck!

Laura xXx


Read More

Tuesday 27 August 2013

Paper Themes Giveaway Winner


Good morning you lovely lot! Today I am very excited to announce the winner of my Paper Themes Giveaway!

... And, the winner is...

Claire from Claireabellemakes!

Well done Claire!

Commiseration's to those of you that didn't win, BUT don't despair, I have another giveaway coming up in the next couple of days that I think will knock your socks off! So stay tuned!

Laura xxx
Read More

Saturday 24 August 2013

Tri-This; Quinoa


Quinoa is supposed to be pretty much the perfect food. It is super high in protein, low in sugar, and gluten free! It is actually a seed not a grain, did you know that? Quinoa has recently become one of my favourite ingredients. So here are a few experiments I have tried with it that turned out well!
quinoa burger recipe
1. Quinoa Crusted Turkey Burgers

This is an adaptation of a recipe I posted about here. But instead of using breadcrumbs to coat the turkey burger, I used Quinoa!  It crisped up really well and is obviously a fantastic healthy substitute for breadcrumbs. I actually added curry powder to the turkey mixture this time, which turned out great! I also put in a little bit less garlic.

Ingredients;

Burger
400g Lean Turkey Mince
1 Clove of Garlic
1 or 2 tsp Ground Cumin (or/and curry powder)
Chopped coriander

Crust
Cooked Quinoa
Pepper and Salt to taste
2 eggs
Olive oil

For the full recipe check out this post, substituting breadcrumbs for quinoa, obviously!
quinoa flapjack recipe
2. Quinoa Flap Jacks

I've seen a few recipes about which use quinoa as an ingredient in a sweet dish, so I thought I would give it a go myself! My idea was to make little snack bars, but I think actually they taste better served with yoghurt, so these are perfect for a breakfast treat! Full of goodness and no naughty ingredients at all!

Ingredients;
1/2 cup uncooked quinoa
1 cup oats
2 mashed bananas
1/4 cup coconut oil
1 cup raspberries
sesame seeds
Ground flax seed
Agave nectar to taste

Rinse and cook your quinoa, then put to one side. Mash the bananas and mix with the coconut oil, oats, sesame seeds, ground flax seed and quinoa. Add agave nectar to taste. Add the raspberries last and mix in carefully. Put the mixture in a flat baking tray. It would probably be a good idea to line the baking tray with baking paper, but I didn't think of this at the time! I cooked this in the aga for about 30 minutes, but just keep checking on it until it is brown on top, but not burnt!
Quinoa Salad
3. Quinoa Salad

I like to make all sorts of quinoa salads, it really just depends what is in my cupboards! My favourite is probably salmon with peas, sweetcorn and avocado. This one is really tasty too!

Ingredients;
Quinoa
Broccoli
Onion (Diced)
Chorizo Sausage
Butter

Rinse and boil up your quinoa. Meanwhile fry up some diced onions, small chunks of chorizo sausage, and broccoli with a little butter. Rinse your quinoa then chuck it in the pan with everything else for a minute or two. Finished!

Are you a fan of quinoa? 


Laura xXx
Read More

Thursday 22 August 2013

Experiments With My Video Camera


The other day, Chris and I went with his Mum and Dad, to my parents house, to show them the church we will be getting married in.

I decided it was high time I used the video function on my camera, so I took some footage of the journey and the bits and bobs we did that day.

Since we got engaged I have spied some lovely wedding videos on the internet, and I really wanted a videographer for our wedding. However, as it goes, all the good ones are rather expensive! So, I decided to test out if I could edit together a relatively decent video myself, out of the footage I took on our little church expedition day. The idea being that we get a couple of friends to capture the highlights of the day, then I will edit them together afterwards.

My camerawork is rather shoddy in this instance (I'm sure you would never guess that I graduated with a degree in Media Studies!), but actually I quite like the effect this gives once you put it all together. It is that kind of home made style that wedding videographers seem to be trying to capture these days anyway!

I wish I had shot a bit more footage so that I could have made it a bit more pacey in places, but I'd love to know what you think.  If you stick around to the end there is a VERY cute donkey.

Would you hire a videographer for your wedding, or perhaps you have already done so. Would you recommend it?

Laura xXx
Read More

Monday 19 August 2013

Cake Decorating with Tala

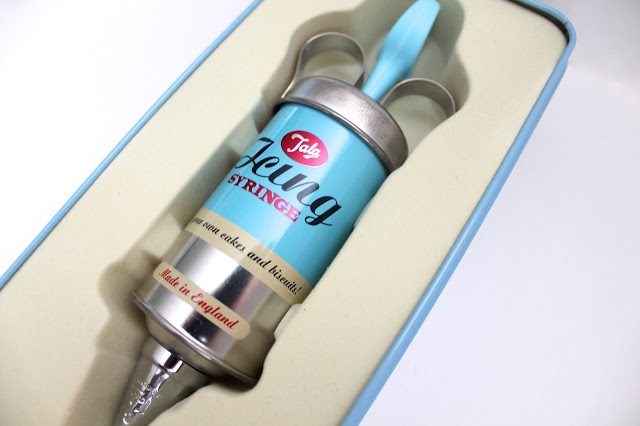
Tala Icing Syringe

I had another wonderful post day last week because the lovely people at Tala sent me one of their products to test out! A beautiful, vintage style icing syringe!

I was really excited to give this a go! Although I love cooking I don't often bake, but I would really like to learn a bit more, and if I can make the cakes look pretty all the better!

I was also sent 3 additional types of nozzle, so I have lots of experimenting to do!
Tala Icing Syringe
First of all I needed to bake some yummy cakes, for which I used this cake recipe. They were delicious, but I always find that my cakes don't rise enough. I don't know if it is because I am not putting enough mixture in, or perhaps it is because I am using an Aga instead of a conventional oven, but either way, they were never going to look as pretty as the pictures of the cakes in the recipe I followed! Perhaps one of you will be able to tell me where I am going wrong?

Next came the challenge of the icing sugar.  Tala have a very helpful guide on how to make your icing and use the syringe, so that was really handy! But, it is still a bit tricky getting the icing the consistency that you want it. In the end I think it might have had a bit too much icing sugar in it, next time I will try it with a little less.

I was excited to get my food colourings out again! I figured I would just have a bit of a play and see what happened. Lets just say I need a little bit of practice. Here is a picture of my best effort...
My Iced Cake
Ok, I went a little crazy with these ones. We will be consuming a lot of sugar in the coming days! 
Decorating Cakes
I think I will work on my cake baking technique, then once I've got that sorted I can give this another shot. I do really like the icing syringe though, I'm sure it is easier than using a piping bag would be, and it is much prettier!

One thing I will say about icing cakes.. it is super messy! I got myself in a right state. Next time I will be more prepared!

Laura xXx


Disclaimer -Tala sent me this item to test out free of charge, however all opinions stated above are my own.
Read More

Saturday 17 August 2013

A DIY Personalised Housewarming Gift Idea

DIY Housewarming card
This week, one of my best friends, Kate, and her boyfriend, moved into their very first house! It has all been very exciting, because originally we were buying a house in the same street! Unfortunately, ours didn't quite work out, but the good news is that we have now found somewhere even better, and it is still only a 6 minute walk from their house, hurrah! I am very excited to become neighbours, so fingers crossed this one goes smoothly. 


As you can see from my little interpretation above, their house is absolutely lovely! I thought I should take them over a little house warming gift, but I knew that they had been shopping for most things already, so I settled for something which I believe you can't have too many of, wooden spoons!

But wooden spoons are usually a bit boring aren't they? So I thought I would share with you the quick make over I gave them. (Kate, if you are reading this, it wasn't quick at all, it was a long and painstaking process!)

First of all, in case you can't imagine it, here is a picture of some normal wooden spoons...
Plain wooden spoons
All I did was to mask of little sections of the spoons with washi tape. Then I used different coloured acrylic paint in each section. I had to give each one 2 coats.
diy fancy wooden spoons
Once it was dry I just removed the masking tape and and gave it a coat of clear sealer. Making sure to only get the sealer on the painted parts of the spoons, and no further down (I don't want to poison anyone!) And here they are finished...
diy painted wooden spoons
Now these probably wouldn't hold up that well in a dishwasher, but for a quick (not quick Kate!) personalised gift I don't think they are too shabby. And whats better is that they hadn't even bought any wooden spoons yet, woohoo!

Have you made anything in the past to give as a housewarming gift?

Laura xXx

Read More

Wednesday 14 August 2013

Alphabet Dates - A for Animals (and Nautical things)


seagull graffiti
Today Chris and I decided we needed a bit of a break. We both work from home, and Chris often gigs at weddings during the weekend. Last weekend he played Friday, Saturday and Sunday, which pretty much writes off the weekend.  I will usually work some of the weekend too, with the idea that we will go out on a weekday instead, but that very rarely happens!

It is very difficult when you work from home to split your 'work' time and your 'play' time up. Anyway, the other day we had an idea that we would start 'alphabet dating'. The idea is that each week one of us comes up with a date that is based on a letter of the alphabet, and the next week the other one does the following letter, etc. So I kicked it off with the letter A. Well, the day out went well, but I didn't really stick to the rules very well.  I thought maybe I could base the day on Animals, but somehow we ended up at Portsmouth Historic Dockyard. Then I thought we could go to the cinema and watch Alpha Papa, but we actually ended up watching Kick Ass (which is awesome by the way!).

We did go to Las Iguanas for lunch though (an iguana is an animal!!!) and we also went into a mini fossil museum/shop, which featured various creatures and critters.

Here are some of the pictures I took...
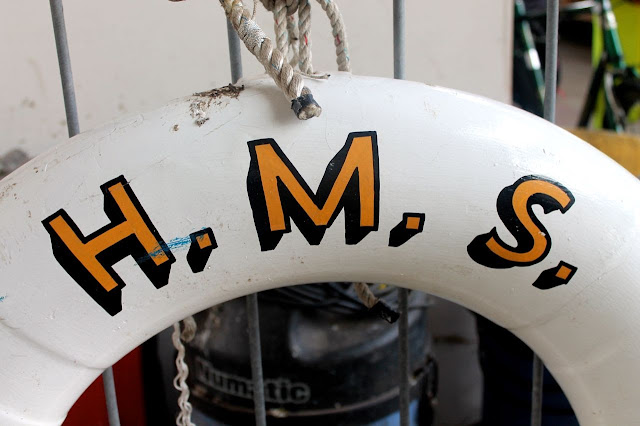
h.m.s
seaside font
Has anyone else tried alphabet dating? I thought we have invented it, but whilst searcing the internet for inspiration I discovered it was already a 'thing'.

So in a fortnight Chris will be basing a date on the letter B. Hmm, I wonder what he will come up with! Hopefully he will be more successful than I was!

Now we are off to eat an apple, an almond and an aardvark for dinner, see ya!

Laura xXx

Read More

Saturday 10 August 2013

Shrinky Dink DIY - Game of Thrones Sigil Badges

DIY Game of thrones sigil badges
The other day I promised you a Game Of Thrones themed shrinky dink tutorial. Well I hope you won't be disappointed because I have put every effort into making these as accurate as possible, using my GOT nerd knowledge.

Essentially what we are making is little badges, so if you aren't a GOT fan you can always adapt the idea to make something else.  I will share a few things I learned about shrinky dinks along the way.

So, without further ado, I present to you DIY GOT House sigil badges, featuring Lannister, Baratheon and Stark!

What you will need;
Shrinky Dink Paper (printable)
An Oven
A Brooch Back
Paint (can be spray paint, nail varnish or something else)
Glue

First of all decide what you want on your brooch and find images online. For these I simply found a shield outline, and the 3 animals on the Game of Thrones Sigils. Remember, we can paint these afterwards so it is really just the outline that is imporant. You will see that I reversed the Stark Direwolf below, that was because I did think I might just leave it white, so I didn't want any of the print on the side it was supposed to face.

If you had really good images I suppose you could just print them directly onto the shield design. But I decided to print them all separately, so they would have a 3D effect.

Copy and paste the images into a word document or another computer program, and print out onto your shrinky dink plastic. Then you will need to be patient and cut out each shape. Make sure you get in all the detail, it may take a little while but it is well worth it! Once I had done this I placed all my animals on top of the shields to get an idea of scale. I decided that the wolf and the lion were too big, so you will notice that later on I switched to smaller versions.
game of thrones diy
To get an idea of the size they are likely to come out, my shields measured 4.8cm by 6cm at their widest points when I printed them. Once they had been in the oven they measured about 2.8cm by 3cm. So make sure you make your images big enough. Here's the size before and after;
DIY shield brooch
Now follow the instructions on your shrinky dink packet.  Mine told me to make sure all the pieces were separate and put them on some baking paper. They took between 3 - 5 minutes to cook, and you could tell when they were done because they would curl up, and then flatten out. When they were flat again they were done. It was actually really interesting to watch!
Game of thrones sigil badges
Once all of your pieces are cooked you can think about what colours you want to paint them. I used spray paint on the wolf, lion and yellow shield, and nail varnish on the red and white shield. I think I preferred the evenness of the spray paint, but use whatever you have to hand!

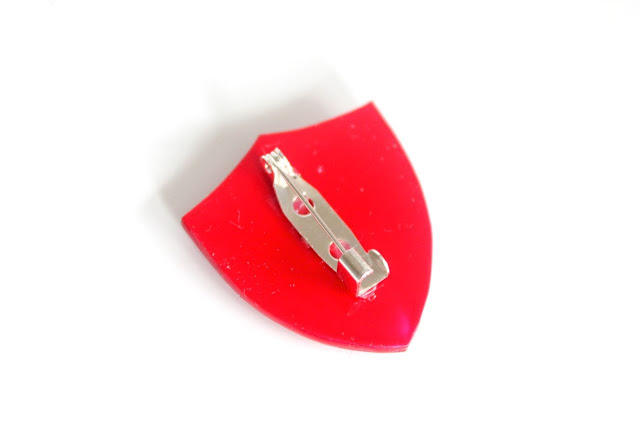
When these are completely dry, glue both pieces of plastic together, then glue the brooch back on too.
brooch back
 And you're finished! You can wear you sigil brooch with pride! But which house will you choose?
DIY - Game of Thrones Sigil Badges.


House Baratheon
DIY Tutorial - Baratheon sigil badge
House Stark
DIY Tutorial - Stark sigil badge
House Lannister
DIY Tutorial - Lannister sigil badge
I can't decide! Which house would you pick?

I hope you enjoyed my tutorial, even if you aren't a Game of Thrones fan. The possibilities really are endless with Shrinky Dink plastic. Although I do wish it was called something slightly less silly!  

You can take a peek at what else I have been making in this post. 


Laura xXx


Read More
Related Posts Plugin for WordPress, Blogger...
Powered by Blogger.

© 2011 Wrapped Up In Rainbows, AllRightsReserved.

Designed by ScreenWritersArena