Showing posts with label DIY. Show all posts

Thursday, 30 July 2015

My Living Room Tour

Grey and Yellow Living Room
Hey chaps, long time no see!

Way back in November 2013 I showed you what our Living Room was like when we first moved in. Here's a link back to that old post. It was looking pretty sad and bare, and since then I have been working hard to re-decorate.  It has taken me ages to find everything that would fit, but I think I'm pretty much there now, so today I've decided to finally do a living room tour! 

As I mentioned in my first post, I decided to go for a yellow and grey colour scheme. Eventually I also decided to give it a bit of a botanical/natural history museum feel, which you might notice a little bit more in the close up photos.

The first things we bought were the sofa, the armchair and the rug. The sofa came from Next, and the armchair and rug were both from Ikea.

The cushions came from H&M Home, except for the little grey ones which I made myself from off-cuts from the curtains (They were crazy long!)

I hunted for quite a while to find an old botanical encyclopaedia which had pretty pictures in it that I could hang, and in the end we found one at an antique shop which I mentioned in this post. I chose Kiko frames to hang them in as I liked the simplistic look.
lounge tour
kiko frame with botanical print
My absolute favourite buy was my hexagon shelves, which I had specially made and shipped from the US. I think they make a really nice focal piece in the room, and I was really pleased with the way they turned out.  The birds on display are actually made of lego, you can find the kit here . I like the fact that they have their latin names on little plaques below them, I feel like it fits with the museum theme pretty well!
hexagonal yellow shelves
lego birdlego humming bird
succulent in terrarium
So just to compare, this is what the lounge looked like before...
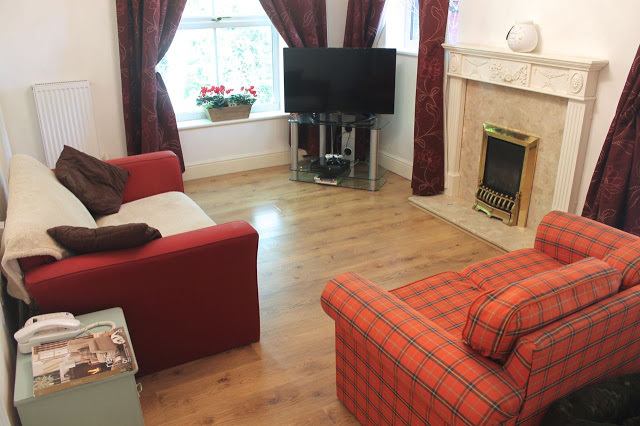
before of lounge
...and here it is after!  A great improvement I'm sure you will agree!  The curtains were also from Ikea. I think having less heavy curtains has made a huge difference to the room. And I think painting the walls grey makes it look a little bit more homely.
Yellow and gray styled lounge
I made the butterfly chart hanging above the fireplace using a pretty poster, you can find my No-Saw DIY here.

I also made a little trio of pictures using another botanical book that my friends Mum bought for me. I couldn't decide which pictures to use as there were quite a few good ones, but the great thing about the Kiko frames is that I can swap them whenever I want!
kiko frames
agate coaster
I bought these agate slices when I was on holiday in Majorca, I thought they would make great coasters to go on the table, and they are so pretty! I might buy some more of these just to put on display on the shelves.
agate slice coasters
I re-painted this little side table to match my colour scheme, since it used to be blue. The phone is another of my favourite things in the room, it was given to us as a wedding gift!
yellow phonehoneycomb magazine rack diy
This magazine rack started out life as a yarn holder which came free with a knitting magazine. I decided I wanted to re-cover it to match the room, and I found some awesome honeycomb fabric from Zazzle which I thought would work really well. The amount of choices of fabric patterns and fabric types on Zazzle is insane, so it took me ages to decide.  You can also design your own fabric, which I would love to try at some point!
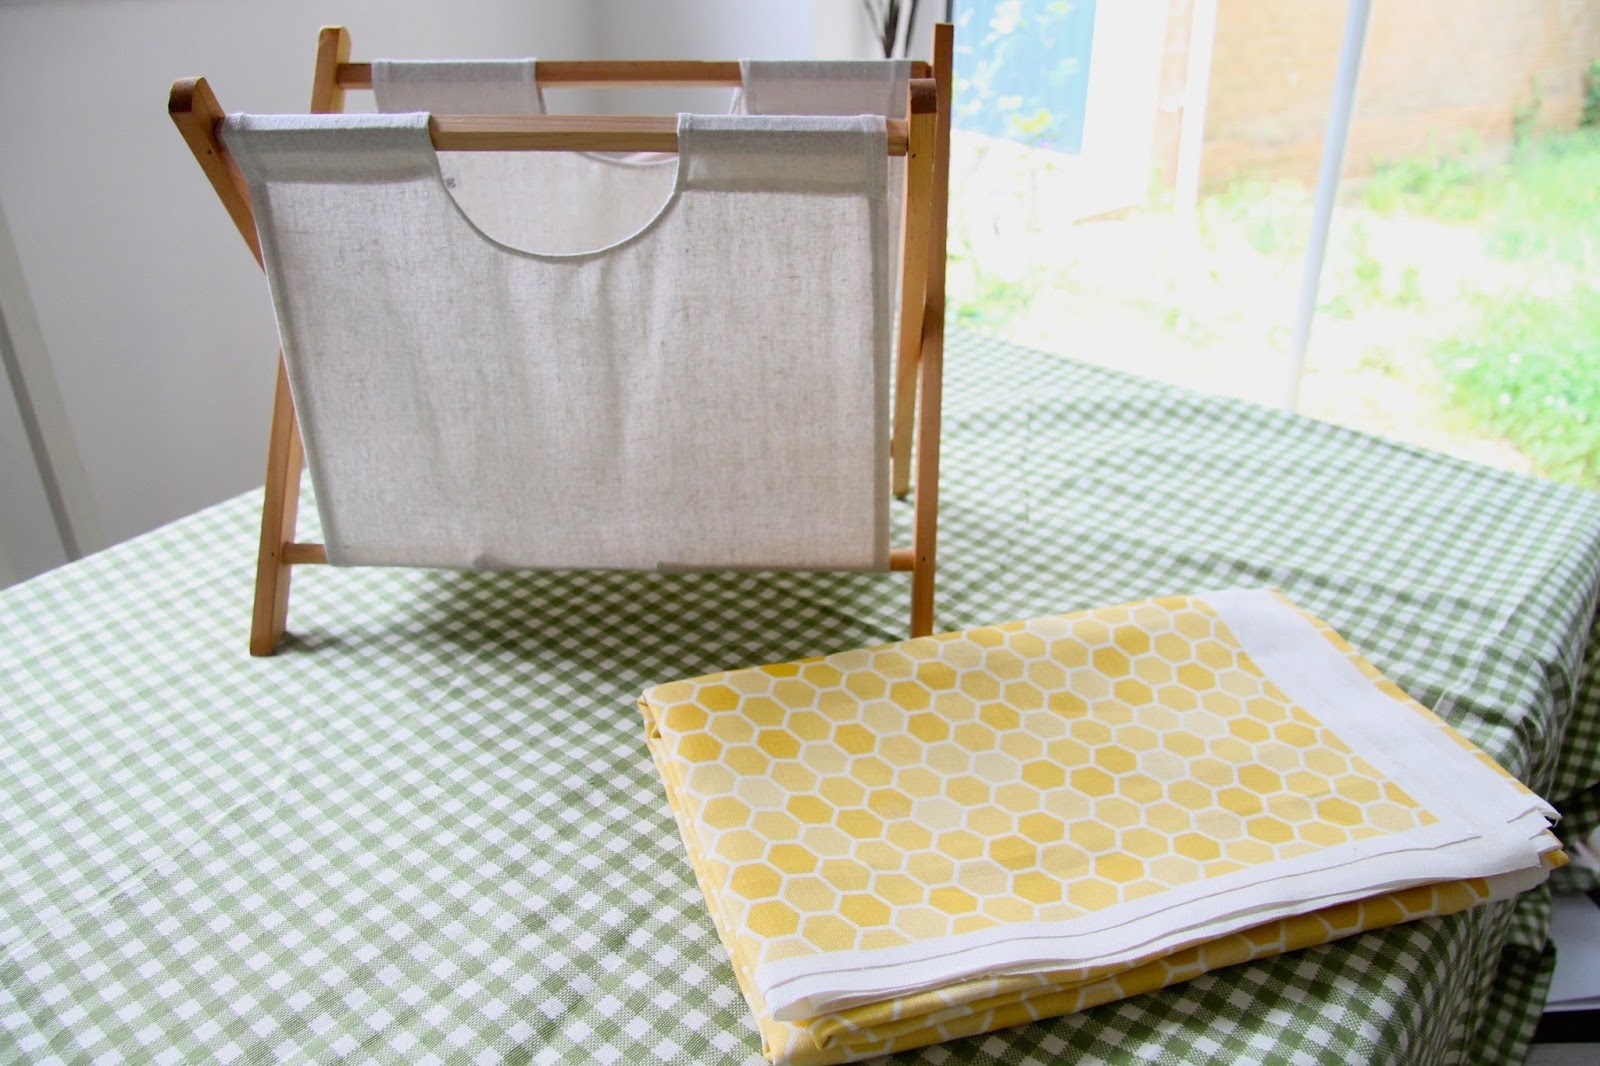
DIY Zazzle honeycomb fabric magazine rack
zazzle honeycomb fabric
All I did to make it was to unpick the old fabric from the frame, then I used this as a template, and tried to make an exact copy of it with my honeycomb fabric.  The only tricky bit was attaching it securely back onto the frame. In the end I had to do this by hand which was a little bit difficult  as the canvas fabric which I ordered is quite thick, but I got there in the end and I think it looks fab!

I also used the same fabric to make a little table cloth for the coffee table which you can see in the earlier pictures. I think that they really match my hexagon shelves beautifully .  honeycomb diy magazine rack
Another good buy was my Oliver Bonas shelves/drawers. I was pining after them for a long time since they were pretty expensive, but in the end I decided I had to have them! They definitely help bring the room together. 
oliver bonas shelves
books and oberyn
lego robin
This TV cabinet, as well as the coffee table were both things that I found at the dump. They cost me £5 each and were both a little worse for wear when I found them. But after a good sanding down and a few coats of grey paint they looked good as new! This cabinet is actually the perfect size and we can fit the X-Box in the little cubby hole and all of our games inside.
DIY TV cabinet

There are still a couple of things I would like to do before I will feel the whole room is complete, but I am much happier with it now that I feel there is some sort of decor going on, rather than random furniture thrown into a room.

Laura xXx


Disclaimer - The honeycomb fabric was gifted to me by Zazzle. I was really pleased with the quality of the fabric and service and I would recommend to those that are looking to add a unique touch to their decor.

Read More

Friday, 27 March 2015

My Handmade Aztec Pattern Cami Top

Sew over it silk cami top diy
Okay, so I have now attempted my second hand made item of clothing (you can see the first one here), and it is pretty much a success!

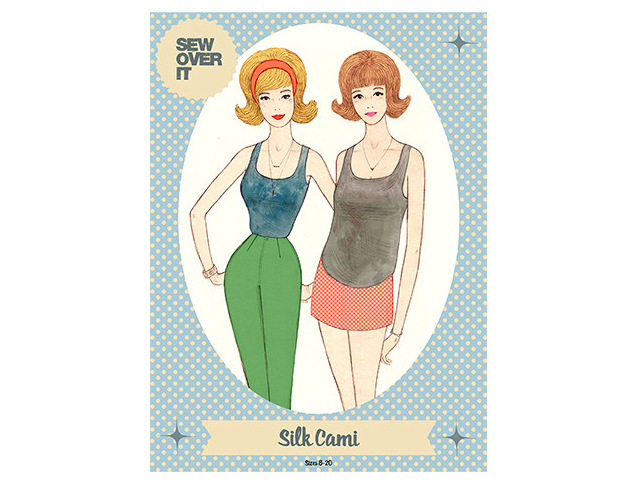
This time I tried something a bit simpler, which was the 'Silk Cami Top' by Sew Over It (my new faves!)  

I was actually able to buy this pattern as a downloadable PDF, which was great because it meant no waiting for it to arrive!  It does mean that you have to piece together the pattern though, so you need to make sure you have some tape or glue and set aside some time to make sure you do it accurately, but it didn't take me too long, especially since it is only a small garment. I'm not sure I'd be keen to do this with a dress though, I think I'd prefer to pay the extra to buy the ready made design in that case!

What is most definitely a bonus with a printable PDF, is that if I want to make a different size top, I can print it out again, whereas, obviously with a ready made pattern once you've cut it out to a size, you can't make it bigger again very easily!
Sew over it silk cami
Once I had my pattern all I needed to do was to find a suitable fabric, so off to my local Fabric Land I went! I needed a very light material for this top, they suggested silk crepe de chine, rayon or crepe. I hunted high and low but I couldn't find a pattern I liked in the right sort of fabric. Then I spotted this sort of Aztec tribal number, and thought it would be perfect! It didn't have a label on it so I'm still not sure exactly what fabric it is, but it seemed to be the right sort of weight and feel.

It has a very bold pattern so I wanted to make sure that it was balanced well once the top was cut out. I'm glad I took the time to do this because I think it definitely made for a better top on the end. You can see the points of the triangles in the centre of the top, and had I cut it any other way it would have looked a little odd.

handmade cami top aztec pattern
I found that I had to adjust the shoulder straps and shorten them to give me a better fit. I did the same thing with the dress I made, so perhaps I have unusually small shoulders!

I'm really pleased with the way it has turned out, I'm looking forward to some nice sunny weather so that I can actually wear it without a cardigan over the top. The top can be worn tucked in or out, but I think I'm preferring tucked in at the moment, especially with high waisted trousers (which these are clearly not!)
aztec pattern silk cami top
handmade aztec cami top
Now that I have the pattern I think I will try making this top again and hopefully make a few small improvements on the fit. What do you think? Would you try a downloadable PDF sewing pattern? Have you used Sew Over It patterns before and what was your experience?

Laura xXx
Read More

Monday, 23 March 2015

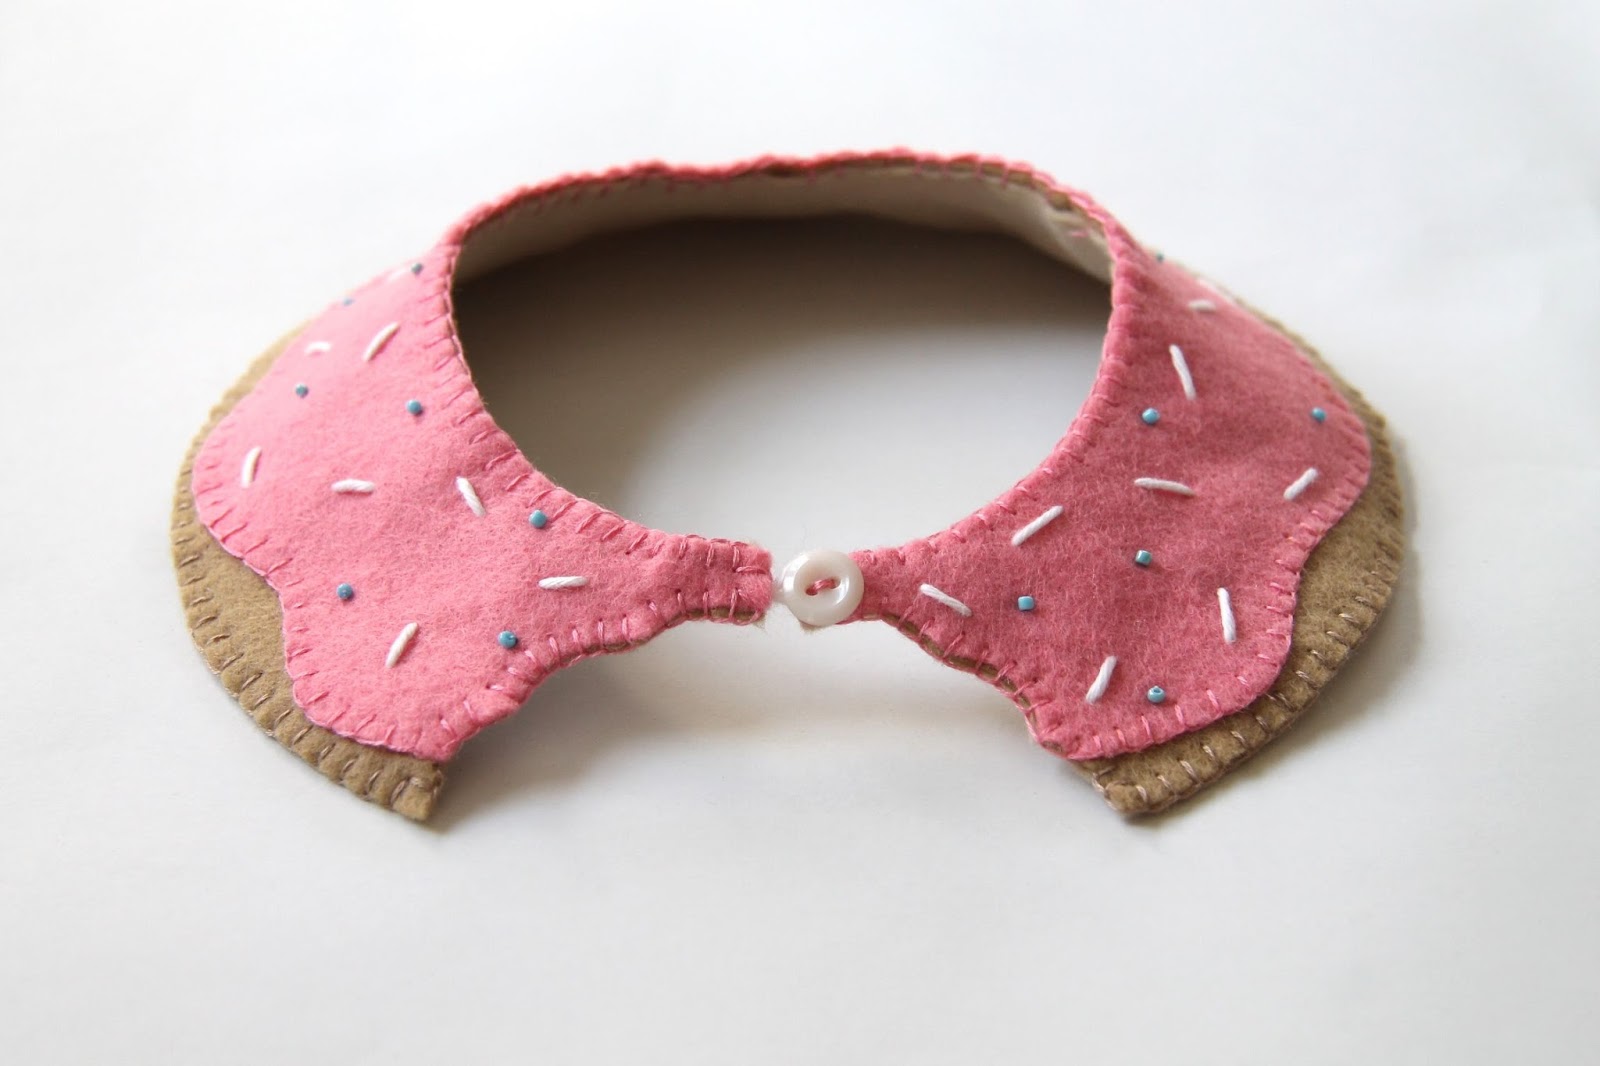
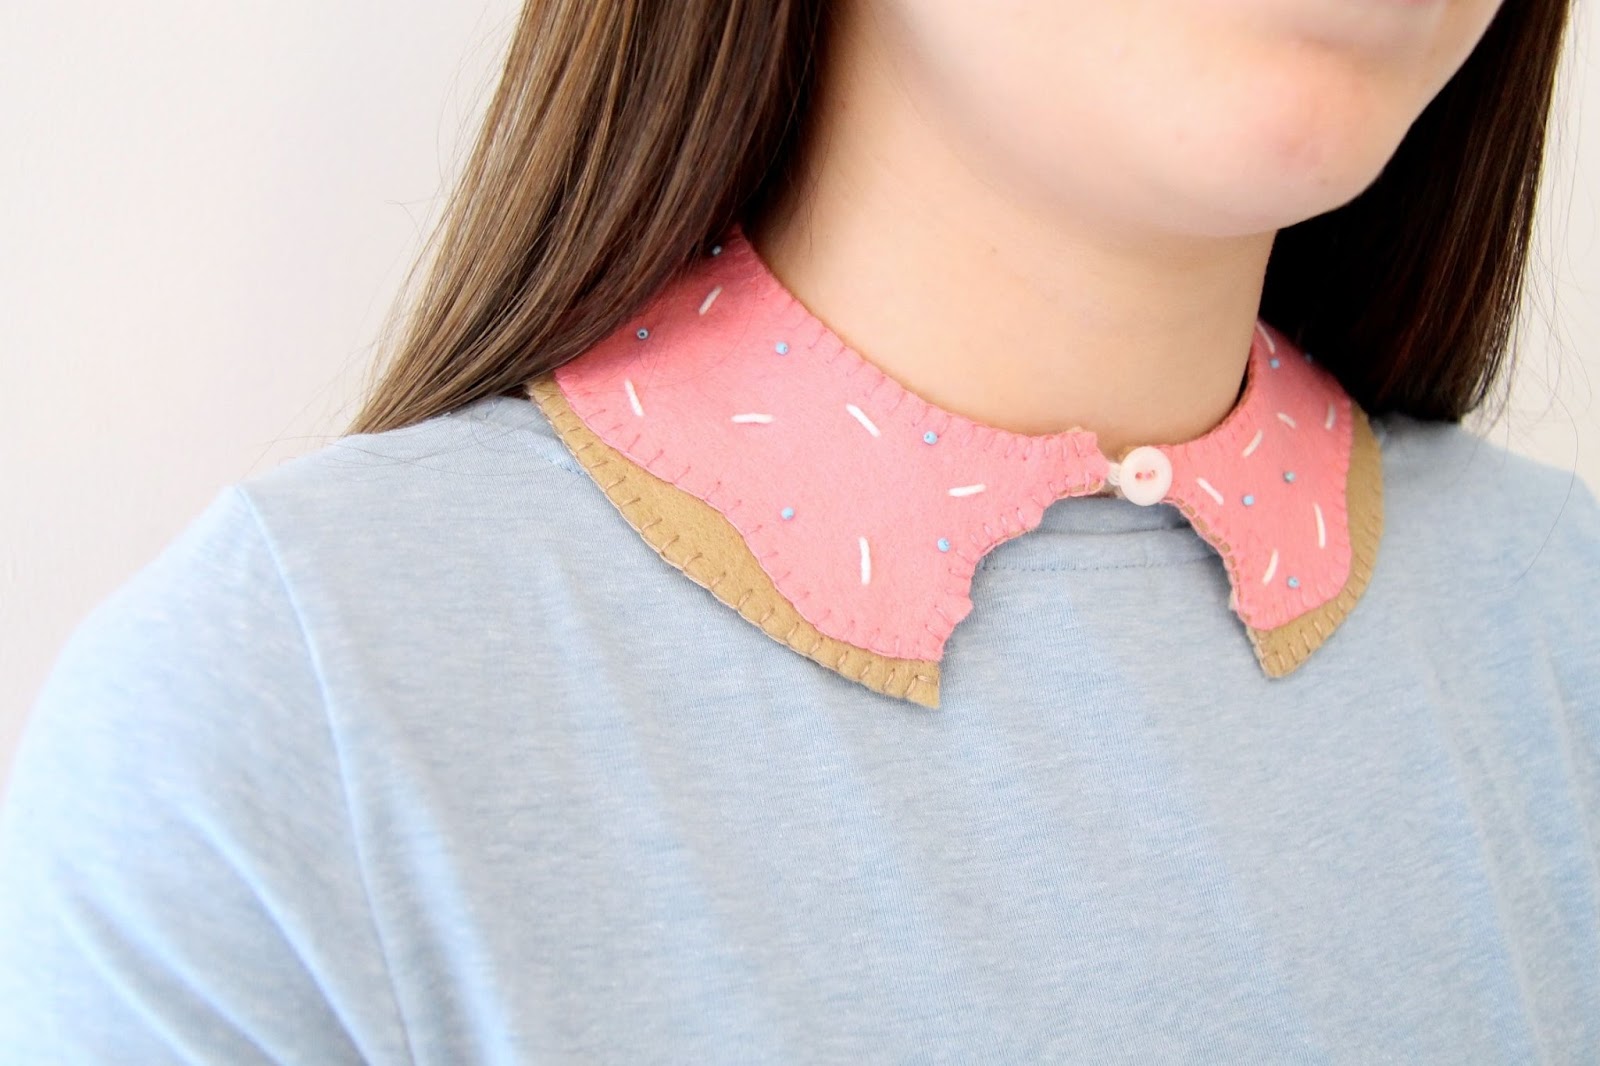
DIY Felt Doughnut Collar Tutorial

DIY Pink Doughnut Collar Tutorial
The other day I bought a massive bundle of felt, and ever since I have been having crazy ideas of creations I could make with it. So here is my first crazy creation! (no doubt there will be many more to come)

Doughnuts are pretty good right? I mean, they taste good, but they also have the potential to look rather lovely too! Whilst mulling over felty ideas, the thought of a doughnut collar popped in to my mind. I envisioned a bite having been taken out of said doughnut, which would form the front of the collar. Luckily I had the perfect coloured felt to start putting my idea into action, there's nothing better than a pink doughnut, I'm sure you will agree!

I thought it would be nice to take you through a step by step tutorial, so if you like it, you can make your very own!
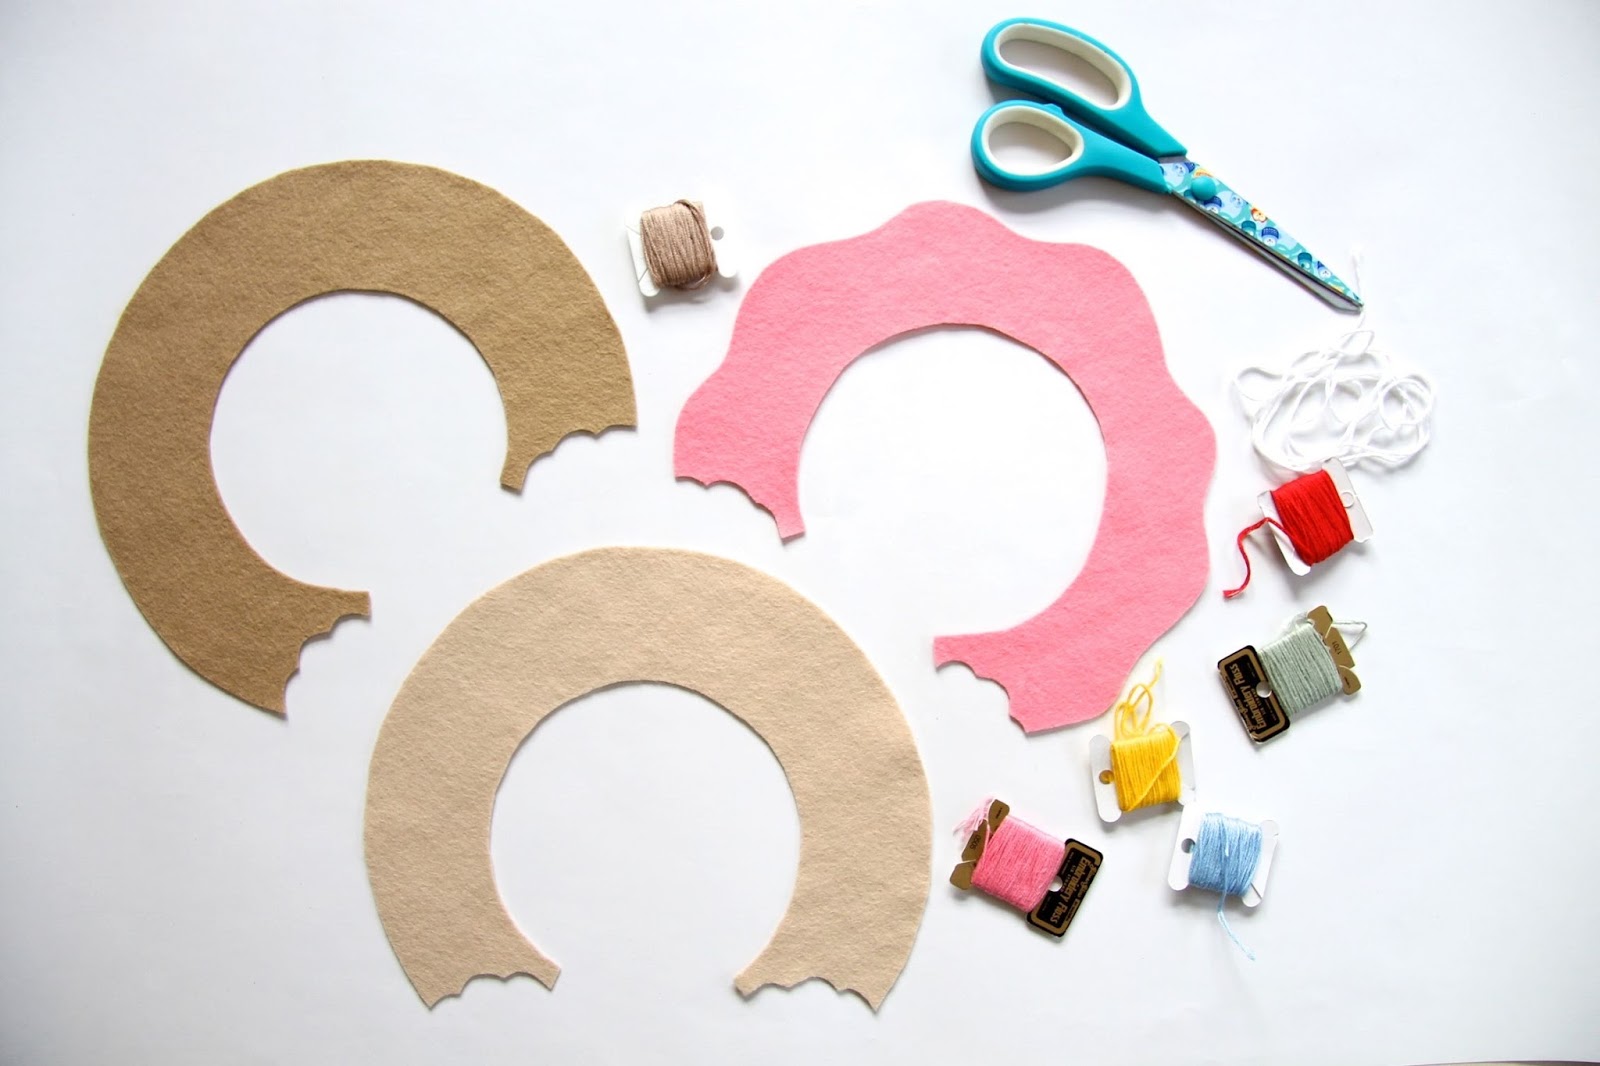
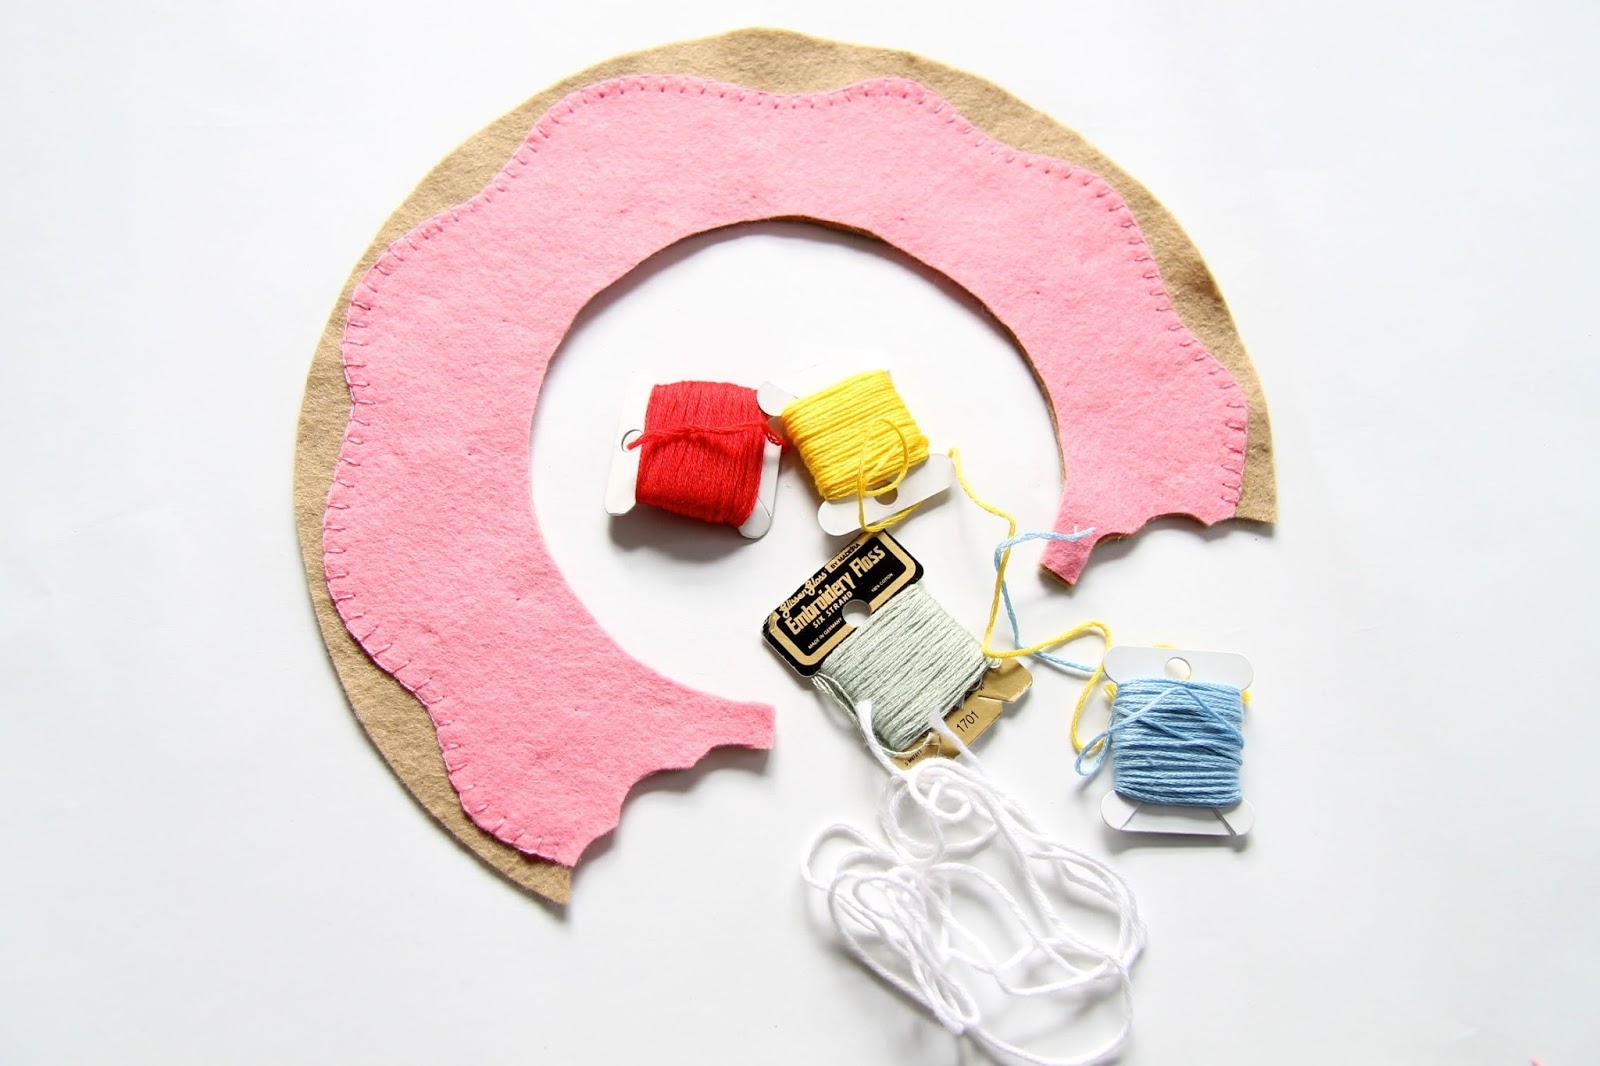
craft supplies
You will need;

  • 1 sheet of pink felt and 2 sheets of brown felt (A4 size). You can use one lighter and one darker brown if you prefer to give the top a baked golden brown look!
  • Embroidery threads to match the pink and darkest brown felt.
  • My doughnut template which you can download here (you will need to download this to computer first and then print it to make sure it is the correct size.
  • Scissors
  • Pins
  • Your choice of coloured embroidery threads (to make the hundreds and thousands) 
  • Beads (optional) 
  • A button
pin the felt
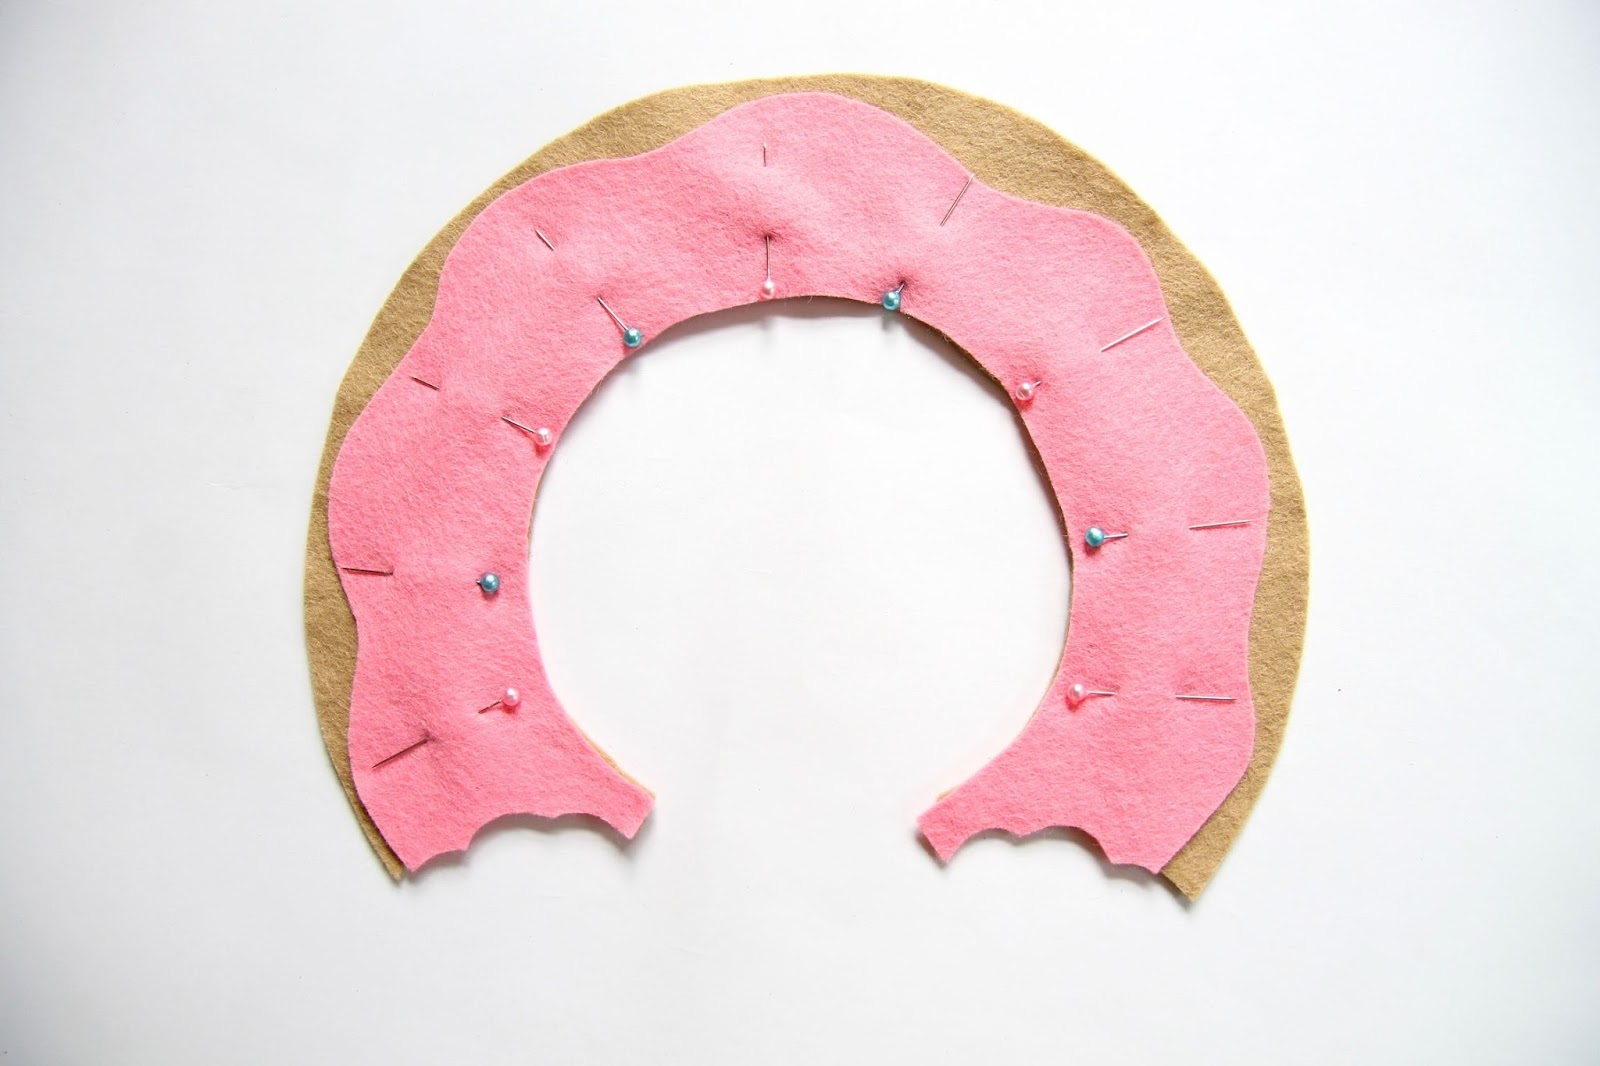
First of all print out the template, cut it out, and check that it will fit your neck. If it is too big/small, now is the time to alter it! Once you think it is a good fit, simply pin the template to each piece of felt in turn, and cut out.  So eventually you will have one pink and 2 brown doughnut shapes (as shown in the 'supplies' picture).  The pink one is going to be the icing, so you now want to cut this out in a slightly more wiggly fashion, as shown in the picture above. Leave one piece of the brown fabric aside (the lighter one if using 2 shades), as we won't need to use that for a while, it will essentially just be a backing.  

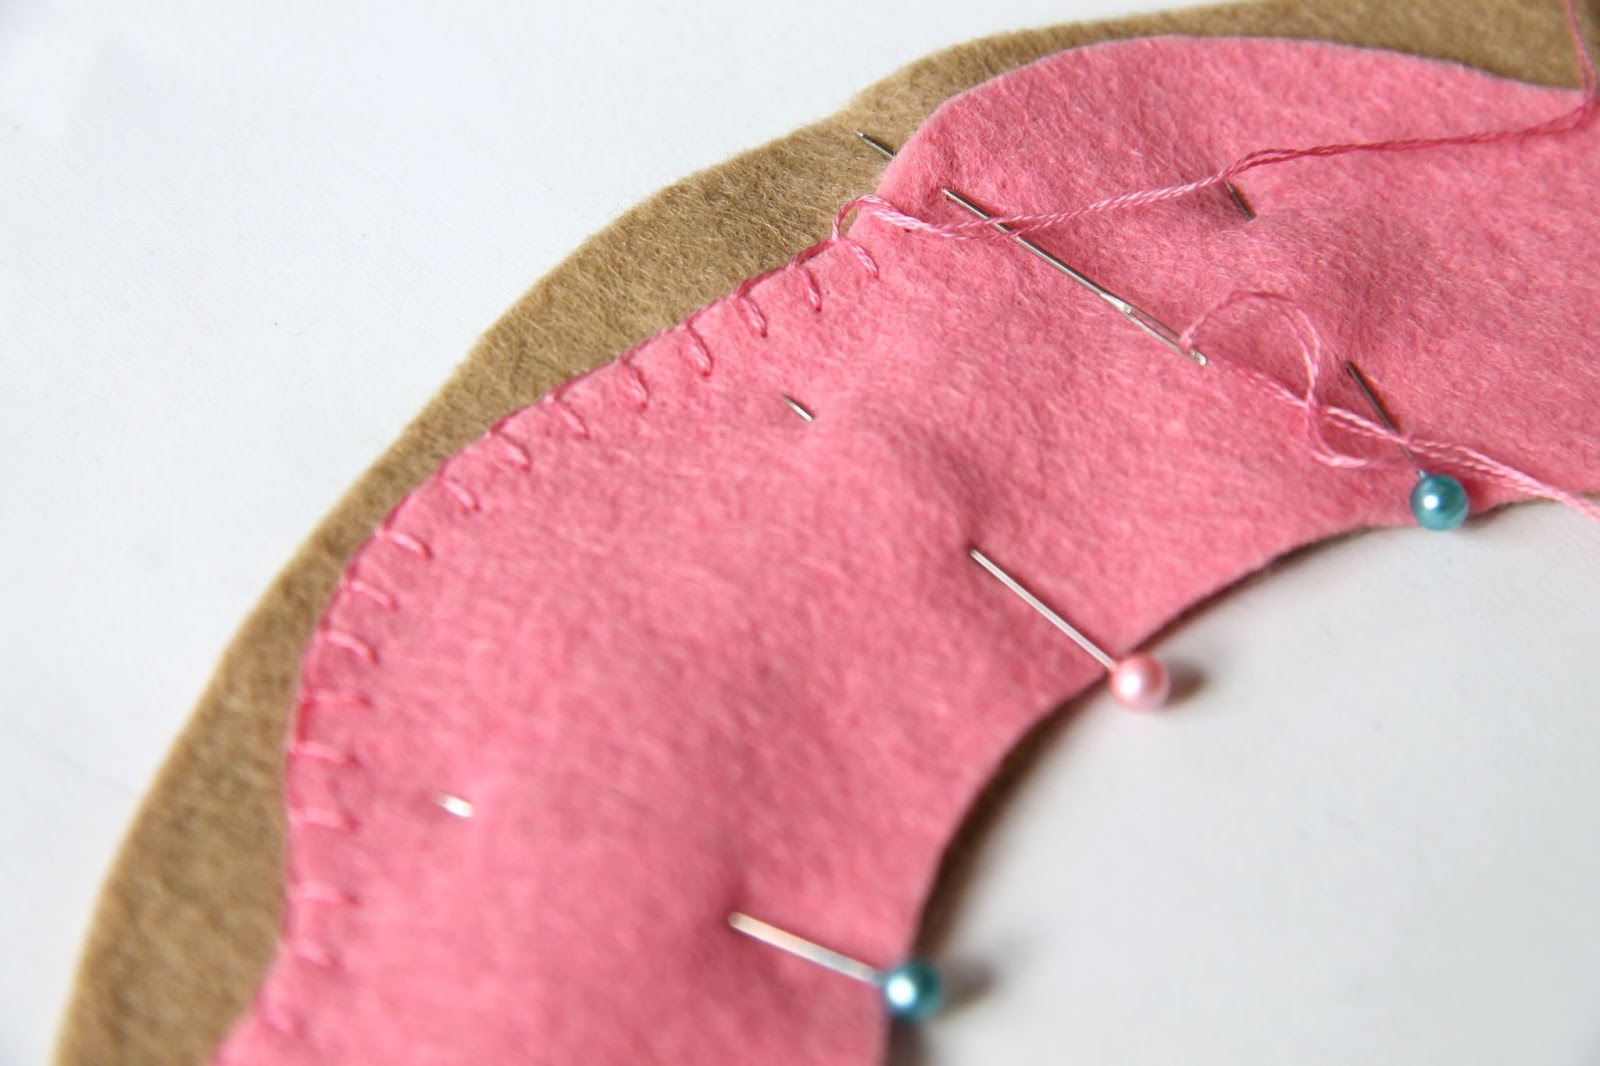
Pin the pink felt onto the darker brown felt, and then, using 2 strands of the matching pink embroidery thread, we are going to stitch it on using blanket stitch. If you haven't used this stitch before you can find a tutorial here. Try and keep it as even and near as you can. If you haven't done it before it might be best to practice on some scrap felt first.
Use blanket stitch to attach the felt
Trim the felt
Felt tends to warp a bit when working with it, so once you have finished this stage you may want to trim the edges of the felt to make sure they both match up.
selection of embroidery threads for embellishing
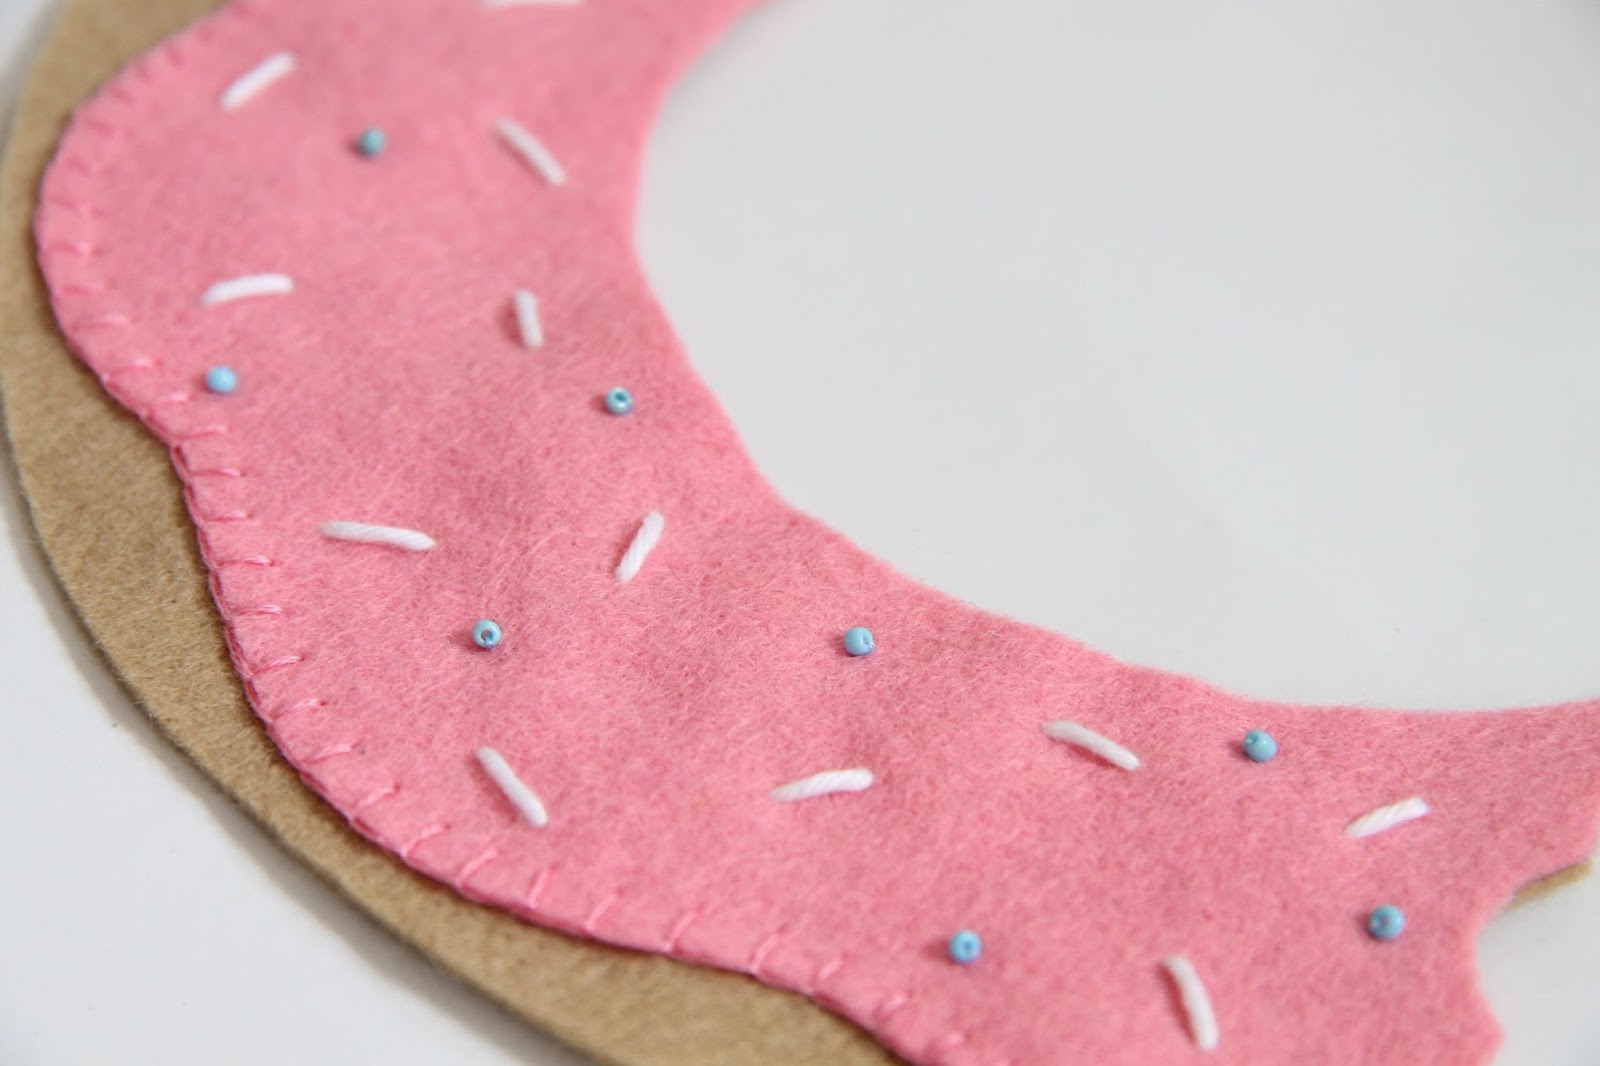
Now for the really fun bit, the sprinkles!  You can use whatever colours you want for this but in the end I decided I wanted to stick with just white sprinkles. Embroider these evenly but randomly across the pink felt,  making sure that the fabric is not puckering in any places as you go.
white sprinkles using embroidery thread
I found some little blue beads in my craft stash and I decided to embellish the collar with some of these as well.  I used one single blue embroidery thread to attach these. At this stage, it doesn't matter that the back of your brown felt is getting a bit messy with stitches, as this will be covered later with the lighter brown felt.
beads and embroidery threads
buttonsOnce you are happy that your doughnut is perfectly embellished with sprinkles, it is time to make a fastening.  Now you might want to try your own method of fastening, since mine was a bit trial and error, but it seems to work pretty well, I'm just not sure how durable it will be in the long run.
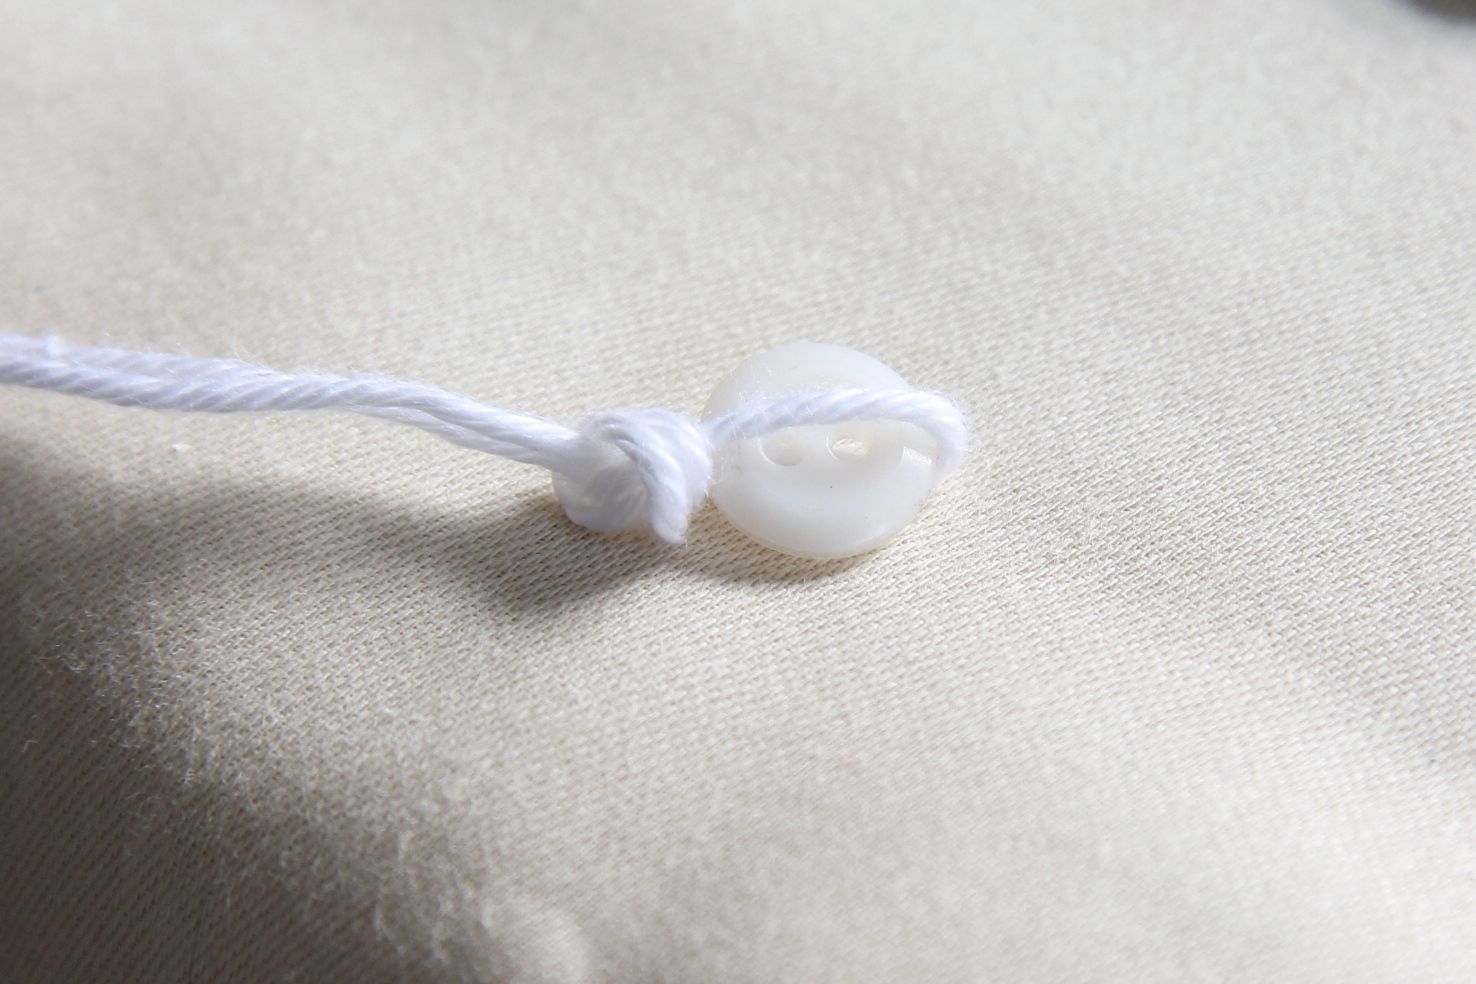
I started off by picking a button from my extensive button collection. It was a tough decision but in the end I went for a simple little while one.  Then I tied a knot in some thick embroidery thread, making a loop around the button. I tied it so that the button could just about squeeze though.
making the fastening for the collar
Next I stitched my loop onto the collar, underneath the pink felt, so that it would not be seen from the outside. The button will be stitched on right at the end of the process.
attaching the fastening for the collar
Now we just need to finish it up by taking our lighter piece of brown felt, and pinning it to the back, then trim the edges if needed to make sure they all line up, and again we are going to blanket stitch around the entire edge of the collar. This is slightly different than before because we are sewing 2/3 pieces of fabric together, rather than sewing one on to another, but it is the same principle. Use the brown thread on the edge with the brown felt, and the pink thread on the inside edge and at the bottom.   

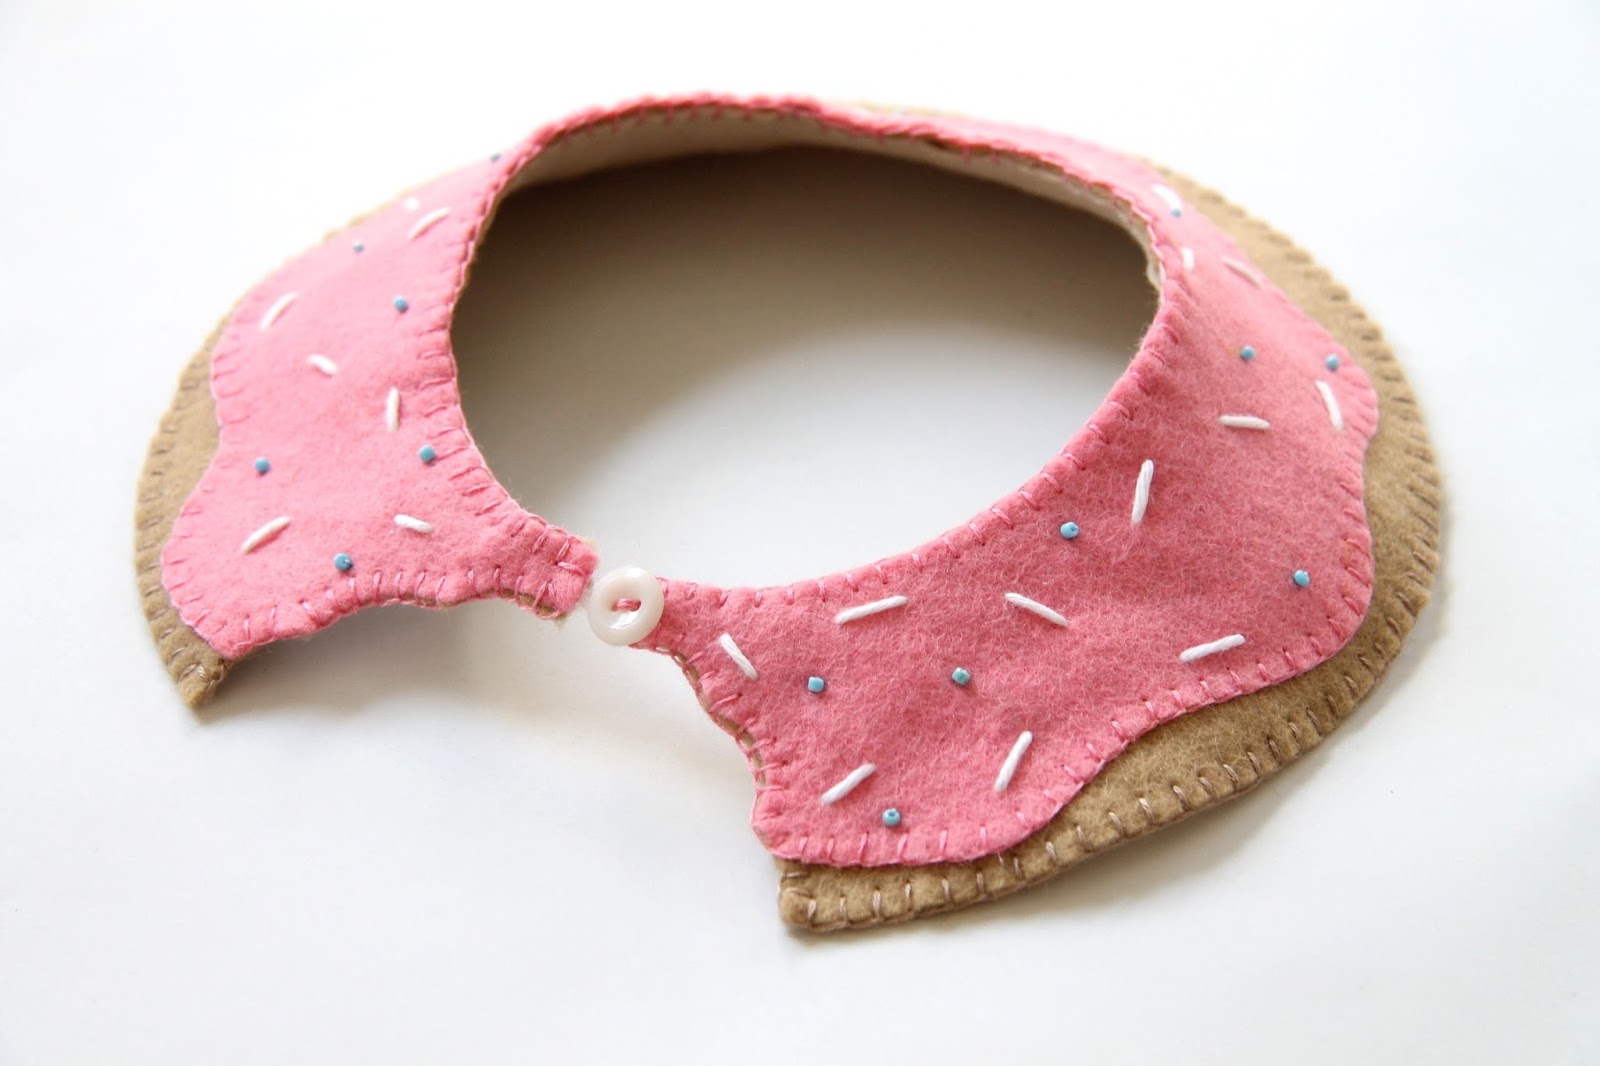
Now all you need to do is sew on your button and you are done!
finished doughnut collar
Here is what it should look like when you have finished...
completed DIY Donut collar tutorial
Pink Doughnut collar tutorial including sprinkles
I am super pleased with how it turned out, what do you think?

I really enjoyed sewing this and it has given me lots of ideas for other felty embroidery projects. Have you ever made anything from felt?
DIY Felt Donut collar tutorial
felt doughnut collar tutorial diy

Laura xXx

Read More

Friday, 20 March 2015

DIY Quote Pennant - I've Got Blings!

tutorial DIY Chappie quote pennant
Hey chaps! Today I want to try something a bit fun.  I'm currently on the hunt for pretty things to hang on the wall in my study, so I thought I'd give making my own little pennant a go.

There were so many quotes I could have used, I thought about all the usual motivational ones, but in the end I went with something that had tickled me recently and would make me smile every time I looked at it.  A couple of days before we and been to see the film Chappie, which is about a robot which develops a consciousness, but essentially he has to grow from a child. Unfortunately he is being brought up by a bunch of pretty gangsta' criminals, so he learns a lot of funny stuff. At one point they give him some chains, and he gets very excited that he's 'got blings!'  It was a very cute and funny moment, and its definitely a film worth seeing, Chris and I have both said it has been our favourite film so far this year by far.
chappie film I've got blings
Anyway, back to the DIY. It's a pretty simple one, all you will need is the following;
  • Your choice of coloured card
  • A paper straw
  • Sticky letters. (I got mine here)
  • String
  • Pencil
  • Craft knife and ruler
supplies for diy
First up we need to cut the card into the right shape.  The one I made measured 18cm by 25cm, then to cut the triangle in I drew a line on the back 8cm up form the bottom, and then marked the halfway point (9.5cm) and drew lines to join it up to the bottom two points, then I cut it out with my craft knife and ruler.
pennant outline
Next, you want to very carefully cut as straight a line as possible through one side of your straw using the craft knife. Then measure your piece of sting to about 75 cm, and thread it through the straw. This is how you will hang your pennant.
Then you can simply slide your card inside the slit you have made in the straw. It should hold it easily, but if it feels loose you may want to stick it down at the edges with some glue. Lastly you just need to arrange your sticky letters into your chosen quote and you're done!
Now it is hanging happily in pride of place on my pin board alongside lots of other film and TV related goodies!
Chappie DIY Quote Pennant Tutorial

Laura xXx


Read More
Related Posts Plugin for WordPress, Blogger...
Powered by Blogger.

© 2011 Wrapped Up In Rainbows, AllRightsReserved.

Designed by ScreenWritersArena