The other day I bought a massive bundle of felt, and ever since I have been having crazy ideas of creations I could make with it. So here is my first crazy creation! (no doubt there will be many more to come)
Doughnuts are pretty good right? I mean, they taste good, but they also have the potential to look rather lovely too! Whilst mulling over felty ideas, the thought of a doughnut collar popped in to my mind. I envisioned a bite having been taken out of said doughnut, which would form the front of the collar. Luckily I had the perfect coloured felt to start putting my idea into action, there's nothing better than a pink doughnut, I'm sure you will agree!
I thought it would be nice to take you through a step by step tutorial, so if you like it, you can make your very own!
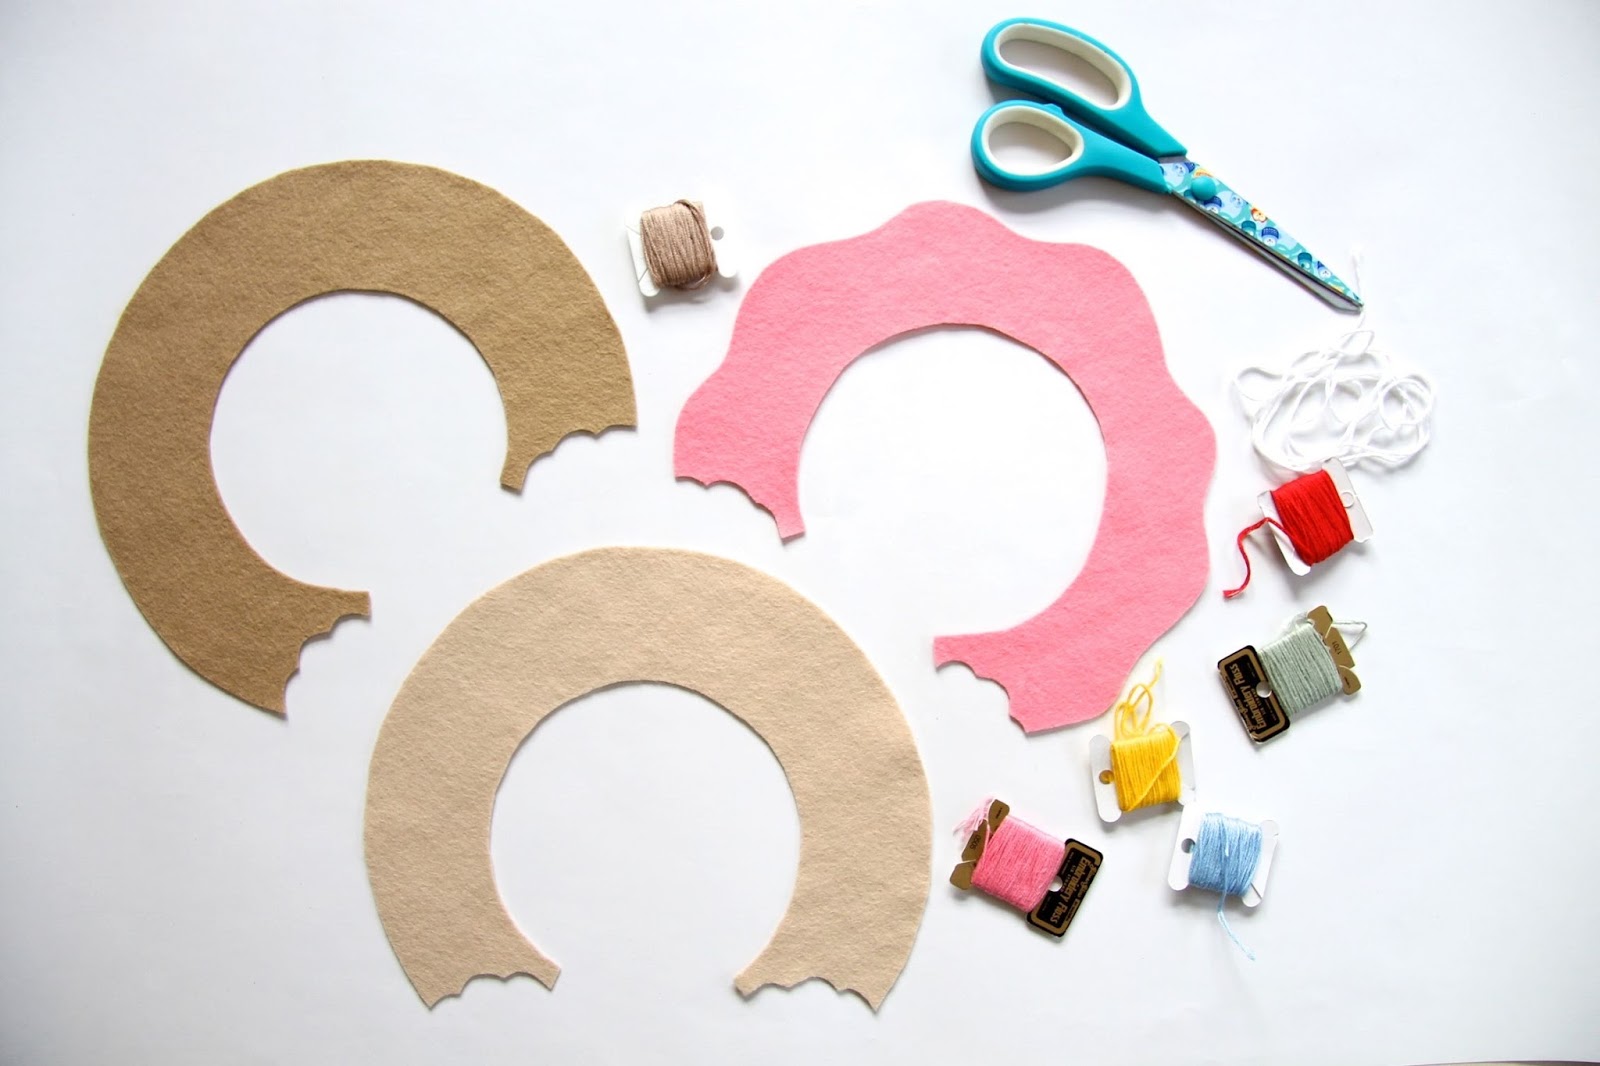
You will need;
- 1 sheet of pink felt and 2 sheets of brown felt (A4 size). You can use one lighter and one darker brown if you prefer to give the top a baked golden brown look!
- Embroidery threads to match the pink and darkest brown felt.
- My doughnut template which you can download here (you will need to download this to computer first and then print it to make sure it is the correct size.
- Scissors
- Pins
- Your choice of coloured embroidery threads (to make the hundreds and thousands)
- Beads (optional)
- A button
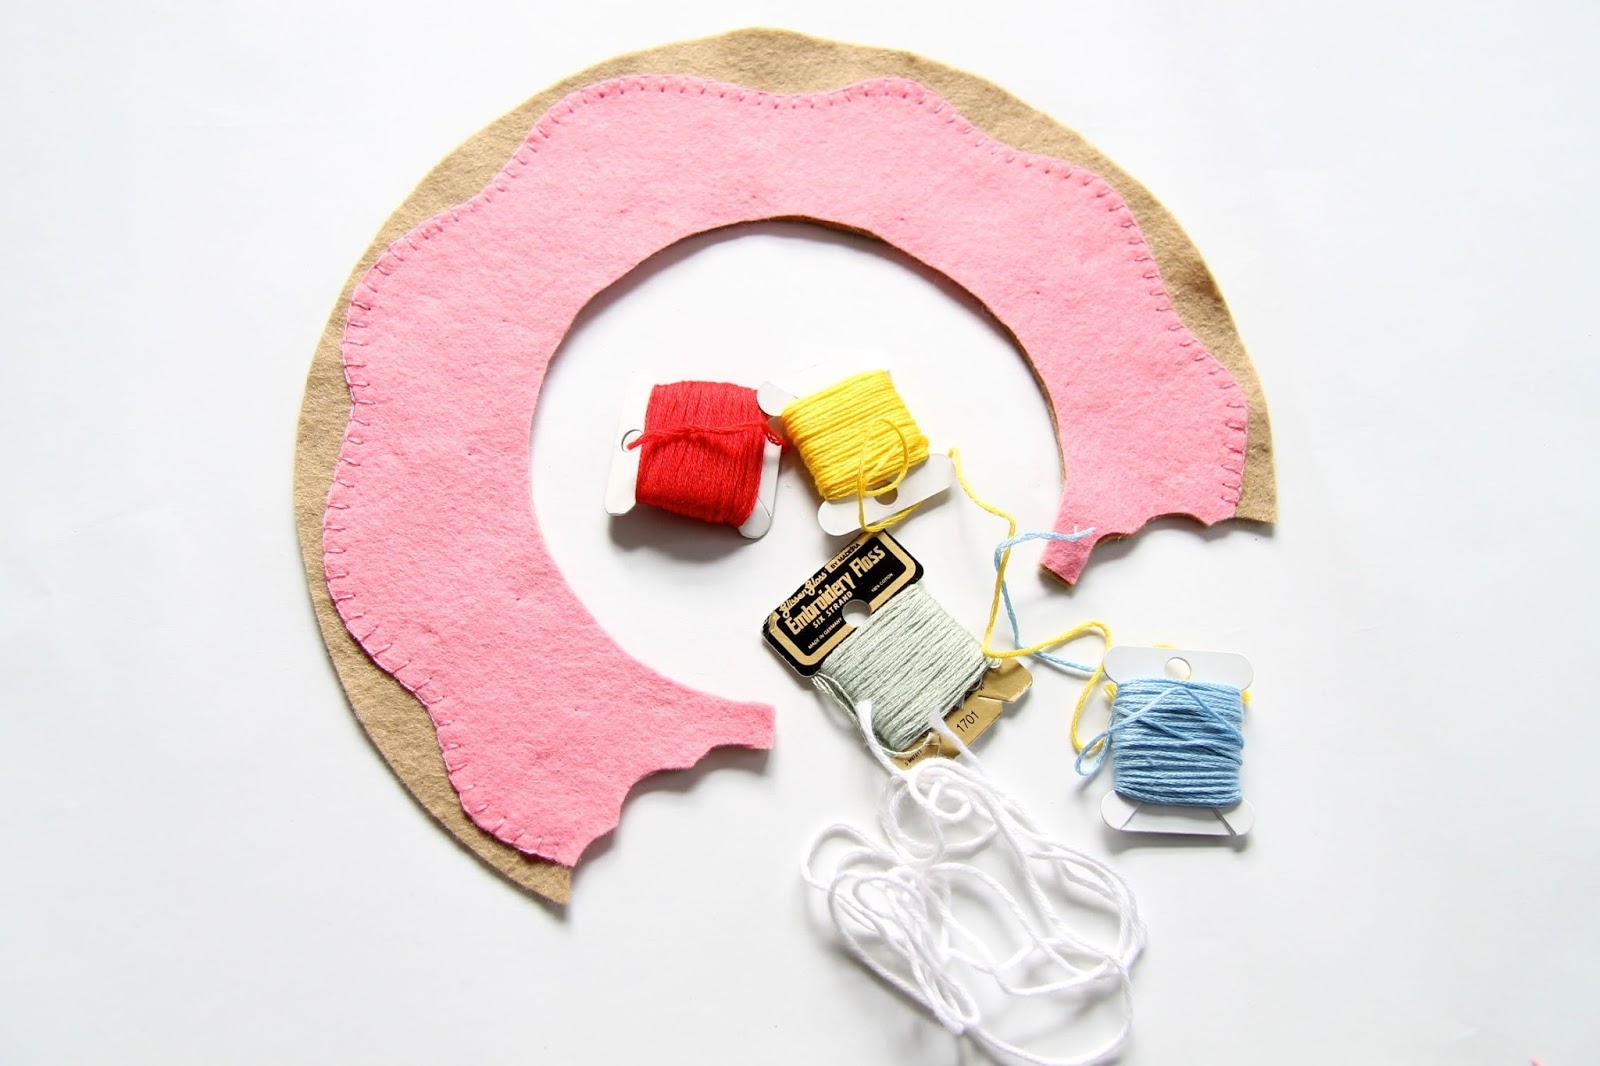
First of all print out the template, cut it out, and check that it will fit your neck. If it is too big/small, now is the time to alter it! Once you think it is a good fit, simply pin the template to each piece of felt in turn, and cut out. So eventually you will have one pink and 2 brown doughnut shapes (as shown in the 'supplies' picture). The pink one is going to be the icing, so you now want to cut this out in a slightly more wiggly fashion, as shown in the picture above.
Leave one piece of the brown fabric aside (the lighter one if using 2 shades), as we won't need to use that for a while, it will essentially just be a backing.
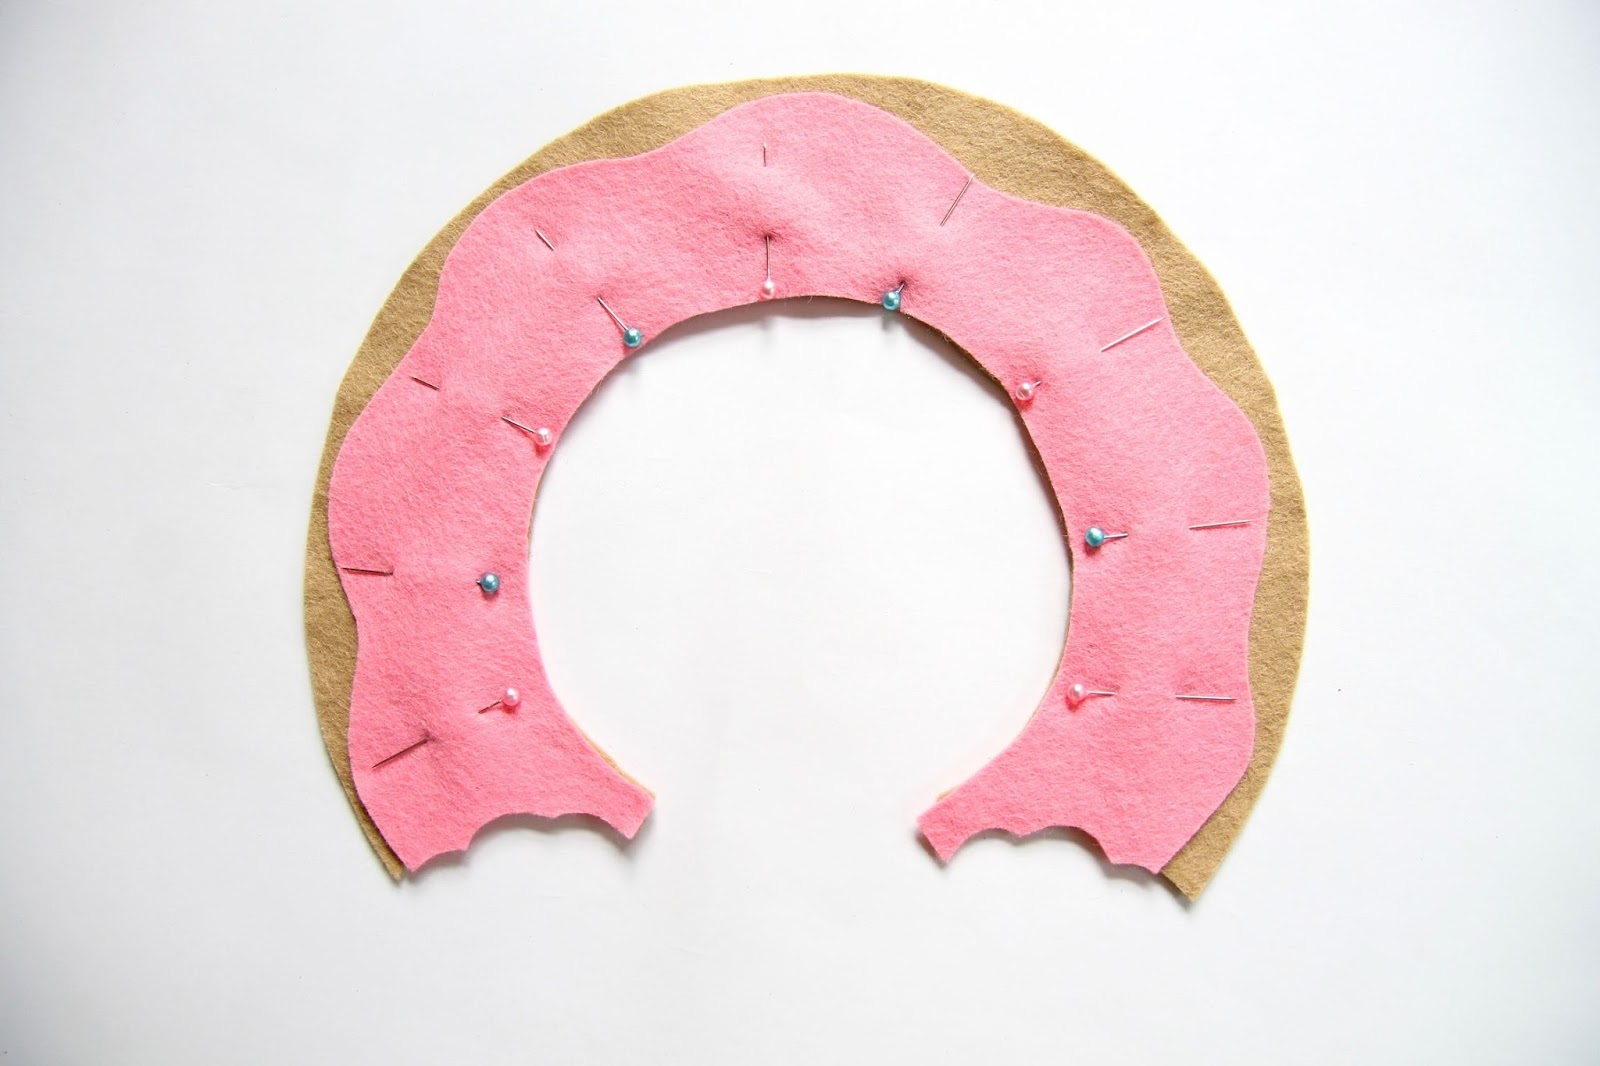
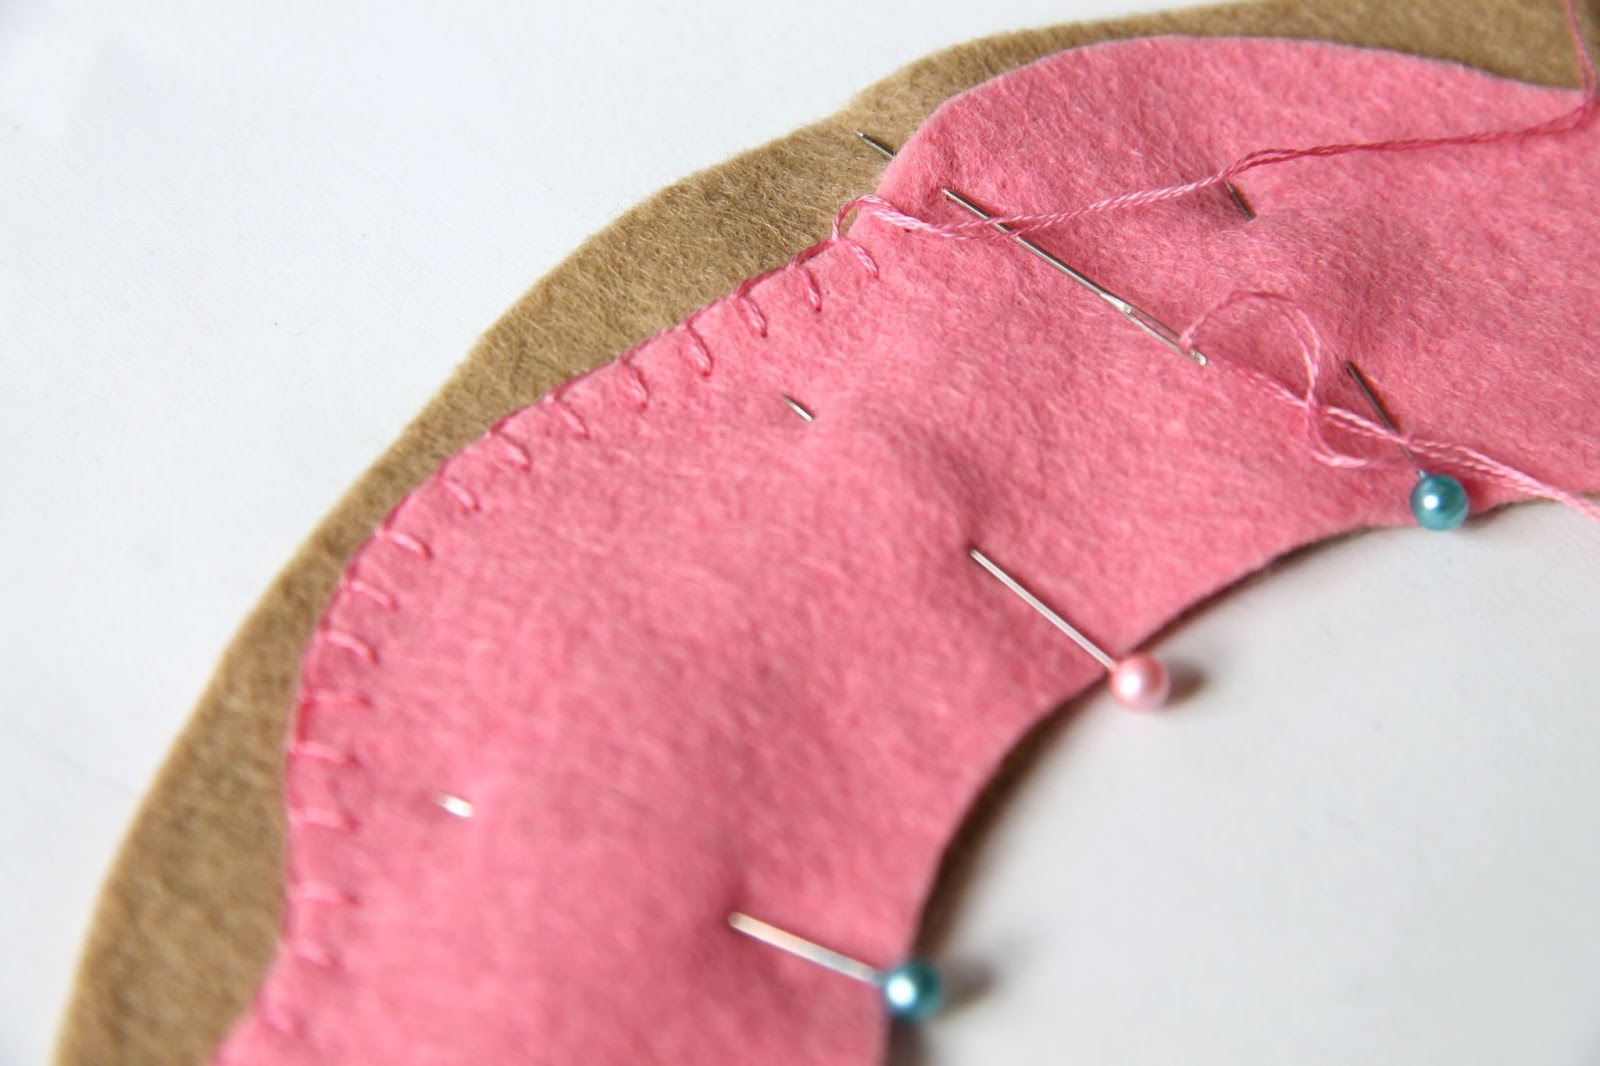
Pin the pink felt onto the darker brown felt, and then, using 2 strands of the matching pink embroidery thread, we are going to stitch it on using blanket stitch. If you haven't used this stitch before you can find a tutorial here. Try and keep it as even and near as you can. If you haven't done it before it might be best to practice on some scrap felt first.
Felt tends to warp a bit when working with it, so once you have finished this stage you may want to trim the edges of the felt to make sure they both match up.
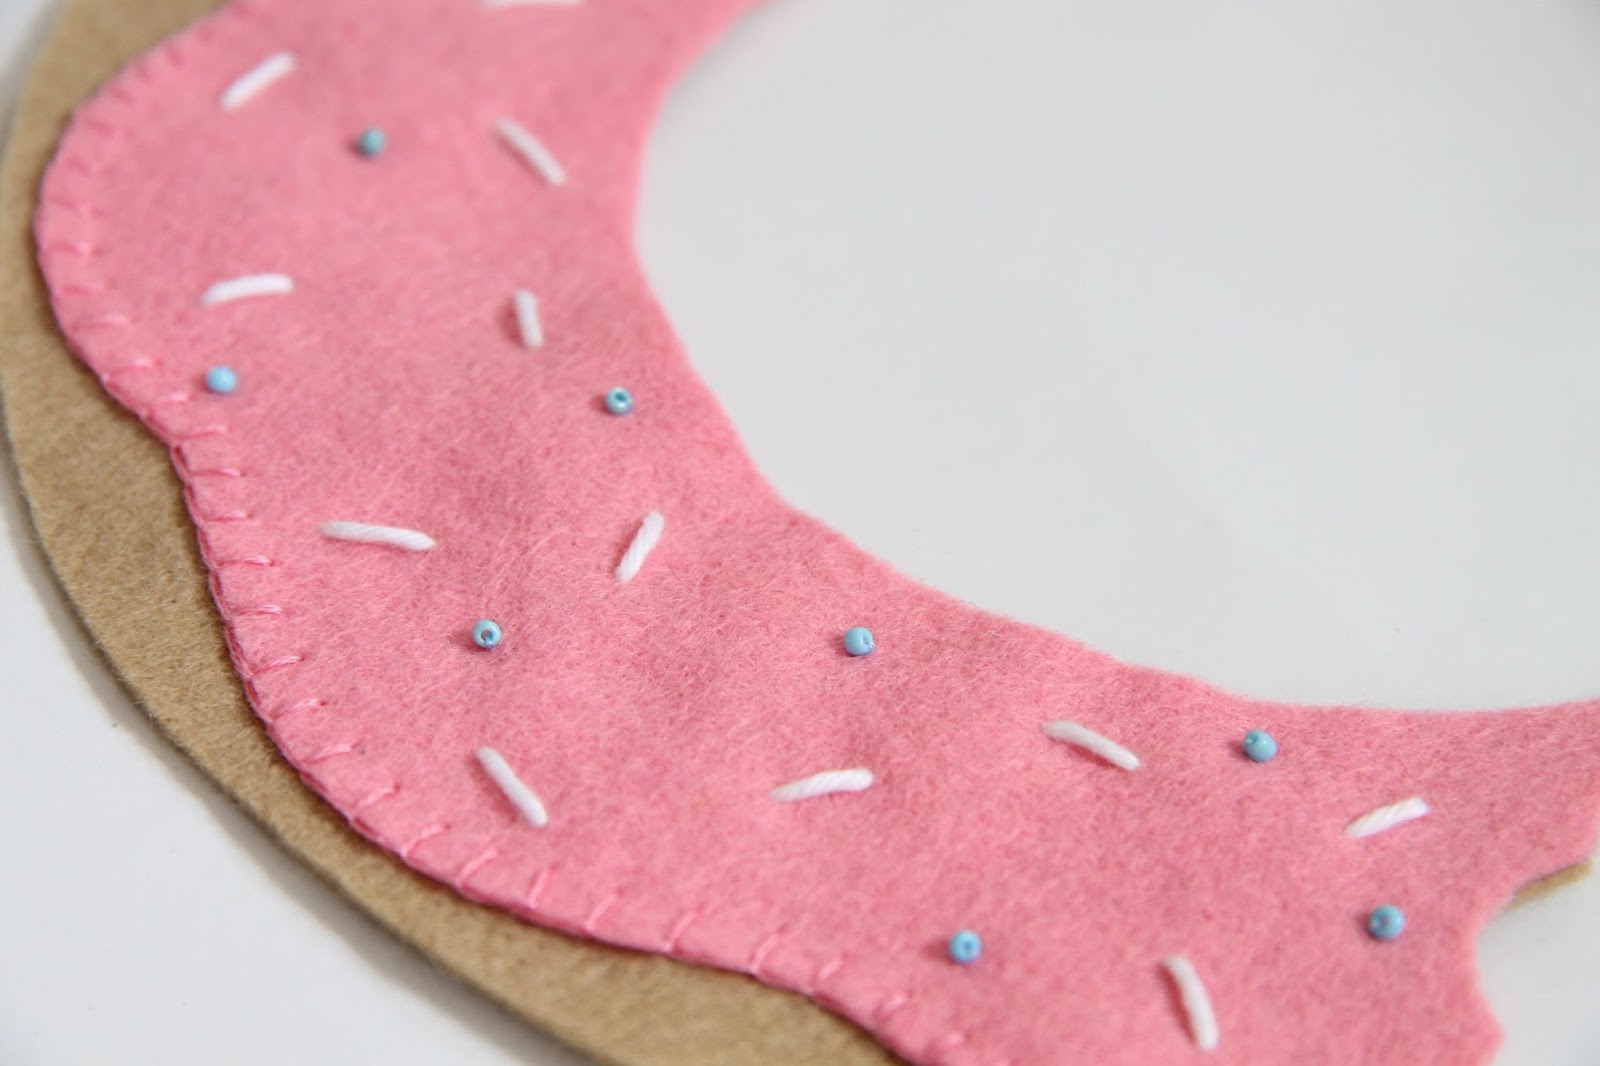
Now for the really fun bit, the sprinkles! You can use whatever colours you want for this but in the end I decided I wanted to stick with just white sprinkles. Embroider these evenly but randomly across the pink felt, making sure that the fabric is not puckering in any places as you go.
I found some little blue beads in my craft stash and I decided to embellish the collar with some of these as well. I used one single blue embroidery thread to attach these. At this stage, it doesn't matter that the back of your brown felt is getting a bit messy with stitches, as this will be covered later with the lighter brown felt.
 Once you are happy that your doughnut is perfectly embellished with sprinkles, it is time to make a fastening. Now you might want to try your own method of fastening, since mine was a bit trial and error, but it seems to work pretty well, I'm just not sure how durable it will be in the long run.
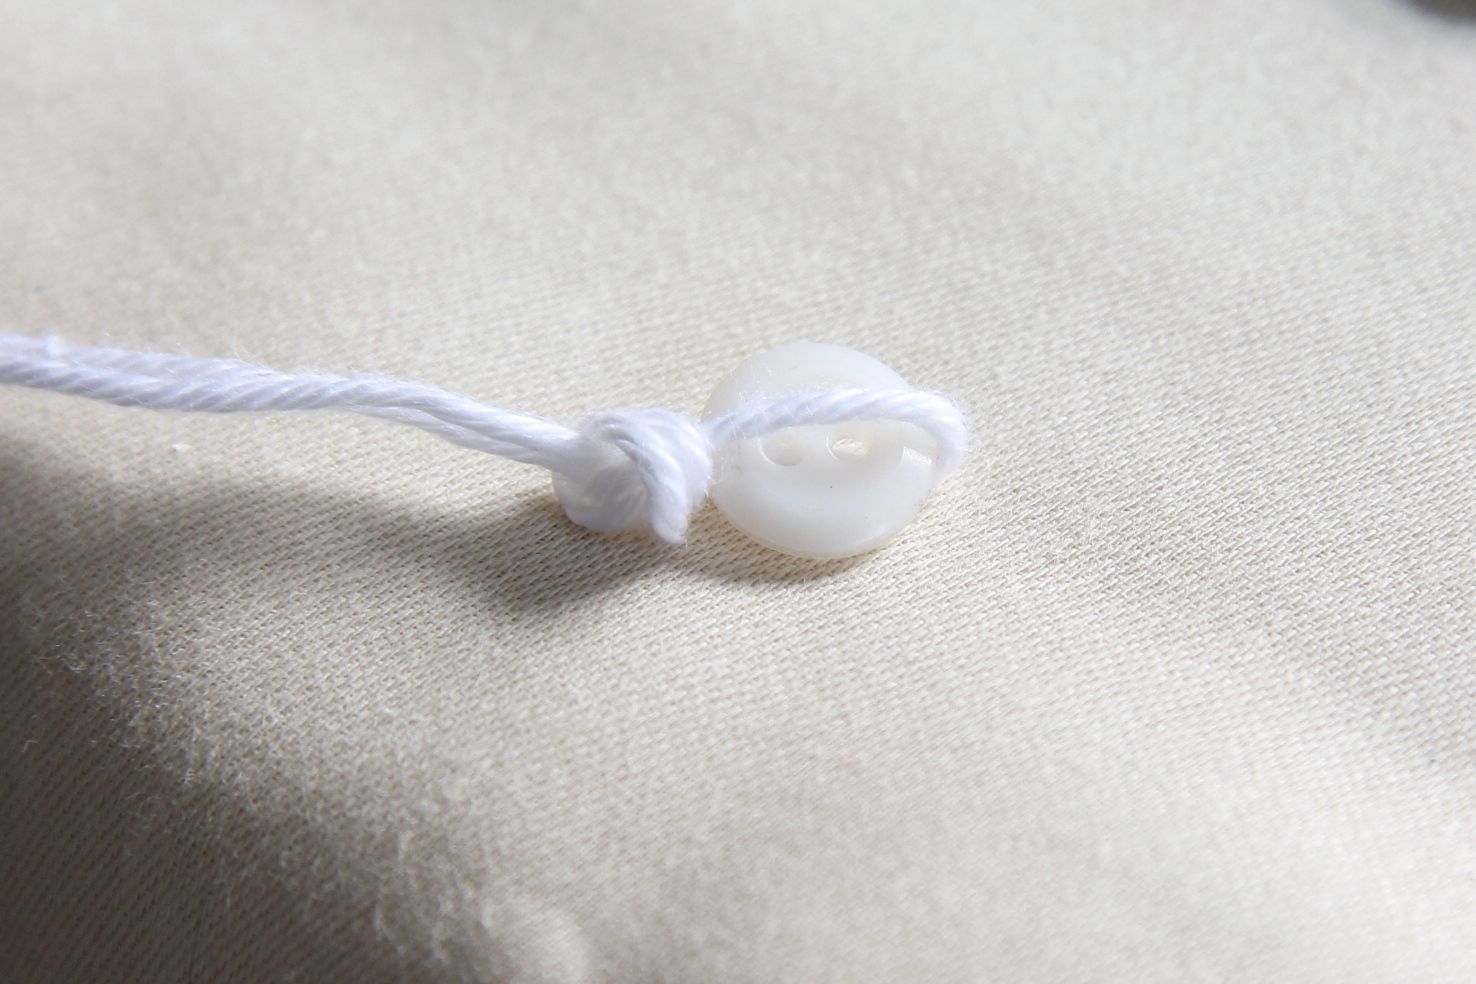
I started off by picking a button from my extensive button collection. It was a tough decision but in the end I went for a simple little while one. Then I tied a knot in some thick embroidery thread, making a loop around the button. I tied it so that the button could just about squeeze though.
Next I stitched my loop onto the collar, underneath the pink felt, so that it would not be seen from the outside. The button will be stitched on right at the end of the process.
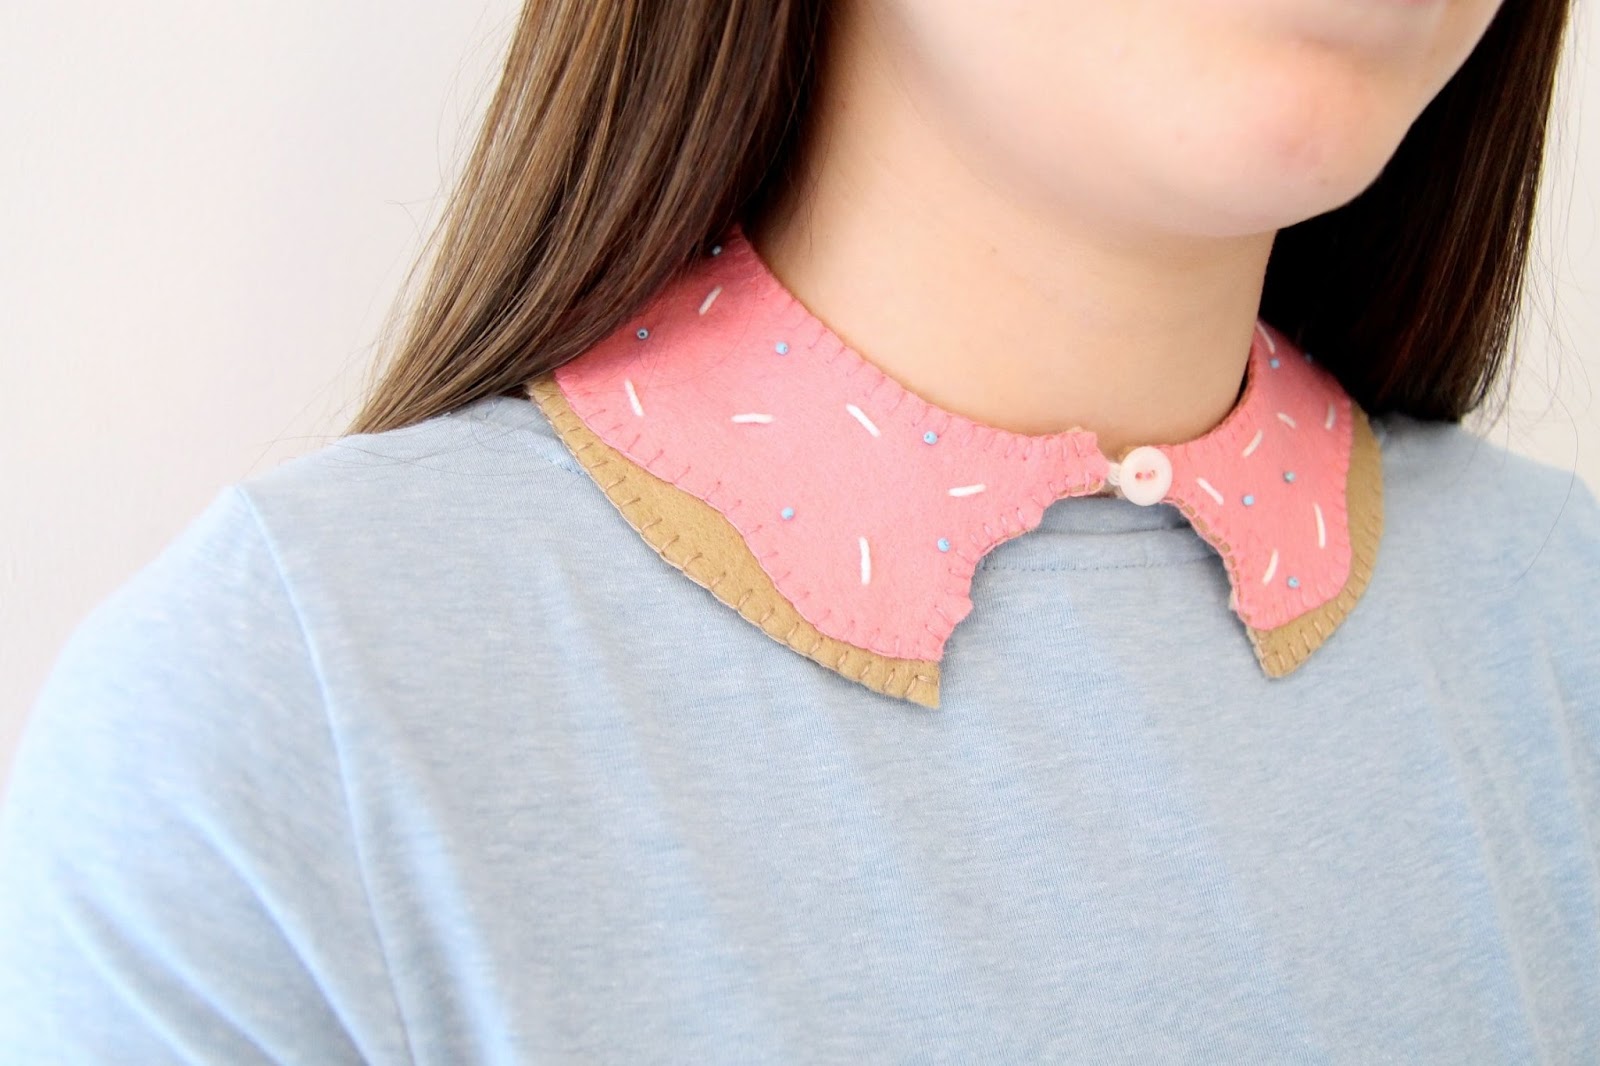
Now we just need to finish it up by taking our lighter piece of brown felt, and pinning it to the back, then trim the edges if needed to make sure they all line up, and again we are going to blanket stitch around the entire edge of the collar. This is slightly different than before because we are sewing 2/3 pieces of fabric together, rather than sewing one on to another, but it is the same principle. Use the brown thread on the edge with the brown felt, and the pink thread on the inside edge and at the bottom.
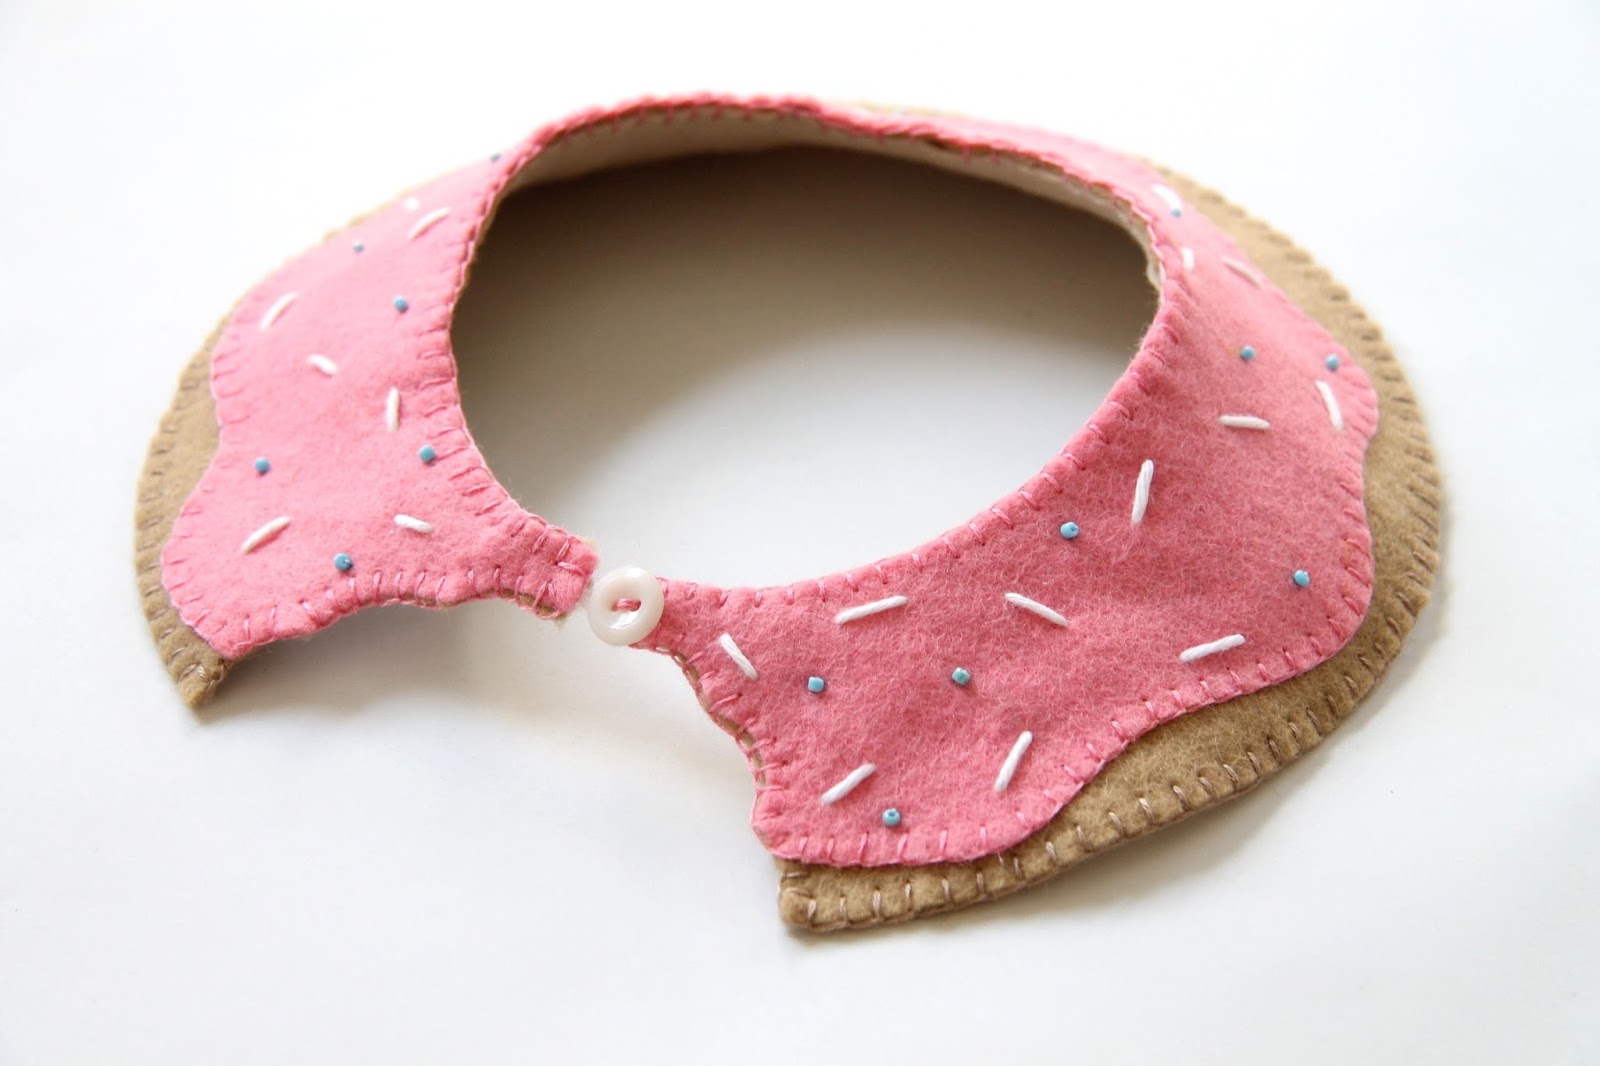
Now all you need to do is sew on your button and you are done!
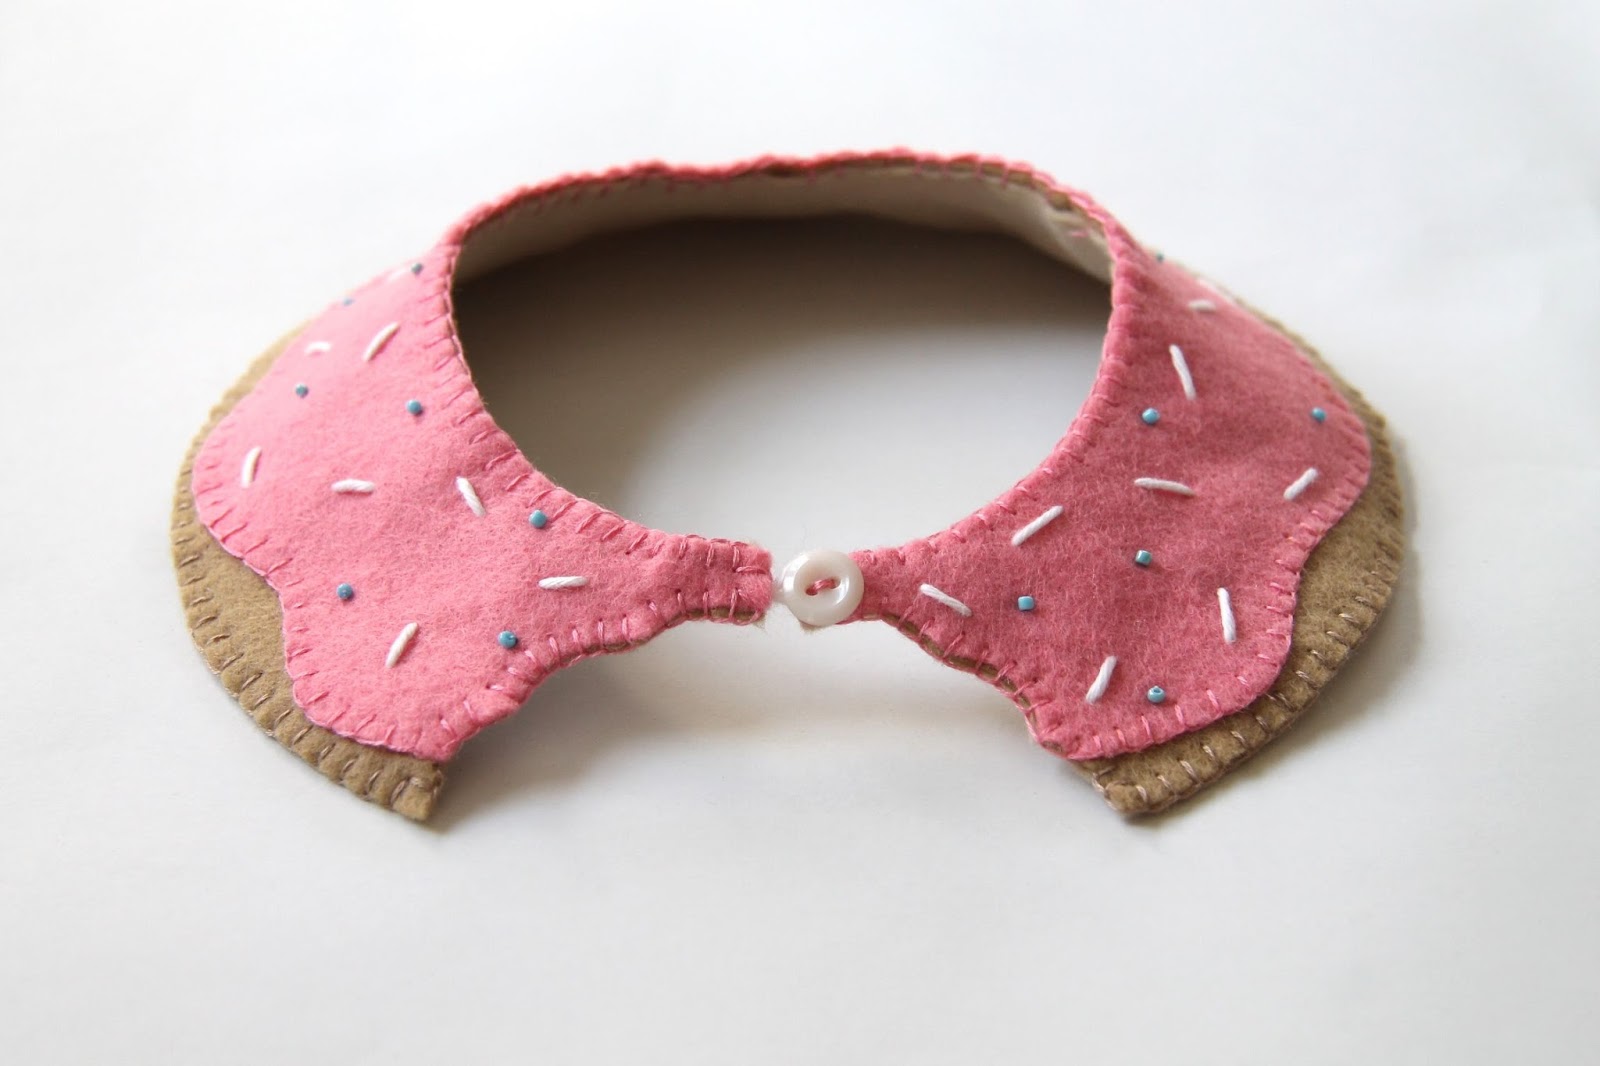
Here is what it should look like when you have finished...
I am super pleased with how it turned out, what do you think?
I really enjoyed sewing this and it has given me lots of ideas for other felty embroidery projects. Have you ever made anything from felt?
Laura xXx









This is just awesome. I will definitely be making at least one - my sister is obsessed with donuts!
ReplyDeleteThanks Char! I may have another doughnut themed post in the next couple of weeks too, so watch this space! ;)
DeleteThat's so cute! I will definitely be trying this :)
ReplyDeleteThanks Mel. Let me know if you do, I'd love to see how it turns out! And also if my instructions are adequate :s
DeleteThis is gorgeous! So fun and also very pretty! It would make my day any day to see someone wearing this on the street.
ReplyDeleteThanks so much, glad you like it :)
DeleteThis looks great! Original, cute and you explained every step very well. Thanks for sharing!
ReplyDeleteThanks, glad it made sense :)
ReplyDeleteIn modernity, most RMA requests are completed through the Internet, so having the ability
ReplyDeleteto process RMAs has become reviews a crucial aspect of the tech world. Upon receiving the
initial request, the representative, aided by the help of reverse logistics technology.
become reviews
This is amazing, I love it!
ReplyDeleteEs hermoso! Pero no logro descargar la plantilla de la donuts :(
ReplyDeleteLooks gorgeous. Haven't thought felt could be such cute. Love this non-woven fabric DIY project.
ReplyDeleteThis is the best iron skillet because other than aiding you in cooking the steak to perfection it provides other comforts as well. If you cook your steak in this cast iron skillet your hands will never get tired. Not only is the handle designed to be soft but the gripper can also be taken off when needed or is coming in the way controllable thermostats on smartenmyhome.
ReplyDelete