Showing posts with label nails. Show all posts

Monday, 24 November 2014

My Favourite Nail Varnish Brands

best nail varnish brands
Following on from my favourite make-up products post, I thought I would share my favourite nail varnish brands, and what it is that I like about them!
essie nail varnish
ESSIE
Essie is possibly a little bit overrated in my opinion, I'd read that you only needed one or two coats and it definitely didn't live up to that for me, it also takes a while to dry. BUT on the up side, they do come in some awesome colours, and if you have the time to sit and wait for the layers to dry, it does have a great finish.
barry m nail varnish
BARRY M
Again, Barry M takes a few coats, but I do love the colours that they sell. Their gold is actually really quick to dry though, and my new favourite is a gold foil effect varnish called 'Treasure Chest' which is perfect for the Christmas season!
max factor nailfinity nail varnish
MAXFACTOR INFINITY
This is my go-to varnish when I don't have a lot of time. It dries SUPER quick, and you can get away with just one coat if you are really in a hurry. The only downside is that it does start to chip quite quickly, but I'm sure you could prevent this with a decent base coat and top coat.
rimmel london nail varnish
RIMMEL LONDON
Rimmel is by far my favourite brand of nail varnish, there are loads of cute colours, it dries pretty fast, the brushes are a good shape and the finish is always great!

What's your favourite brand of nail varnish?

Laura xXx
Read More

Tuesday, 19 November 2013

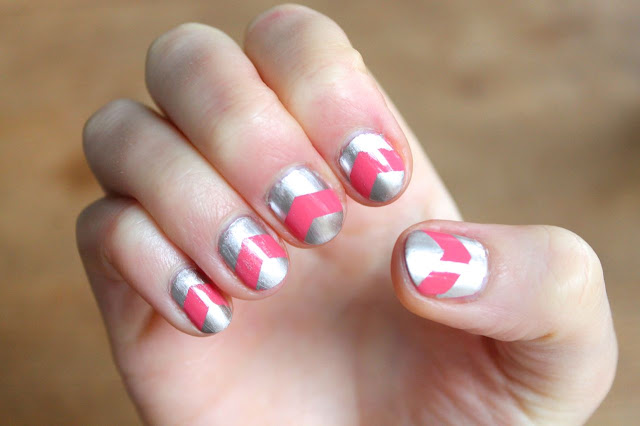
Pink and Silver Chevron Nails

nail art - silver chevron design
It's  been a little while since I did a nail art post. Don't worry, I'm still obsessed with painting them pretty colours, I have just been forgetting to take photos!

I dug out an incredibly old silver Sally Hansen nail varnish for this, which I am pretty sure I have had for over a decade, but it still works just fine!

I painted my nails a base coat of pink a couple of days before finishing the final pattern. I tried a different technique by putting the nail sticker in the middle of the nail, rather than at the top, and it turned out rather better than I expected, giving a bit of a neon chevron vibe. Who doesn't love chevrons?
chevron nail art
Supplies-
  • Rimmel London 60 Seconds Nail Varnish in Rose Libertine
  • Silver nail varnish by Sally Hansen (pretty sure they don't sell this any more!)
  • Nail stickers - Number 4
  • Seche Vite top coat

What do you think?

Laura xXx
Read More

Tuesday, 6 August 2013

Nail Art Tutorial for OH NO Rachio!

diy nail art design
Today I am guest posting over on OH NO Rachio! I'll be showing you how I created the nail art design above with a quick tutorial, you can find the full post here.

I know Rachel has got some wonderful guest bloggers lined up for posts for the rest of this week, so  stay tuned! 

Laura xXx
Read More

Thursday, 27 June 2013

Nails, Nails and more Nails!

blue nail art
It's nearly been three weeks since my last nail post, I've been getting withdrawal symptoms! So I thought that today I would share with you the nail design I came up with for our Etsy Party. The photos are by Rachel who captured them on the day, you can see the rest of her post on the awesome Etsy party here
Supplies;
  • Rimmel Lasting Finish - 704 - Sweet as sugar
  • Rimmel Lycra Pro - 600 - Peppermint
  • Rimmel 60 Seconds - 840 - Blue eyed girl
  • Nail Stickers
I really loved this colour combo, not least because it matched my outfit on the day! Some of which you can see in the photo below. No matter how many other nail varnishes I try I always seem to end up coming back to Rimmel. I do think they are great quality varnishes for the price of them.
blue nail art design
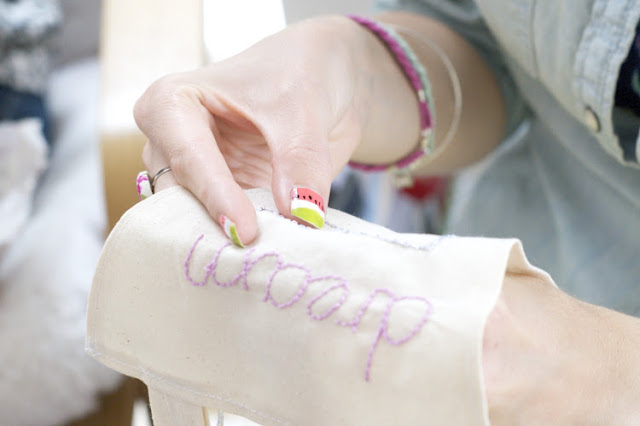
Speaking of our Etsy party, I had some pretty serious competition for most fabulous nails going on, check out these beauties (which I also stole from Rachel's blog)...


The red and gold triangles are Rachel's, the watermelon nails are Rosie's, and I don't know whose the sparkly gold ones belong to,  but if anyone can tell me I'll give you a biscuit!

Laura xXx


Read More

Friday, 7 June 2013

Gradient Nail Art

I have seen lots of tutorials for gradient nail art recently, but they all seem to use a sponge and look rather messy. Also, I didn't really have a suitable sponge, so I found an alternative solution. This tutorial shows how to create a gradient by mixing clear varnish with your chosen colour on tin foil, and layering it over the top. Gradually you will add more of the colour to the mix so that it gets darker towards the top. 
It was a little annoying having to re-mix the varnishes for every coat, but all in all it was quite easy. I started off using a make up brush as the tutorial suggests, but I found that this dried out too quickly. So instead I started using the brush from one of my old clear polishes that I don't use any more. This worked much more smoothly.
Supplies:

  • Rimmell- Peppermint
  • Mavala - Pistachio
  • An old clear polish
  • Seche Vite top coat
  • Tin foil - to mix together the varnishes

What do you think? Does it look as good as the ones that use the sponge technique?

Laura xXx
Read More
Related Posts Plugin for WordPress, Blogger...
Powered by Blogger.

© 2011 Wrapped Up In Rainbows, AllRightsReserved.

Designed by ScreenWritersArena