Showing posts with label Sewing Projects. Show all posts

Friday, 27 March 2015

My Handmade Aztec Pattern Cami Top

Sew over it silk cami top diy
Okay, so I have now attempted my second hand made item of clothing (you can see the first one here), and it is pretty much a success!

This time I tried something a bit simpler, which was the 'Silk Cami Top' by Sew Over It (my new faves!)  

I was actually able to buy this pattern as a downloadable PDF, which was great because it meant no waiting for it to arrive!  It does mean that you have to piece together the pattern though, so you need to make sure you have some tape or glue and set aside some time to make sure you do it accurately, but it didn't take me too long, especially since it is only a small garment. I'm not sure I'd be keen to do this with a dress though, I think I'd prefer to pay the extra to buy the ready made design in that case!

What is most definitely a bonus with a printable PDF, is that if I want to make a different size top, I can print it out again, whereas, obviously with a ready made pattern once you've cut it out to a size, you can't make it bigger again very easily!
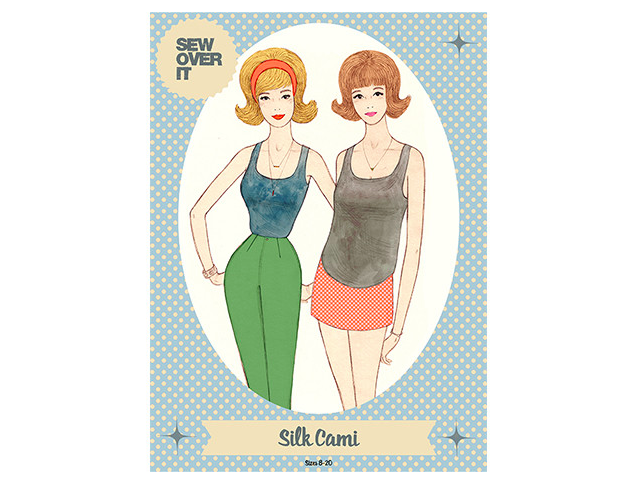
Sew over it silk cami
Once I had my pattern all I needed to do was to find a suitable fabric, so off to my local Fabric Land I went! I needed a very light material for this top, they suggested silk crepe de chine, rayon or crepe. I hunted high and low but I couldn't find a pattern I liked in the right sort of fabric. Then I spotted this sort of Aztec tribal number, and thought it would be perfect! It didn't have a label on it so I'm still not sure exactly what fabric it is, but it seemed to be the right sort of weight and feel.

It has a very bold pattern so I wanted to make sure that it was balanced well once the top was cut out. I'm glad I took the time to do this because I think it definitely made for a better top on the end. You can see the points of the triangles in the centre of the top, and had I cut it any other way it would have looked a little odd.

handmade cami top aztec pattern
I found that I had to adjust the shoulder straps and shorten them to give me a better fit. I did the same thing with the dress I made, so perhaps I have unusually small shoulders!

I'm really pleased with the way it has turned out, I'm looking forward to some nice sunny weather so that I can actually wear it without a cardigan over the top. The top can be worn tucked in or out, but I think I'm preferring tucked in at the moment, especially with high waisted trousers (which these are clearly not!)
aztec pattern silk cami top
handmade aztec cami top
Now that I have the pattern I think I will try making this top again and hopefully make a few small improvements on the fit. What do you think? Would you try a downloadable PDF sewing pattern? Have you used Sew Over It patterns before and what was your experience?

Laura xXx
Read More

Wednesday, 18 March 2015

My first homemade dress!

sew over it betty dress
Hi guys, I'm baaack! You might have noticed that I've been out of action for a while on the blogging front. I'd sort of run out of enthusiasm and ideas, so I decided to have a little break and give myself some time to replenish my creative brain bank! I am happy to say that I am now brimming with ideas and I can't wait to share them with you! I hope you have all been well, let me know what you have been up to!

I'm going jump right in to something I've been really excited about today, dressmaking!  During my time away I have been following The Great British Sewing Bee with eagle eyes. I love everything about it and it has really made me want to give sewing a proper try.   Back last year you may remember I spent a lovely day at The Handmade Fair  where I bought a dressmaking pattern from Sew Over It! The pattern was for a rather pretty 1950's/1960's style dress inspired by Betty Draper from Mad Men. The great thing about Sew Over It, is that as well as the little instruction booklet you receive with the pattern, you can also view a step by step guide on how to make the dress on their blog! Perfect for beginners!
betty dress pattern - sew over it
However, in the end I didn't need to refer to their blog, as I had a little bit of real life help!  A couple of weeks ago my Dad went away Skiing, so my Mum and I, and her neighbour, decided we would have our very own Great British Sewing Bee, and each make a dress in a couple of days.  It was handy to have their help, as they were both fairly experienced in dressmaking, whereas this was the first ever garment I had attempted to sew! (Aside from a project I attempted whilst at Uni, which got halfway finished and then I had to give up through complete confusion!)

Aside from the invisible zip, and sewing the shoulder straps together, this dress was actually very easy to make! It only had 6 pattern pieces which made it pretty simple to keep track of.
cutting out the betty dress pattern
I was really chuffed with how it turned out, it is actually a wearable dress, and a pretty nice one at that! There are a couple of tweaks I could make if I make the same one again, just to get it fitting perfectly, but as far as a first attempt goes, I am super pleased with it. I was worried I would struggle and that it would put me off sewing for life! But because it went so well I can't wait to get stuck in to more!  Here I am doing the 'I'm a little teapot' pose to  show off its lovely skirt.
my first homemade dress - sew over it
the betty dress
the betty dress back
It goes well with a nice belt too. It's definitely a twirly kind of dress, so I thought I'd better demonstrate!
1950's dress pattern
This project, along with my constant watching of The Great British Sewing Bee, has really got me in the mood for more sewing! I shall definitely be sewing up a storm in the near future, so watch this space!

By the way, it was a total coincidence that I bought the exact same fabric as is shown on the drawing of the dress pattern! I didn't realise until I got home!

Laura xXx


Read More

Thursday, 5 July 2012

DIY Tutorial - Tea Towel Aprons

DIY Tea Towel Apron Tutorial So, you want to make yourself a personalised apron without all of the faffing? Brilliant, find yourself a pretty tea towel and lets get going!

You will need :
• A (large) tea Towel
• Scissors
• A sewing machine or a good old fashioned needle and thread.

The tea towel has already done most of the hard work for you, now all you need to do is...

1. Cut the arm holes out. You may find it useful to use an apron you already have to judge the correct shape. If not just judge it by eye, but make sure both sides are equal by folding in half.
Make your own aprons
2. Fold the cotton tape in half and pin it around the apron as shown in the pictures below. Try to make it so the ties are even and there is still enough room to get your head through. This may take a few goes but it is best to make sure it sits correctly at this point.
Tea Towel Aprons
DIY Apron Tutorial
3. Simply stitch the cotton tape to the tea towel on both sides, making sure you catch both sides of it and the tea towel in the middle. You can do this by hand or using a machine.
DIY Apron Tutorial
Snip of any loose threads and you’re done!

These are really quick to make. They are much cheaper than buying a pretty apron too. I have been buying packs of 3 tea towels from Dunelm Mill for £5.99, so adding the cost of the cotton tape that is less than £3 per apron! I made Chris' mum a set of 6 for her birthday. As she teaches painting classes I thought they would look lovely hanging up in her workshop. She was really pleased with them, and I was right, they do look lovely!

Apron TutorialDifferent Apron PatternsThese aprons make a great gift
Laura xXx
Read More

Tuesday, 5 June 2012

DIY Tutorial - IPhone Stand

I don't know about you but I like to watch TV programmes on my Iphone when I am feeling bored (usually in my lunch breaks at work), but I always have trouble finding something to prop it up against. If you are anything like me then you have probably resorted to using a cup or a book, but not any more! Now, all of your IPhone propping problems can be solved with my handy portable DIY stand!

To make this essential piece of equipment you will need:

  • Thick cardboard (I used the back of an old note pad)
  • Ruler
  • Craft Knife
  • Fabric (at least 27cm by 30cm)
  • Pins
  • Large Needle/ Darning Needle and thick thread (Or wool)
  • Scissors
  • A Sewing Machine (optional)

Step 1

Using your craft knife cut 3 rectangles out of the card, as shown below (you will probably want to measure this all up properly first). Two pieces measuring 11.5cm by 6cm, one measuring 11.5cm by 5cm and one measuring 11.5cm by 9cm. The largest piece will form the base .

Step 2

Lay your piece of fabric pattern up, then lay your 4 pieces of card in a line (just touching each other) nearly at the top of the fabric, with the biggest and smallest pieces at each end and the medium pieces in the middle (Take a look after step 7 to get a better idea why we are doing this). Fold the fabric over as below, then draw around the outline of all 4 pieces of card. We are going to use this outline to make a pocket.

Step 3

Pin around the outline we have just drawn. I chose to leave the cardboard in place to give me more of a guide to follow and make sure the card will fit back in afterwards. Leave one end open so that we can turn the fabric back round the right way and insert the cardboard.

Step 4

Sew it up! Don't forget to leave one end open.

Step 5

Turn the pocket out, so that the fabric is now facing patterned side out. Now re-insert just the largest piece of cardboard so that it sits at the bottom of the pocket.

Step 6

We are going to make a hinge, so you will need to sew in backstitch (I used wool) along where the first piece of cardboard ends. You will want to keep it as close to the edge of the cardboard as possible. Once this is done, insert one of the medium sized pieces and repeat the process, do the same with the next medium sized piece, then insert the smallest piece.

Step 7

To finish off the end I still used a backstitch but made sure the ends were tucked in nice and neatly, then kept as close to the edge as I could.
Hopefully it will look a bit like the above picture when you have finished! You should be able to fold it up like this too. It flatpacks!
I hope you liked this tutorial, and that you understood it all. Please let me know if you have any questions. But if not, happy Iphone watching!

Oh, and let me know if you decide to make one, I'd love to see photo's and maybe even feature them on a post at a later date. Feel free to post the tutorial up on your site too, as long as you include a link back to this one :)

Laura xXx
Read More
Related Posts Plugin for WordPress, Blogger...
Powered by Blogger.

© 2011 Wrapped Up In Rainbows, AllRightsReserved.

Designed by ScreenWritersArena