Showing posts with label nail art. Show all posts

Monday, 24 November 2014

My Favourite Nail Varnish Brands

best nail varnish brands
Following on from my favourite make-up products post, I thought I would share my favourite nail varnish brands, and what it is that I like about them!
essie nail varnish
ESSIE
Essie is possibly a little bit overrated in my opinion, I'd read that you only needed one or two coats and it definitely didn't live up to that for me, it also takes a while to dry. BUT on the up side, they do come in some awesome colours, and if you have the time to sit and wait for the layers to dry, it does have a great finish.
barry m nail varnish
BARRY M
Again, Barry M takes a few coats, but I do love the colours that they sell. Their gold is actually really quick to dry though, and my new favourite is a gold foil effect varnish called 'Treasure Chest' which is perfect for the Christmas season!
max factor nailfinity nail varnish
MAXFACTOR INFINITY
This is my go-to varnish when I don't have a lot of time. It dries SUPER quick, and you can get away with just one coat if you are really in a hurry. The only downside is that it does start to chip quite quickly, but I'm sure you could prevent this with a decent base coat and top coat.
rimmel london nail varnish
RIMMEL LONDON
Rimmel is by far my favourite brand of nail varnish, there are loads of cute colours, it dries pretty fast, the brushes are a good shape and the finish is always great!

What's your favourite brand of nail varnish?

Laura xXx
Read More

Saturday, 9 August 2014

Nail Art - Gold, Mint and Pink

gold nail art
Last week my nail art took inspiration from the colour scheme of this lovely tassel garland. Pink, mint and gold! I think its a lovely combination, don't you?

Supplies Used;
  • Barry M - 320 - Foli Effects
  • Rimmel 60 Seconds - 262 - Ring a ring o'roses
  • Essie - Mint Candy Apple
  • Nail Stickers

I went on a little mini adventure in Pip this week to Dorset,  on the way home we went to see Guardians of the Galaxy, which was super mega awesome! I can't wait to do my film review on that one? What have you been up to this week?
Laura xXx
Read More

Monday, 13 January 2014

Revlon Chalkboard Nail Art Review

revlon chalkboard nail art
For Christmas one of my friends bought me Revlon's duel ended Chalkboard Nail art set. As it is a bit of a novelty varnish, I thought I would give it a go and do a little review for you while I am at it!
matte black nail effect
So here is how my nails looked once I had painted 2 coats of the matt black. Let me tell you, this stuff dries super fast! It was great!  Next I had to come up with a design to paint on them with the chalk paint. 

It has a skinny brush so that you can do intricate designs. Although, I don't know anyone that would be able to draw something freehand neatly on their nails, especially when using their non dominant hand! 

I decided to get out my trusty nail stickers to make the design as neat as possible. I opted for a  lightning bolt effect using these stickers (number 7).


Revlon chalkboard nail art
So here is the finished effect! What do you think? Probably not as neat as I would have liked.  In fact, I quite like the black on it's own. I'd like to try out using just the matte black together with a shiny black, like in this post. Although I think you would need to use a matte top coat if you wanted these to last for more than a day, as it does seem to chip quite easily. So I'm  not quite sure how you would get a top coat to work with that design!

The other thing I noticed about this dual varnish, was that there were a few times I started opening it upside down by accident,  I could see it making a bit of a mess if you aren't careful! Also, the skinny shape of the bottles makes them a little wobbly when you set them down, so definitely one to have an old magazine or something under just in case!

What is your take on chalkboard nails?

Laura xXx

Read More

Tuesday, 19 November 2013

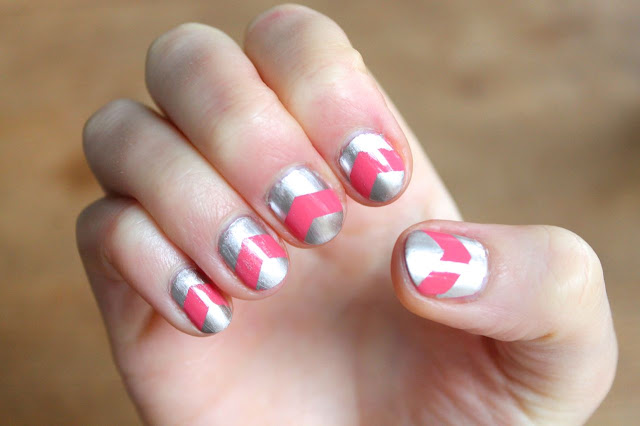
Pink and Silver Chevron Nails

nail art - silver chevron design
It's  been a little while since I did a nail art post. Don't worry, I'm still obsessed with painting them pretty colours, I have just been forgetting to take photos!

I dug out an incredibly old silver Sally Hansen nail varnish for this, which I am pretty sure I have had for over a decade, but it still works just fine!

I painted my nails a base coat of pink a couple of days before finishing the final pattern. I tried a different technique by putting the nail sticker in the middle of the nail, rather than at the top, and it turned out rather better than I expected, giving a bit of a neon chevron vibe. Who doesn't love chevrons?
chevron nail art
Supplies-
  • Rimmel London 60 Seconds Nail Varnish in Rose Libertine
  • Silver nail varnish by Sally Hansen (pretty sure they don't sell this any more!)
  • Nail stickers - Number 4
  • Seche Vite top coat

What do you think?

Laura xXx
Read More

Tuesday, 6 August 2013

Nail Art Tutorial for OH NO Rachio!

diy nail art design
Today I am guest posting over on OH NO Rachio! I'll be showing you how I created the nail art design above with a quick tutorial, you can find the full post here.

I know Rachel has got some wonderful guest bloggers lined up for posts for the rest of this week, so  stay tuned! 

Laura xXx
Read More

Monday, 8 July 2013

Holiday!


gold and blue triangle nail art
Today I am going on holiday! In fact I am on the plane to Turkey as we speak! Wish me luck, I'm not very fond of planes. Although, strangely, I do enjoy plane food, which is not something I seem to share in common with many other people. I will also be happy to spend the 4 hours of the flight reading Game of Thrones on my kindle!

Above you can see the nail art design I went with for my holiday, I am quite pleased with them! And yes, I am that sad that I made them match my bracelet! I got the triangle design idea from Rachel's post here.

It should be an interesting holiday as I am going away with Chris, his parents and sister, and my parents too! Plus, we are staying on a boat! Luckily I know we all get on, otherwise there could have been trouble staying in such close quarters! It's going to be a bit of an adventure, so I will be taking my camera and promise to report back.

Anyway, whilst I am away I have some very talented girlies holding the fort for me! All 4 of them have wonderful blogs which I know you will love, so if you haven't already you must check them out...

Claire from Claireabellemakes
Rachel from OhnoRachio
Erica from Caught On A Whim

I am sure you will really enjoy their posts, they have got some wondrous DIY's lined up, so get your craft box and baking ingredients at the ready! Come back on Wednesday to see Harriet's post which is a tutorial on how to make a macrame pot holder!

So long for now, I hope you all have a lovely couple of weeks while I'm away!

Laura xXx
Read More

Thursday, 27 June 2013

Nails, Nails and more Nails!

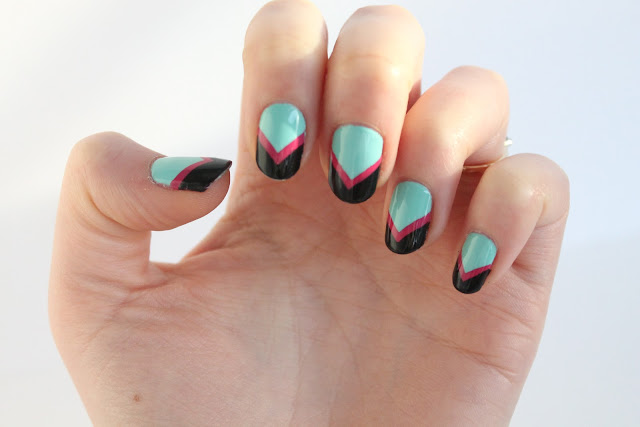
blue nail art
It's nearly been three weeks since my last nail post, I've been getting withdrawal symptoms! So I thought that today I would share with you the nail design I came up with for our Etsy Party. The photos are by Rachel who captured them on the day, you can see the rest of her post on the awesome Etsy party here
Supplies;
  • Rimmel Lasting Finish - 704 - Sweet as sugar
  • Rimmel Lycra Pro - 600 - Peppermint
  • Rimmel 60 Seconds - 840 - Blue eyed girl
  • Nail Stickers
I really loved this colour combo, not least because it matched my outfit on the day! Some of which you can see in the photo below. No matter how many other nail varnishes I try I always seem to end up coming back to Rimmel. I do think they are great quality varnishes for the price of them.
blue nail art design
Speaking of our Etsy party, I had some pretty serious competition for most fabulous nails going on, check out these beauties (which I also stole from Rachel's blog)...


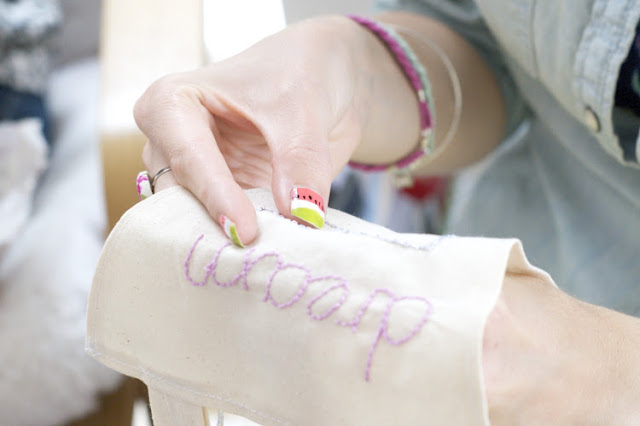
The red and gold triangles are Rachel's, the watermelon nails are Rosie's, and I don't know whose the sparkly gold ones belong to,  but if anyone can tell me I'll give you a biscuit!

Laura xXx


Read More

Friday, 7 June 2013

Gradient Nail Art

I have seen lots of tutorials for gradient nail art recently, but they all seem to use a sponge and look rather messy. Also, I didn't really have a suitable sponge, so I found an alternative solution. This tutorial shows how to create a gradient by mixing clear varnish with your chosen colour on tin foil, and layering it over the top. Gradually you will add more of the colour to the mix so that it gets darker towards the top. 
It was a little annoying having to re-mix the varnishes for every coat, but all in all it was quite easy. I started off using a make up brush as the tutorial suggests, but I found that this dried out too quickly. So instead I started using the brush from one of my old clear polishes that I don't use any more. This worked much more smoothly.
Supplies:

  • Rimmell- Peppermint
  • Mavala - Pistachio
  • An old clear polish
  • Seche Vite top coat
  • Tin foil - to mix together the varnishes

What do you think? Does it look as good as the ones that use the sponge technique?

Laura xXx
Read More

Saturday, 27 April 2013

My Top 10 Tips For Flawless Nails

Over the last year I have become more and more obsessed with painting my nails pretty colours and patterns. Whilst browsing some of my old posts I noticed how much better I have become at actually doing them neatly, so I thought I would share with you my top 10 tips on how to create flawless nails.
  • Let them breathe! Even if its's just for a day a week, try not to keep them painted the whole time.
  • Buff! Once a week I usually remove my nail varnish, cut my nails, buff them, mouisturise them and push the cuticles back. I have found that when my nails are buffed they are less likely to stain from the nail varnish, as they have a shiny surface. And that brings me on to my next point...
  • Use a base coat! I have had nasty experiences, especially with red nail polish, after having not worn a base coat, it is not a pretty sight.
  • Pick a good quality nail varnish, especially if you are planning on painting different layers. Some of my faves are Rimmel, Sally Hansen, Essie and Models Own.
  • Don't flood your cuticles. Make sure you leave a gap between your cuticle and the start of the varnish. It took me ages to realise this looked SO much better. If I do by accident, or if they look a little untidy I get a very fine paintbrush and dip it into some nail varnish remover, then I just follow the cuticle round until it looks nice and smooth.
  • Let the layers dry. This may sound obvious but it is especially important if you are planning on painting different colours on top.  A lot of the designs I go with have 3 colours, so I would usually paint my nails the base colour on an evening where I don't have anything to do. The first coat would go on after I had done everything I needed to. Dinner made and washed up, any chores done, and already in my PJ's! I would give the first coat at least an hour to dry before putting on the second, and make sure there is another hour to go before I need to be in bed. I often find that I end up with annoying duvet marks if I paint them too late!  Then, my second colour would go on the following day, and the third the day after that. I often use these stickers, so the polish has to be completly dry or it would ruin the layers you had already done!
  • When the varnish is dry, if you have made any mistakes you can touch them up using you chosen nail varnish and a cocktail stick for the fiddly bits. The lumpiness you can often get with this will most likely be concealed by my next tip...
  • Use a top coat of Seche Vite. This can hide a multitude of sins! 
  • Moisturise! Your nails will always look better if your hands are not dry and in a good condition. I probably have a bit of an ocd thing about moisturising though, I do it all the time!
  • When your nail art is coming to the end of its life, you may find that the top of the varnish starts to wear away and you can see the top of your nail coming through, or perhaps another colour. A handy tip to make it last just that little bit longer is to use a nail art pen to add to the design, just like I did below!
I hope you found my tips today useful. I will admit that I do not follow all of these tips myself all the time, but I find that I get the best results when I do! If you want to take a look at all of the other nail designs I have done on the blog, you can find them here.

Just in case you are interested the varnishes I used for my nail design in the pictures above are these...
    Laura xXx
Read More

Wednesday, 3 April 2013

White and Blue Polkadot Nails

polkadot nail art
Today I thought I would show you a really simple but very cute nail design I tried recently.  Who doesn't love a few polkadots!?
Supplies:
So, pretty simple really. Just paint your nails a base colour, once dry you can start dotting them with your nail art pen. I got mine from Primark for a bargain!

I would suggest practicing a little bit on paper before you try on your nails. I found that mine gave the perfect splodge of white by just pressing the tip of the pen down vertically for a second. You want to try to do them so they are all roughly the same size if you can. I can definitely see myself trying this design in lots of different colour ways. I have already tried  grey and black which you can see in this post.
polkadot nail art
Laura xXx


Read More

Sunday, 24 March 2013

Kitty Nail Art

kitten nail art supplies
I wanted to share something very cute with you today. These are teeny tiny cat nail transfers which the lovely Harriet Gray was sweet enough to send to me.  I was very excited when these were delivered on saturday and had to try them out straight away! Here's how they turned out:
kitten nail art
Pretty sweet huh? As well a selection of kitten designs there were also some cute little hearts included.
kitten nail art transfers
There is a limited amount available in Harriet's shop now, so I suggest you scoot on over pretty quick if you want to snag some for yourself.  You will also find lots of other lovely goodies with these kitten designs on, as well as other cute animals. I think these temporary kitten tattoos and this iphone case are my favourites.

Just in case you were interested the nail varnish I have used as a base coat is Barry M Peach Melba.

Thumbs up to these Harriet!
kitten nail transfers

Laura xXx
Read More

Wednesday, 13 March 2013

Silver Streak Nails

I wanted to try out a quick design the other day, so I went for a stripey effect. Unlike most of my other nail designs I actually did this one completely by hand. I was fairly impressed with myself that it didn't turn out a total mess! 
The supplies I used were;
  • Chrome - Sally Hansen
  • Blue eyed girl - Rimmel London 60 seconds
  • Peppermint - Rimmel London Lycra Pro
  • Seche Vite as a top coat
I painted on the Peppermint first. Once that was dried I painted just less than half of each nail with the Chrome. Finally, I just painted a thin line with the dark blue. Pretty simple, but I liked the way they turned out! 


Laura xXx
Read More

Monday, 18 February 2013

Outfit Post - Posing in Patterns

aztec jumper
polkadot nails
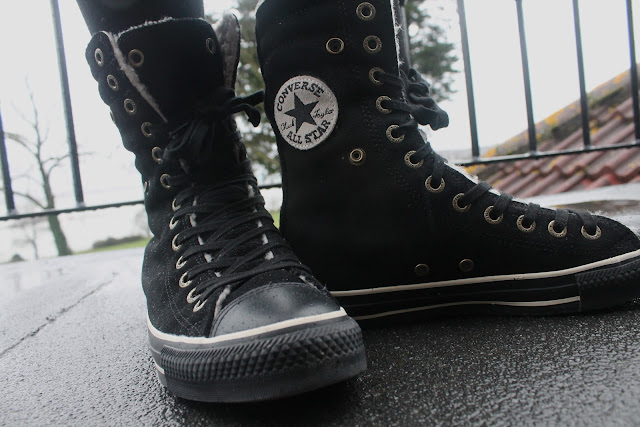
high top converses
button earrings
Aztec Jumper- Camden market, Label reads 'happy'
Leggins - Topshop
Button Earrings - Gift from a friend

Here's a sneaky peak at the outfit I wore for the Blogger meetup on Saturday. If I had been sensible I would have worn wellies like Rachel. Instead I wore my new Converses that Chris bought me for Christmas. They are very comfy and they look pretty awsome, but I did get them rather soggy by treading in lots of puddles whilst trying to navigate my way to the place we were meeting at.

I bought the jumper in this post from The Stables Market in Camden.  If you haven't been you should definitely go, it is awesome. Lots of vintage shopping as well as some really lovely quirky handmade stuff! Plus there are loads of massive brass horses everywhere!

People seem to be liking my button earrings which my friend Jess bought me for my 25th Birthday. I think she said she bought them from Camden market too, but I can't quite remember. Perhaps she can remind me if she is reading this! I don't usually wear earrings a lot as I often forget to put them in, but of course this was a special occasion so I made an effort to remember!

I think I am getting quite good at looking wistfully off into the distance, it is a talent I have acquired with much practice! I don't quite know what is going on with my eyebrow in the third picture down though, I didn't even know I could do that!

Laura xXx

Read More

Monday, 28 January 2013

Dotty Nails

nail dotting tools
Time to reveal what I did with these lovely little nail dotting tools that my Aunt bought me for Christmas.... dotty nails!
dotty nail art
First off I painted my nails a nice shade of grey. I wasn't sure what kind of paint I was meant to use for this, so I just picked some pretty acrylic colours that I already had. All I did was dip the tool into the acrylic, then dot a line all the way up my nail. One application of paint on the tool lasted for 1 vertical line, then I re-dipped,  which is why the dots get smaller towards the top of my nail.  dotty nail art
I think they look pretty cool, though they seem to remind me of Daaleks! Once I had painted a layer of Seche Vite on top this seemed to solve the problem though... not that it is really  a problem, particularly if you like Daaleks!
Supplies:

On a side note, how awesome is it that the colour of the dotting tools match exactly the colours in my header!?

Laura xXx

Read More

Monday, 7 January 2013

80's Nails

80's nail artThis nail design is part of my New Years Eve costume. The theme was 1980's so I thought I would pick out some bold and clashing 80's colours and see what happened! The results were surprisingly good!
1980's nail design
Supplies:
  • Barry M - Black
  • Maxfactor Infinity 704
  • Rimmel London Lycra Pro - 600 Peppermint
  • Nail Stickers
  • Seche Clear
  • Seche Vite
Rimmel's Peppermint is definitely one of my favourite colours, but I am running out so I had better buy some more quick!  The pink Maxfactor varnish was given to me as part of a Christmas present, and I really like it! It seems to cover really well, the other day I wore it with just one coat!
1980's nail varnish
Laura xXx


Read More

Saturday, 29 December 2012

Chevron Nails

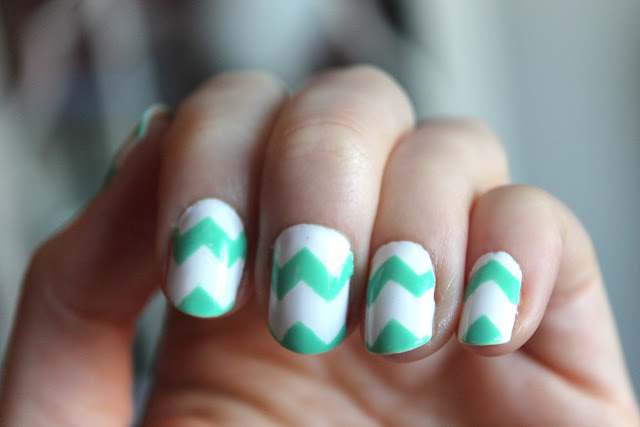
chevron nail art
I recently tried out some new stickers and used them to make a cute chevron design. They were a little tricky but I think they just about worked. What do you think?
chevron nailsnail art stickers
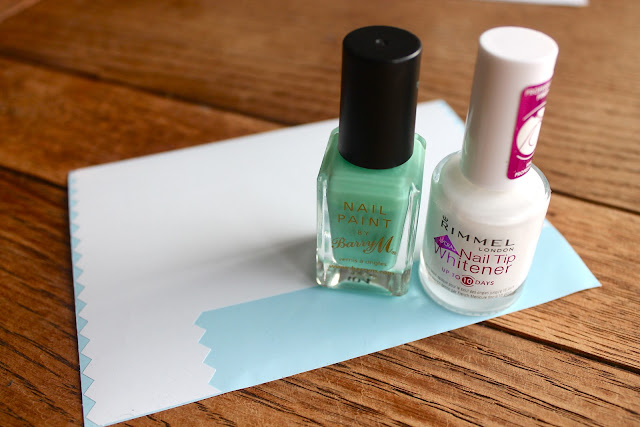
Supplies:

  • Barry M - Mint
  • Rimmel Nail Tip Whitener (If you have normal white nail varnish use that instead!)
  • Seche Clear
  • Seche Vite
  • Nail Stickers

Start by painting your nails white, I also always use a coat of Seche Clear to protect my nails from discolouring. Then, once completely dry, I simply stuck 2 of the nail stickers horizontally across each nail and painted the green fairly thickly across the entire nail. I removed the stickers immediately, then once dry, topped with a coat of seche vite.

Laura xXx


Read More
Related Posts Plugin for WordPress, Blogger...
Powered by Blogger.

© 2011 Wrapped Up In Rainbows, AllRightsReserved.

Designed by ScreenWritersArena