Thursday, 31 July 2014

A 90s party & a DIY Photo Booth

90s gif
If you saw my last post, The Makings of a 90's Party, you will know that I recently created a 90s Photo Booth, along with several themed props to go with it. We took some fantastic photos and I thought I would share the fruits of our labour with you today, get ready to be time warped back to the 90s!...

Also, the GIF above is courtesy of the fantastic new Party Party app by the Beautiful Mess team. It 's tons of fun!
gamers Photo Booth
As you can see, I went for the classic crop top and high waisted shorts ensemble Topped off with a nice bumbag, topknot scrunchie, 'tattoo choker', and yes, thats a bindi on my forehead, not a spot!
DIY gameboy pokeball Photo Booth
90s diy Photo Booth
pokemon Photo Booth
charlies angels style Photo Booth
gameboy Photo Booth
teenage mutant ninja turtles Photo Booth idea
90s Photo Booth idea
nintendo Photo Booth
turtles Photo Booth
balloons Photo Booth
The party itself was a triumph, so much effort had been put into it and we had some fantastic games like pass the parcel and musical statues. But by far the highlight of the day was the 'Art Attack' 3 rounder, the finale of which we had to create a Transformer out of rubbish. After learning our task, 30 minutes of complete madness ensued. Our team created the 'Arnietron' (in the middle) which transformed into a helicopter, or 'chopper'.  I did enjoy the name of the Transformer on the left which was 'Amazon Prime', and the one on the right actually transformed into a van! However, I am pleased to say that Arnietron won the battle on the day!
transformers challenge
Of course, it wouldn't have been an authentic 90s kids party without goodie bags! There was also a bouncy castle, loads of sweets and fizzy pop, face painting, and the odd balloon animal here and there!
90s goodie bags
I have to say, I kind of miss the 90's now! What are your favourite memories of that era?

Laura xXx
Read More

Tuesday, 29 July 2014

The Makings of a 90s party

90s themed photo booth DIY
I just love themed parties, so when I heard that I was invited to a 90's kids party (for grown ups), I was very excited, and more than happy to get stuck in to helping with the prep and creating a 90's Photo Booth!

To start off with we decided to make a backdrop for the photo booth.  This was made from an old sheet and some bright acrylic paints which we bought from Tiger.  Much fun was had creating a 'splatter' effect. There is definitely a technique to it!
Make your own DIY 90s Photo Booth
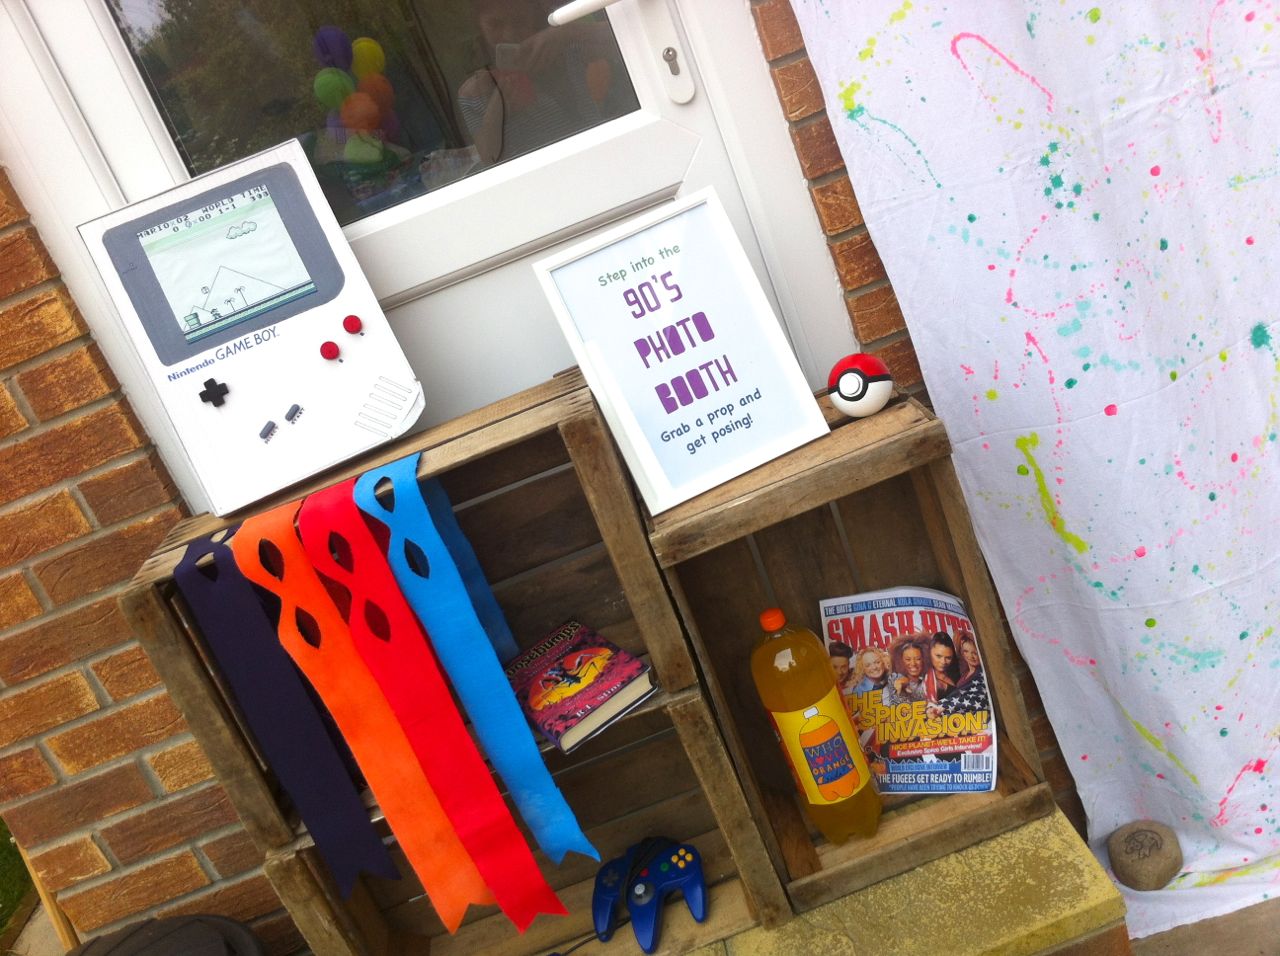
When you think of the nineties, what pops into your head? I was between 4 and 14, so most of my memories consist of cartoons, games and toys! I had a gameboy and loved to play Super Mario, as well as Pokemon, so I got to work making a giant Gameboy! I found a box that was about the right proportions and then printed out a screen shot from the game.  The buttons were made from cut out pieces of plastic cork and polystyrene, and I painted the details on with acrylics.
DIY giant cardboard gameboy
Speaking of Pokemon, I knew we HAD to have a Pokeball involved somewhere, so I made one using a small globe ball from Tiger, and lots of acrylic paint!  The button was made from a section of cork painted white. I really wish it worked and I could unleash my very own Pikachu, but alas, we are not that technically advanced yet.
diy pokeball
Obviously the Spice Girls were a 90's phenomenon, so I found this picture of an old Smash Hits cover, printed it out, and glued it on to a telco magazine.
smash hits spice girls 90s prop
Lets face it, ALL boys and a lot of girls, were obsessed with the Teenage Mutant Ninja Turtles.  So I just had to re-create the masks worn by Leonardo and Crew. I had a load of canvas type fabric which I find takes acrylic paint super well, and I used the general shape of the mask outline I made in this halloween post. I was so pleased with the way they came out, since they were pretty quick and easy to do!
DIY Teenage mutant ninja turtles masks
Remember the Goosebumps books? I'm sure they were pretty much a staple in any kids book collection. I knocked up a quick copy by printing off the front page of the wonderfully named 'Shocker on Shock Street', and making a sleeve to fit around an old book I already had.

And who could forget Keenan and Kel? 'Who loves orange soda?'  We made a bottle of Orange soda so that guests could channel their inner Kel. We also had copious amounts of Orange soda to drink, by the end of the party I think we all knew where Kel had been coming from all those years ago.
90s Photo Booth props
As a final thought we decided it would be cute to have a sign ready for when the games were being explained.  So Jessica (who was explaining the games) took the place of Clarissa, who as we all know, could explain it all!
clarissa explains it all sign
In my next post I'll show you some of the photos we took in the Photo Booth, and I may be slightly biased, but I think they came out awesome!

Were you a child of the 90s?  What are your favourite memories of that era?

Laura xXx 
(now constantly singing Pokemon and Fresh Prince of Bel Air theme tunes)
Read More

Thursday, 24 July 2014

Easy Canapes - A Cheats Guide


easy canape
These canapés could not be easier, which is one of the reasons I love them, but also because they are delicious! I served these at our cocktail party the other week and I think they went down pretty well!

Simply grab some cocktail sticks (I prettied mine up by using wash tape to make little flags), and slide on your ingredients.

For the meat eaters we had half a tomato, a slice of chorizo followed by a rolled up basil leaf.

We also had the option of tomato, feta and basil for those that didn't want to eat meat.

Easy peasy right!?

tomato, feta, chorizo, basil canapes

Laura xXx

Read More

Tuesday, 22 July 2014

A Hidden Gem - Ice Cream and Video Games

Tooti's gelato bar southampton  Today I have a story for you of a delicious Gelato bar with a difference!Chris and I have resumed our weekly dates, where we each organise a surprise outing every Thursday. Last week Chris took me to Chewton Glen in New Milton, for a very posh 3 course dinner. It was delicious (I instagrammed the food if you want to take a look). Weirdly that very same night as we were watching the telly, we noticed Chewton Glen pop up on 'I Wanna Marry Harry' (not that I watch that sort of thing! Winkey smiley). Obviously that's where the fake royals hang out!
Anyway, this week I decided to take Chris out to a Gelato bar in Southampton that my friend had told me about. Apparently the food was great, and it had one even bigger selling point, retro gaming stations at the tables! Whaaaat!?
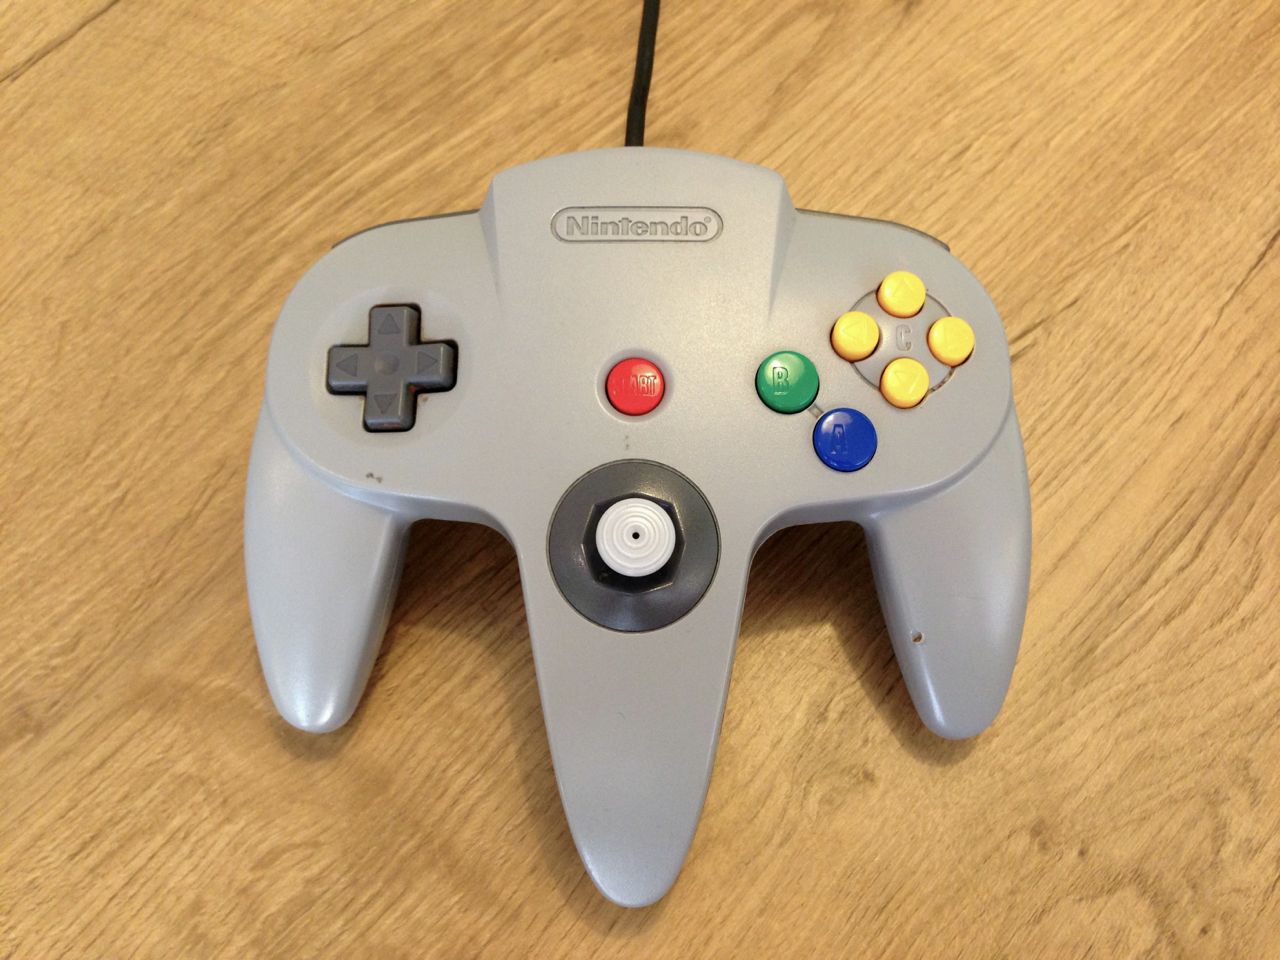
retro games consolesnintendo controller
It was a tough decision which table to sit at, as each one had a different make of console. Luckily it wasn't busy at all, so we managed to have a go on each of them by swapping tables every time we fancied a new one.raspberry sorbet smoothie
I chose a rasberry sorbet smoothie and a lemon and sugar crepe, while chris had a mountain of chocolate ice cream and a coffee. Yummy!
mario cart
We played Crash Team Racing, Mario Cart, and my favourite, since the Sega Megadrive was my weapon of choice as a youngster, Sonic and Tails! I'd never played it 2 player before though, so that was a treat!

Here I am probably loosing miserably at Mario Cart. I did come 7th once though, so not all bad!
ice cream and gaming
Afterwards we went to see Dawn of The Planet of The Apes, which I think was pretty darn good. Especially the apes, they are amazing, it's crazy how far technology has come to be able to make a film like this!

Weirdly Tooti's don't seem to advertise that they have games on their website, so it is a bit of a hidden gem!  If you're near the Southampton area any time soon I'd definitely suggest popping in.

Are there any hidden gems near you that you know about?


Laura xXx
Read More

Friday, 18 July 2014

Cocktails Made Easy - 3 recipes to get the party started

Cocktail recipes
This time last week I was adding the finishing touches as I prepared for my first cocktail party! If you saw my post about simple syrups earlier in the week, you will remember that I was going to share a bit about the party and the cocktails I chose to make.

Since there were about 15 people coming to the party, I decided it would be rather tricky to make a cocktail for each person individually. So instead I came up with 3 cocktail recipes that I could make and serve in bulk in my pretty drinks dispensers, which we originally bought for the wedding. You can buy them here if you fancy giving this a go yourself.

Here are the recipes I devised for my cocktails, all of them went down well, but I think the Mojito disappeared the quickest!

Drunken Watermelon (far left)
500ml Vodka
2 litres Lemonade
350 ml of Watermelon Simple Syrup - Recipe here
Lime Juice to taste
Watermelon chunks (I cut mine into pretty stars using a cookie cutter)
Frozen Blueberries

El Macho Majito (middle)
500ml White Rum
2 litres of Soda Water
350 ml of Mint Simple Syrup - Recipe here
7 juiced lemons
7 juiced limes
2 sliced lemons
3 sliced limes
Mint Sprigs

Elderflower Fuzzle (right)
350ml Gin
4 litres Tonic Water
350ml Elderflower Cordial
Raspberry and mint ice cubes

And here are some pictures of the madness that ensued after consuming these sugar filled cocktails;
straws and mojitococktail chalk board
My Dad recently came over and mounted the chalkboard that was used for the open-mic at our wedding, to the wall in our hallway. I was excited to use it to show where important things were located.
canapes
cocktail recipe - drunken watermelon cocktails in bulk pretty glasses
Check out my pretty Italian wine glasses from Liberty London. I was very brave and allowed everyone to use these, thankfully they all remain in one piece!
shot glasses
We decided to do some shots of Apple Schnappes. Unfortunately it seemed that my shot glasses were all different sizes, and mine was by far the largest! Oh well, bottoms up!
And so we have the last ones standing.  The alcohol has clearly taken its toll at this point as Chris has replaced his glass of delicious cocktail with some freshly squeezed lemon juice in a lemon juicer.
He seems quite happy about it though.
We had a lovely night and I would definitely recommend my method of bulk cocktail making. It meant that I could relax once it had all been done, and I think it meant less mess too.  Everyone said how yummy the cocktails were, so I think we did pretty well. The secret is just put loads and loads of sugar in it! None of us slept for days.

Laura xXx

Read More

Wednesday, 16 July 2014

Herb 101 - Lemon Balm

Whilst on a trip with my friend to a garden centre recently, I picked up a rather nice pot of herbs for just £9.99, which I thought was a bargain!  Unfortunately most of the herbs in the pot aren't ones I use very often in my cooking. I tend to be a creature of habit, and stick with coriander and basil when using fresh herbs, as they are my favourites. I love a good thai curry or noodle/rice dish with lots of tasty coriander, and I have a weakness for basil in a sandwich with some tomatoes and cheese!

I realised that learning what to do with most of these herbs would require a little bit of research, so research I did!  In the interest of sharing knowledge, I thought I would pass on some of the information I learned with you!
And so, I give you my herb of the week... Lemon Balm!

Lemon Balm is a herb I had heard of (bit of a tongue twister!), but had no idea what it looked like or what to do with it. Of course I knew it would smell lemony, but other than that I was at a loss. It turns out that it is a fantastic herb for attracting bees to your garden, which I am all for! Its latin name 'Melissa', is derived from the Greek name for Bee. When the plant flowers it will apparently attract lots of Bees from far and wide. Hurrah!

It is a herb that is known for its medical properties against stomach ailments and nervous conditions.

But what can we do with it? As it turns out, a whole heap of stuff! ;

  • Make a pesto. Great recipe found at The Healthy Green Kitchen. You can use this as a  pasta sauce, as a sandwich spread, or on crackers as an appetiser. I'm looking forward to giving this a go!
  • Use it as a substitute to lemon grass. Perfect for Thai dishes when you have forgotten that all important ingredient, or are trying to save your pennies.
  • Make candied lemon balm. I gave this a go and I think these would be a fantastic edible garnish for a dessert!  They taste wonderfully sweet and lemony! To make them you just need to dip each leaf in some lightly whisked egg white mixed with a dash of water, then dip in sugar. Lay them on a baking tray and pop in the oven at about 100c and leave for about 20 minutes.
  • Flavour cold drinks. You can add the leaves as a garnish, or create a simple syrup from its leaves like I did in this post with mint.
  • Add it to a fruit based dessert like apple pie.
  • Make a tea. Steep the leaves in boiling water for a few minutes to made a deliciously lemony tea! It is meant to have wonderful calming properties! I've tried this and it's actually really good.
  • Make a tasty lemon balm flavoured butter to spread on toast like I did here. This was really easy to do, I just mixed 100g of softened butter with about a teaspoon of finely chopped lemon balm, and a dash of honey. To make the butter presentable I filled an ice cube tray with the mixture and popped them in the freezer to set quickly. I think they look rather good!
  • Add to a bath and enjoy its delightful lemony scent. Use a little mesh bag to keep it from straying into your nooks and crannies.
Wow, I think Lemon Balm is my new favourite! What do you like to do with Lemon Balm?

Some of the ideas above were inspired by The Nerdy Farm Wife whose blog is full of wonderful tips on herbs and flowers!

Laura xXx

Take care when using Lemon Balm if you are on hypothyroid medications, are pregnant or have any other medical conditions. Always consult a doctor if you are unsure.


Read More

Tuesday, 15 July 2014

Fancy Pants Butter - A Cheats Guide

Ever wanted to impress with your culinary skills, but lacked the time or energy to do so? Here is a quick and simple trick you can prepare way ahead of time. Whip it out for dinner parties, or just when your friend pops over for a cuppa and a snack. 

Create your own delicious toast topper by mixing softened butter with a flavour of your choice. If you're going for a sweet sensation you might want to try cinnamon, vanilla or honey. Or if you prefer something savoury try finely chopped herbs. Whatever you like, give it a go, you can always make a few little batches at once before deciding on your favourite.

Scoop your butter mix into silicone ice cube trays and pop in the freezer. Next time you've got guests just take out a few cubes in time for them to defrost, and you will look super prepared!

Laura xXx

Read More

Monday, 14 July 2014

Simple Syrup Recipes

While Chris and I were away on our honeymoon, I made a list of things I wanted to do when we got home. One of those things was to host a little cocktail party! In preparation for the day I decided to make my own simple syrups to make things a bit easier for myself. Basically these are used to sweeten any cocktail, since sugar tends to not dissolve, which you will have already discovered if you are Mojito lover like me!

It turned out to be really easy, and I had most of the things I needed to make it already in the cupboard. The most basic ingredients are granulated sugar and water in equal parts, but you can add different flavourings depending on what you have in mind for your cocktail!

What you will need:

Ingredients
Sugar
Water
Flavouring (optional)

Equipment
Saucepan
Wooden spoon
Glass bowl or large jug
Cling film
Sieve for straining
A bottle to decant your syrup into

First of all I made some plain simple syrup using 2 cups of demerera sugar and 2 cups of water. The trick is to always use the same amounts of these two ingredients. I simply heated the water in a saucepan until simmering, and then added my sugar. I left it on a low heat for about 15 minutes until the sugar had fully dissolved, and stirred continually.  I let the syrup cool in a covered bowl, then decanted into this rather pretty little bottle, which I got from Dunelm Mill. It made slightly less than 500ml  I imagine if you want a clearer coloured syrup you could try giving white sugar a go instead.
simple syrup recipe
Then I got a little more adventurous and tried a couple with flavourings, since I was having a watermelon cocktail and a mojito style cocktail.

The mint syrup was easy, I just added about 2 packed cups of fresh mint after the syrup was made, but before cooling.  I left this to steep all day, then once it was cool I put it in the fridge overnight.  In the morning I strained it and decanted it into my bottle

I found it trickier to find a recipe for watermelon syrup, so in the end I made up my own. I decided to blend some chopped watermelon to make a juice, I used about the same amount as I did water, and I added this right at the beginning. I also added a few chunks of watermelon. I left this one to simmer a bit longer since there was more liquid. Again I left it to steep and then strained it into a bottle.
Amazingly, although it was my first go all three simple syrups worked really well, and the drinks I made went down a storm.  I'll fill you in on the full recipes and how the rest of the party went later in the week!

What are your favourite cocktail recipes?

Laura xXx
Read More
Related Posts Plugin for WordPress, Blogger...
Powered by Blogger.

© 2011 Wrapped Up In Rainbows, AllRightsReserved.

Designed by ScreenWritersArena