Pages

Wednesday, 31 July 2013

July Review

In Life

So we have had a little bit of a set back on the house buying front. It looks like our seller is going to take longer than we thought, so in the mean time we shall be viewing some other houses. It is a bit of a pain, but hey, maybe we weren't meant to buy that house after all, and the perfect one is just waiting around the corner. Fingers crossed.

What We Watched

Jack The Giant Slayer - We saw this on the plane out to Turkey.  It was ok, it made the flight go faster!
Despicable Me 2 - Yay, I love this. The minions are my favourites and Agnes is the cutest!
Jurassic Park 2 - A classic, but I don't think I had ever seen this the whole way through until now.
Letters to Juliet - A bit of a soppy one, but enjoyable.
Zoom - I'd never heard of this but it was actually quite fun! Just a silly superhero movie with Tim Allen.

Plus Dexter is back on, woohoo! We have also been watching Falling Skies and New Girl.

What I Read

A Game of Thrones - This is a super long book so it was all I got round to reading this month. My Kindle told me it would take 27 hours when I started reading it, I'm nearly finished though! Only 2 hours left to go! As you may know, I am quite obsessed with the TV series, so I thought I would start reading the books too. Did you know that although the TV series is called Game of Thrones, it is actually only the first book in the series that is named that (Plus an A at the beginning). The series of books is called A Song Of Ice and Fire!

I'm thinking of doing some Game of Thrones themed blog posts, so watch this space if you are a fan!

In Blog Land

While I was away on holiday I had 4 lovely girlies guest post for me. I loved all of their posts and they had clearly put loads of effort in! So thanks once again girls. Find the links to their posts below;

Erica's DIY Pom Pom Necklace

Also, I'm hosting a giveaway which ends on the 27th August. If you are planning a wedding or party it could be just the thing for you! Find the post here.


My Favourite Posts

Tuesday, 30 July 2013

£50 voucher giveaway with Paper Themes!

Wedding Giveaway

As you may already be aware, I am currently planning my wedding, so I am thrilled to announce that I will be running a giveaway with Paper Themes! Paper Themes specialise in wedding invitations and wedding stationary, but they also also have a wide selection of party decorations and invites. Any of which you could spend the £50 voucher on if you are lucky enough to win! Above are some of my favourite picks from their shop.

I recently wrote a review on their Wedding Invites, and also on one of their Wedding Planners, on my wedding blog Wrapped Up In Weddings, if you want a better idea of some of the goodies you could win.

So, if you are planning a party or a wedding soon, this could really help cut your costs down. All you have to do to enter is like Paper Themes on Facebook. You can also get additional entries by following Paper Themes on Twitter, Tweeting about the giveaway, and liking my Facebook page. Please use the Rafflecopter widget below to enter.
a Rafflecopter giveaway

The competition will finish on 26th August, and the winner will be sent a voucher code for the value of £50. Good Luck!

Laura xXx

Friday, 26 July 2013

Eco-Market - DIY Body Scrub Recipe

DIY Organic body scrub Recipe
Today I am teaming up with eco-market, who have kindly given me the secret recipe for a wonderful organic body scrub!  It smells delicious and it is super easy to make! Want to learn how? Read on!
ingredients for body scrub
What you will need;
A Small Organic Lemon
A Small Organic Lime
1 Cup Organic Pure Cane Sugar
1/2 Cup Organice Coconut Oil
1 Teaspoon Organic Peppermint Essential Oil/Extract
An airtight container, jar or pot.

I actually decided to halve this recipe because the jar I had was quite small.
Lime Juice
Process;
Simply mix the coconut oil, peppermint essential oil, lemon and lime juice together. Then pour in the sugar and mix well. If you like you can add the lemon and lime peels at this point, or some fresh mint leaves if you are feeling fancy.

I found the consistency of mine a little watery, probably because my lemon and lime were too juicy! So I just added a little more sugar until it felt about right.
Organic peppermint body scrub
I used this for the first time last night and the smell is to die for! It kind of reminded me of mint choc chip ice cream, which made me want to eat it, but I managed to resist since I really don't think consuming an essential oil is a good idea! Anyway, it worked wonderfully and my skin is feeling silky soft as promised!

Remember that you should only exfoliate once or twice a week, otherwise you can damage your skin. Also, don't use immediately after shaving, or on any damaged or broken skin. And don't get it in your eyes.

I'll definitely try this again in the future. It will keep for at least 2 months happily in its airtight container, although I'm sure I'll get through it much quicker than that!

I think coconut oil is absolutely fantastic and I am keen to try out some more natural beauty products that use it. So watch this space!

Thanks to eco-market for sending me the recipe to try out. If you haven't heard of them they are a marketplace where you can buy and sell eco-friendly products. Go and check it out, there have some fantastic products, I think these seedbom's have got to be my favourite!

Have you ever tried making any beauty products yourself? I'd be really interested to hear any of your favourite recipes.

Laura xXx

Wednesday, 24 July 2013

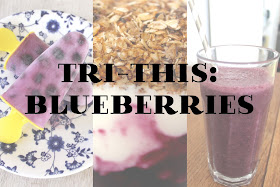
Tri-This - Blueberry Recipes


Blueberry Recipes

I don't mind admitting that I'm having a little bit of a creative slump at the moment. The same thing happened last year after I came back from my holiday too. I like my routine it seems, and whilst my holiday was fantastic and relaxing, it seems to have gotten me out of the swing of things somewhat.

Anyway, to get out of this rut I thought I would challenge myself to a new series of blog posts. Each week I will be picking one of my favourite foods and making 3 (because good things come in threes)  different recipes that use it.  It might be my first ever try, or it could be something I've made before, or maybe even a twist on an old recipe. And I've wittily named it 'Tri-This"! Actually you can thank Chris for that! It does sound a bit like something the candidates on The Apprentice would come up with, not sure if that is necessarily a good thing!

So today I am going to suggest you Tri Blueberries! 

Blueberries are one of my favourite fruits and they are also a superfood, hurrah! Whats not to love?
blueberries with yoghurt and oats
1. Cooked blueberries with vanilla yoghurt and fried oats.

This is something I have made a couple of times before, you may have even seen it on my Instagram feed, but it is becoming a firm favourite! It would be perfect as a breakfast, although I have been eating it as a healthy dessert!

Ingredients;
Blueberries
Vanilla yoghurt
Oats
Coconut oil
Agave nectar

Heres the deal - Cook your blueberries (I used frozen) in a frying pan until they are nice and juicy, then pop them in a glass, and add your yoghurt. Next use same pan as you had your blueberries in and heat up some coconut oil, pop in some oats and add a little agave syrup. Continue to heat whilst occasionally stirring until they have gone a golden brown colour and soaked up some of the delicious blueberry juices. Then add them to the top of your dessert to finish off.
blueberry smoothie
 2. Blueberry and Banana Smoothie

You may remember that I love a good smoothie, I have one first thing nearly every morning. Whilst I like to change it up and have something different most days, I always keep some blueberries handy in the freezer, and a banana and blueberry smoothie always goes down well!

Ingredients;
Blueberries
Banana
Water

Pretty simple this one, grab a large handful of blueberries and one banana and throw in a blender. Add water until you are happy with the consistency. If you like it a bit sweeter you can always add a dash of agave syrup. Or if you like it super healthy why not pop in a little bit of watercress?
blueberry and yoghurt ice lollies
3. Blueberry and Vanilla Yoghurt Ice Lolly

This one was a bit of an experiment but it turned out really great! Since we have been having a bit of a heat wave I thought it was time to try out a new type of ice lolly. I really love the taste of cooked blueberries and I had some vanilla yoghurt hanging around in the fridge, left over from the earlier recipe. The rest is history.

Ingredients;
Blueberries
Vanilla Yoghurt
Agave Nectar

Cook your blueberries in a frying pan until squidgy and juicy, then mix with vanilla yoghurt and a little agave syrup. Then decant into your ice lolly moulds (this is the messy bit) and leave in the freezer over night! Yummy!

I hope you enjoyed my blueberry recipes this week. Are you a blueberry fan? I'd love to hear some of your recipes too! 

Also, any suggestions for future 'Tri-This' posts will be most welcome!

Laura xXx


Friday, 19 July 2013

Holiday in Turkey

turkey holiday
I have returned from my trip to Turkey! But my head and legs still think I am aboard a boat! The last two mornings I have woken up swaying!

Well, I had a fantastic time and we did loads of exciting stuff as well as having a jolly good relax.

I'll keep it short but sweet by filling you in with bullet points of some of the things we did while we were away;
  • Played the Pirates of the Carribean theme tune loudly whenever we set sail
  • Climbed a rocky island, braving crickets, bees, bunnies and lizards! (can you see us in the second picture below?)
  • Took photos of Chris jumping off the boat.
  • Played at being Columbus by claiming and naming new found lands! 
  • Swam to the shore and collected pretty stones and sea glass.
  • Followed some dolphins!
  • Ate delicious mezze's.
  • Lost a flip flop and a camera when jumping off the back of the boat - and then managed to retrieve them in a dramatic James Bond-esque style.
  • Went on a night-time trip in Douglas the Dingy.
  • Celebrated Chris's Mum's Birthday with lots of sparklers!
  • Saw lampshades made of funnels, buckets and straw hats!
  • Got sick for 3 nights in a row and had to rent a hotel room. This is becoming a trend, which you might notice if you read last years holiday post. It's not really a holiday unless you're sick, right?
jumping in the sea
nail design and sea glass
dolphin
dolphins
mezze
funnel lamp shadesdinner time
Laura xXx


Wednesday, 17 July 2013

Guest Post - DIY pom pom necklace

DIY Pompom necklace

I should be heading back from my holiday in Turkey today, but whilst I am recuperating from the journey, here is one of my blog pals from across the pond to with another great DIY!...

Hi guys! My name is Erica and I blog over at Caught On A Whim.  I love creating beautiful things and am so excited that Laura invited me to share this fun DIY with you today.

Ready to create a fun pom pom necklace?

HERE'S THE HOW TO:

Stuff you'll need:


Wooden beads
Twine
Yarn
Scissors
Fork

Method:

1. First, we'll attach the wooden beads to the twine. To start, simply thread the twine through the bead like so:

2. Next, loop the twine around and through the bead once more. Be sure the bead is placed where you want it to be on the necklace.

3. Pull the twine tight. Now, the twine is wrapped around the bead. This will hold the bead in place on the necklace. Add as many beads to the necklace as you'd like.

4. Now, we will make some mini pom poms using a fork. First, wrap yarn around the fork. I wrapped my yarn around about 50 times. Next, tie a strand of yarn around the wrapped yarn. Make it nice and tight. Finally, take the yarn off the fork and clip the loops on both sides. Fluff up your pom to get it nice and plump, and trim it into a nice round shape. (P.S. This is a helpful video tutorial for making pom poms this way.)

5. To attach the poms to your necklace, use a large needle to thread the twine through the poms.

That's all there is to it! I love how fun this necklace is! You can mix it up with different beads or changing up the pom pom colors. The possibilities are endless!
DIY POMPOM NECKLACE

It's been so great to meet you guys, and a special thanks to Laura for having me over today!

If you try out this tutorial, be sure to let me know. I'd love to see yours!

Erica x

Thanks Erica! This is a very cute DIY, I'd love to give these pompoms a go, maybe even make a whole necklace from them as well, like a pompom garland!

I hope you all enjoyed this as much as I did.

Laura xXx

Monday, 15 July 2013

Guest Post - {BEST EVER} Carrot Cake

carrot cake Hello all - it's rather exciting to be introducing myself for the first time over on Laura's lovely blog!

I'm Rachel of OH NO Rachio and I'll be sharing with you the recipe for the world's best carrot cake {bestowed upon me by the lovely Leoni of From Leoni With Love at our Craft Party.}

So whilst Laura is away enjoying herself, here’s a little opportunity for you to enjoy yourself too AND I promise you, there’s little skill required {win!}.
carrot cake ingredients
Here’s what you’ll need to make your cake:

* 5 eggs

* 450ml vegetable oil

* 400g self raising flour
* 570g caster sugar

* pinch of salt

* 12g ground cinnamon

* 530g peeled & grated carrots
* 150g walnuts chopped

* {optional} handful sultanas}

AND here’s what you’ll need for the topping:
 * 200g cream cheese

 * 150g sugar

 * 100g butter

The reason it’s a super easy cake is that {despite killing your arms with all of that carrot grating} all you need to do is throw all of the ingredients together into a food processor or mixer and mix for 5 minutes.
That’s it!

Grease your cake tin all over and pour your goopy mixture in {it’s ok for it to seem abnormally thick!}.

Then you pop it into a pre-heated oven at 160° for 45 minutes. Once your timer goes - take him out and insert a skewer into the centre, if when you pull it out it has cake goo on it, it isn’t done yet and pop it back in the oven for another 15 mins. If your skewer comes out clean, your laughing - and you can pop it onto a cooling rack to, well, cool!
recipe for carrot cake

amazing carrot cake

carrot cake recipe
Then beat together your three icing ingredients and spread on - I use a cake palette knife to get a level smooth finish, then you can decorate however you like!
carrot cake recipe I hope you enjoyed drooling over some gratuitous cake shots today! Thanks to Laura for asking me to fill in whilst she’s away - and if you like what you saw then why not pop on over to my blog to see lots of other cake based posts, recipes and craft DIYs here.
xo

Thanks Rachel! This cake looks yum, and with the addition of sprinkles it is perfection!

Check back on wednesday for my final guest post with Erica from Caught on a Whim. She is going to be showing us how to make a DIY necklace!

Laura xXx

Friday, 12 July 2013

Guest Post - DIY Braided Watch Strap

diy braided watch strap
So I am on day 5 of my holiday and I have a nice tan, and have not yet fallen off of the boat ( I hope, I actually have no idea since I wrote this before I left!)

Anyway, today I have Cambridge Crafter and Blogger, Claire from Claireabellemakes keeping you entertained with a DIY braided watch strap, take it away Claire...

Hi guys! I’m so excited to be here on Laura’s blog today whilst she is off on her hols (lucky thing). 

I know Laura is a big fan of DIY and jewellery like me, so I thought I’d share a little tutorial today for a DIY Braided Watch Strap. It uses the simple knots that are used to make friendship bracelets, so it might be a bit of a nostalgic craft for some of you! I hope the photo step-by-step guide is clear, but if not just tweet me @claireabellemks or send me an email at claireabellemakes@gmail.com. 

Happy Crafting! 

Claire x 

The supplies I used are from Knot and Bow (glitter twine) and eBay (jewellery findings and tools).

diy watch strap tutorial equipment


diy watch strap
Thanks Claire, that was awesome!

Don't forget to come back on Monday, when I have Rachel from OhNORachio popping by to share a delicious cake recipe with us! Yum!

Laura xXx