Monday, 29 April 2013

My Adventures with Bobby Glam Hair Extensions - Video Tutorial and Review

hair extension tutorial
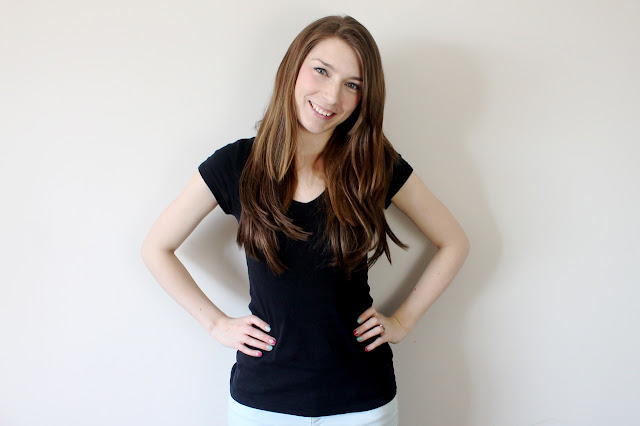
Hey guys, check out my new hair! What do you think? Ok, I have to admit, not all of it is mine, some of it belongs to Bobby Glam! Here's what my hair is like normally ...
I was excited to say the least when Bobby Glam approached me and asked if I would feature their product on the blog. I had never used hair extensions before, and to be honest there was a time when I would have never dreamt of sticking someone else's hair on my head! It seemed rather a strange thing   to do. Perhaps some of you feel the same? However, recently I had wanted to try some out for myself after I had seen my boyfriends sister wearing them, and she pulled them off stunningly! She curls hers, so for an evening out she would just pop them in, and perhaps curl a few sections of her real hair too. It sounded super easy and I would never have guessed it wasn't her real hair.

As you can see, my hair isn't exactly short anyway, but I liked the idea of adding a few extra inches, and also the extra volume I would get. Once the extensions were in I thought I would have a little bit of fun styling them, so have a peek at some of the simple styles I tried out and after I will let you know my thoughts in full.

If you stick around to the end of the post you might even see a cheeky video tutorial! Even if you aren't interested in the tutorial I would love to hear your opinion on the video. It is my first one which is very daunting but also quite exciting! Hopefully there will be many more to come in the future on all sorts of subjects, and I would love to hear your feedback. Anyway, back to the hair!  bobby glam hair extensions
I even managed a fishtail braid! Which is virtually impossible to do on my normal hair!

Just in case you were wondering, here is a picture of what the set looks like when it is not attached to my head...


I can't compare these to any other brands of hair extension, since it is my first time wearing them, and I am certainly no expert! Please remember that these are just my first impressions and I have not yet worn them for long periods of time.

Having said that I have heard that Bobby Glam do some of the thickest hair extensions, and they certainly added a lot of volume for me! I found the length of them perfect too (these were the 16 - 18in set). Long enough for me to feel the difference, but not too long that it looks fake.  I am sure I could pass this off as my real hair to people I haven't seen for a while!

To get the colour I had to send Bobby Glam a picture of my hair, they matched me as Iced Coffee, and sent me the triple weft set. When they arrived I was a little worried that they may be a tad too dark, but because the hair has a few shades in (one of which matched my colour exactly) it seemed to blend in pretty well. I have been thinking of dying my hair a slightly darker shade and I think they would still work well with that too.

I found them easy to clip in (once I had figured out how to do it), and they seem to blend seamlessly with my own hair. My only criticism is the fact that they did not come with any instructions, and to a hair extension novice like me it was a little confusing.

So, to help solve the mysteries of hair extension application I have made you a little video of the way I figured best to do it! I have found there is also a fun game that can be played with this video, it's called "spot the frame where I am not pulling a silly face". There are very few! It turns out that I am very expressive when I talk. Enjoy!


Disclosure - I was not paid to write this review for Bobby Glam, but I was sent the product free of charge. Everything I have written (and said) is my own opinion and was not influenced in any way.

Laura xXx


Read More

Saturday, 27 April 2013

My Top 10 Tips For Flawless Nails

Over the last year I have become more and more obsessed with painting my nails pretty colours and patterns. Whilst browsing some of my old posts I noticed how much better I have become at actually doing them neatly, so I thought I would share with you my top 10 tips on how to create flawless nails.
  • Let them breathe! Even if its's just for a day a week, try not to keep them painted the whole time.
  • Buff! Once a week I usually remove my nail varnish, cut my nails, buff them, mouisturise them and push the cuticles back. I have found that when my nails are buffed they are less likely to stain from the nail varnish, as they have a shiny surface. And that brings me on to my next point...
  • Use a base coat! I have had nasty experiences, especially with red nail polish, after having not worn a base coat, it is not a pretty sight.
  • Pick a good quality nail varnish, especially if you are planning on painting different layers. Some of my faves are Rimmel, Sally Hansen, Essie and Models Own.
  • Don't flood your cuticles. Make sure you leave a gap between your cuticle and the start of the varnish. It took me ages to realise this looked SO much better. If I do by accident, or if they look a little untidy I get a very fine paintbrush and dip it into some nail varnish remover, then I just follow the cuticle round until it looks nice and smooth.
  • Let the layers dry. This may sound obvious but it is especially important if you are planning on painting different colours on top.  A lot of the designs I go with have 3 colours, so I would usually paint my nails the base colour on an evening where I don't have anything to do. The first coat would go on after I had done everything I needed to. Dinner made and washed up, any chores done, and already in my PJ's! I would give the first coat at least an hour to dry before putting on the second, and make sure there is another hour to go before I need to be in bed. I often find that I end up with annoying duvet marks if I paint them too late!  Then, my second colour would go on the following day, and the third the day after that. I often use these stickers, so the polish has to be completly dry or it would ruin the layers you had already done!
  • When the varnish is dry, if you have made any mistakes you can touch them up using you chosen nail varnish and a cocktail stick for the fiddly bits. The lumpiness you can often get with this will most likely be concealed by my next tip...
  • Use a top coat of Seche Vite. This can hide a multitude of sins! 
  • Moisturise! Your nails will always look better if your hands are not dry and in a good condition. I probably have a bit of an ocd thing about moisturising though, I do it all the time!
  • When your nail art is coming to the end of its life, you may find that the top of the varnish starts to wear away and you can see the top of your nail coming through, or perhaps another colour. A handy tip to make it last just that little bit longer is to use a nail art pen to add to the design, just like I did below!
I hope you found my tips today useful. I will admit that I do not follow all of these tips myself all the time, but I find that I get the best results when I do! If you want to take a look at all of the other nail designs I have done on the blog, you can find them here.

Just in case you are interested the varnishes I used for my nail design in the pictures above are these...
    Laura xXx
Read More

Thursday, 25 April 2013

Book Club - Life After Life

“What if we had a chance to do it again and again, until we finally did get it right? Wouldn't that be wonderful?”

This book was recommended to me by @acaseforbooks on Twitter. She truly knows her stuff where books are concerned and I am delighted to say that I absolutely loved it!

Life After Life explores the idea that a person has infinite lives, when they die they are reborn, and depending on the decisions they make each time, their lives can take all sorts of twists and turns.  Our protagonist is Ursula, and we meet her from the moment she is born in 1910.

Ursula dies repeatedly, in many different ways, but each time she is allowed to begin again (unknowingly) and make decisions which will alter her future each time. To begin with, it is heartbreaking reading the various deaths of a child that you have grown quite fond of. I found myself willing her away from any danger, but the inevitable always happens at some point. However, as Ursula reaches adulthood I began to feel hope with each death, as it marked a new life, and a possibility that she will finally find happiness.

“She no longer recognised herself, she thought. She had taken the wrong path, opened the wrong door, and was unable to find her way back” 

As we learn more about Ursula, so she learns more about herself. The final chapters are quite adventurous, and you might recognise a name or two from the history books! I really loved this aspect, that Ursula could change the course of history not only for herself, but for the whole world! Each life has it's fair share of good and bad, and I feel that Atkinson encourages you to ask the question, in which life is she happiest?

“Ursula craved solitude but she hated loneliness, a conundrum she couldn't even begin to solve” 


If you have read this book I would love to know which life you felt Ursula was happiest, and which life you enjoyed most? If you haven't read this book yet, I think you should! You can get hold of it here.


“You can step in the same river but the water will always be new” 


Laura xXx
Read More

Monday, 22 April 2013

Wedding Plans

Today I thought I would talk a little bit about how our wedding planning is going! I have been blogging over at Wrapped Up in Weddings if you want to hear more.

Recently my Mum and I went on the hunt for the perfect dress. The first dress I tried on was absolutely lovely! But then I tried on lots more and got a little bit confused, so we decided to stop at The Courtyard Kitchen for a cup of tea and a scone to regain our strength! How cute is this little teapot!?
I didn't find the perfect dress, but i did come away with a better idea of what I wanted, so at least I am going in the right direction.

I have been making myself a little scrap book so that I can keep track of any companies I like, as well as colours, styles and other ideas. We have been to quite a few wedding fairs which you will probably know if you have been reading my wedding blog Wrapped Up In Weddings. If you are getting married soon you might like to visit as I mention lots of fantastic suppliers I have bumped into on my travels. Especially lots of photobooth companies!  
Anyway I have been collecting everything I get from the fairs, as well as cuttings from the occasional wedding magazine I buy.  I have loved making little collages with all of the pretty pictures!
I'd love to hear from you if you are planning a wedding too, how are your plans going?  We are rapidly approaching the 1 year mark so I had better get booking things! Doesn't time fly!?

Laura xXx

Read More

Friday, 19 April 2013

DIY Fancy Brogues

You know how much I love nail varnish right? Well, today nail varnish is going to be partnered with shoes! Cute little black brogues to be precise! I like a bit of colour and these seemed a little bland, so I thought, why not!?
The handy thing about brogues is that you already have a line to follow when painting! I picked 2 of my favourite varnish colours, but the bottles were coming to the end of their lives. Then I simply painted in the lines. It took 2 coats in total.

Below you can see how they looked before:
And here's after

I could probably have painted a little bit neater, but I think they came out great! And if I get bored I can just paint over it!

Laura xXx
Read More

Wednesday, 17 April 2013

Healthy Smoothies - Raw Chocolate and Avocado

healthy smoothie
This is the last in my series of healthy smoothies, and it is a bit of a wild card. You may remember a little while ago I made a healthy chocolate mousse using raw cacao and avocado as the main ingredients. Well it was so delicious I thought I would modify the recipe for a smoothie. There are some fab health benefits with the ingredients too!

Raw Cacao enhances physical and mental well being, lowers blood pressure, improves circulation, helps prevent against cancer and improves digestion! Please note this is RAW chocolate, I don't think your average bar of dairy milk would have the same effect.

Avocado's are one of my favourite foods. I add them as a side to lots of meals we have. They make me feel healthy! They are a fantastic source of healthy fats, they lower your cholesterol, they protect your eyes, they reduce blood pressure and on top of that they are great for your skin too!

Coconut Oil can reduce bad cholesterol and can be a cure for arthritis and joint pains. It is good for your heart and keeps your blood sugar level under check. It is also great for your skin!

Rice Milk is healthier for your heart than cows milk, and obviously is much better for those who are lactose intolerant!


healthy smoothie - cacao and avocado
Ingredients:
  • 2 tablebspoons raw cacao
  • 1 avocado
  • 3 cups rice milk
  • 2 tablespoons agave nectar
  • 2 tablespoons melted coconut oil
As usual, just whizz it all together in a blender.

Ok, I must admit, this one did not go down with everyone as well as the others have done. I think it is probably because the taste is so unusual, and if you are expecting to get a chocolate smoothie then you would be in for a shock! However, it is definitely still drinkable and considering the health benefits I would have this again. Maybe it could do with a few tweaks. Please let me know if you can make one that actually tastes as good as chocolate!

I hope you enjoyed my little smoothie series. Have you made any healthy smoothies that have turned out delicious recently?  If you missed any of my previous smoothie recipes, you can follow the links to them below.

healthy smoothie
Laura xXx

Read More

Monday, 15 April 2013

Guest Post at Caught On A Whim - DIY Cross Stitch Bracelet

I am super excited to be guest posting over at Caught On A Whim today, while Erica is on holiday. It is such a lovely blog full of wonderful DIY's. You really must take a look!

You can take a peek at my DIY Cross Stitch Bracelet Tutorial here. Hope you like it!

Laura xXx
Read More

Friday, 12 April 2013

Vanilla seeds and berries

healthy vanilla seed snack
A little while ago I decided to try my hand at making a healthy snack, after being inspired by my Graze box which included vanilla pumpkin and sunflower seeds! I think these would be great added to cereal or yoghurt in the morning as well.
Ingredients:
  • Sunflower seeds
  • Pumpkin seeds
  • Goji Berries
  • Vanilla pod
  • Honey
Pour out some honey into a bowl, then scrape out the seeds of the vanilla pod and mix in.  Now mix in your seeds and goji berries. Cover a pan in baking paper and spread out your seeds evenly as above. As I used an Aga rather than a conventional oven I can't really tell you what temperature to set the oven to.  Just make sure you keep an eye on them, they probably won't take much longer than 10 minutes. Be careful the goji berries don't burn, mine were getting very close!  

One mistake which i made was to leave them out to cool on the baking paper. When I came back they were completely stuck to the paper and I couldn't get them off! Luckily, after popping them back in the Aga for a minute the honey eased up and I was able to scrape them off easily into a bowl. This time I made sure I stirred and broke them up while they cooled. It didn't take long! And I found this to be the best way of separating them.

They were pretty tasty! Next time I think I will use a milder honey to let the vanilla flavour come through more. Also, perhaps I will add the goji berries later, as they took the least time to cook.
PS. Don't put them in the fridge! The honey's consistency will change and you will end up with a bit of a gloopy sticky mess.

Laura xXx

Read More

Tuesday, 9 April 2013

Hair Tutorial - 80's Curls

80's hair tutorial
Today I wanted to share with you the results of my attempt at this hair tutorial from The Glitter Guide. I actually first tried this for last New Years Eve party, as it was an 80's theme. It worked so well I wanted to see if I could pull it off in everyday life. I love curling my hair but I don't like the idea of damaging it using curlers or hair straighteners too often. Well this is the perfect solution as it involves no heat whatsoever!

Please excuse the myspace-esque photos. I didn't have a Chris handy to take them for me. Also, I find it very difficult to take photos of myself without making silly faces, you may notice this in a moment...

When still damp (but not too wet) simply twist segments of your hair into little buns. (You have done it correctly if you are starting to look like Bjork or one of the members of Alisha's Attic) I also sprayed a little hair spray onto each bun as I finished it. Then sleep on it! In the morning untwizzle them and seperate the hair and you should have something similar to above. But whatever you do, don't brush it! If you are in a hurry you can also do this with dry hair, just make sure you use lots of hairspray, then leave to set for a couple of hours. 
80's hair
I was pretty shocked at how big my hair was to begin with! But it soon calmed down into some rather nice waves. It seems that my hair doesn't hold a curl for very long at all! Luckily I quite liked the way it tuned out in the end. One of those styles that looks naturally tousled in a boho, bed head sort of way. (even though it did take me a fair bit of time to achieve this 'I've just got out of bed' look!)
curly hair tutorial
I've been looking at lots of hair tutorials recently. My hair is getting pretty long now so there seems to be lots more I can do with it, I'm looking forward to trying some more! Have you found any good hair ones recently?

Laura xXx


Read More

Monday, 8 April 2013

Healthy Smoothies - Mango, Banana and Goji Berries

healthy smoothie recipe
Todays smoothie is mango, banana and goji berry! Here are some of the health benefits of these ingredients:

Mango has been proven to help protect against cancer as well as strokes and  is great for your eyes!

Bananas are fantastic, they can help with depression, morning sickness, heartburn, increase brain power and calm the nervous system.

Goji Berries have compounds rich in vitamin A, that may have anti-aging benefits. In Asia they have been eaten for generations in the hopes of living longer. They also boost immunity, protect your vision and help prevent heart disease.
Ingredients:
  • 1 mango
  • 1 banana
  • 3 tbsp goji berries
  • 1 cup water
This one turned out delicious and refreshing! I love the colour too! You can check out some of my previous smoothie recipes here, here, here and here.

Laura xXx
Read More

Friday, 5 April 2013

Wheat Free Rocky Road Recipe

Wheat free rocky road recipe
I seem to have developed a bit of a weakness for Rocky Road in the last few weeks.  The sandwich lady at work has been bringing it on her little sandwich wagon, and unfortunately I have been unable to resist it on quite a few occasions!

So, I decided to give in completely and make some myself.  If you don't already know, my other half is wheat intolerant, so this version is made using wheat free digestives!
wheat free rocky road recipe
Ingredients:

  • 300g chocolate (I used dark cooking chocolate)
  • 100g unsalted butter
  • 1 tbsp Golden Syrup
  • 200g digestive biscuits (mine were wheat free)
  • Glacier Cherries
  • Marshmallows

Start by putting the biscuits in a freezer bag and bashing them up with a rolling pin so that there are still chunks of biscuit but also some crumbs. Distribute the biscuits into a pan.  I couldn't find any mini marshmallows so I just cut up big ones, distribute these evenly around the pan and do the same with your cherries. I cut some of these in half.  It should now look something like the above picture.

Next break up the chocolate into a pyrex dish, then add the butter and golden syrup. Heat a saucepan half full with water and place the pyrex dish on top (obviously pick a dish that will fit well in the saucepan), then stir while they all melt together.  Once melted pour on top of the other ingredients. You may need to give it all a little stir just to make sure the chocolate is evenly spread around.

Pop in the fridge to cool for a couple of hours and it's done! And it was scrummy too!
wheat free rocky road recipe
Laura xXx
Read More

Wednesday, 3 April 2013

White and Blue Polkadot Nails

polkadot nail art
Today I thought I would show you a really simple but very cute nail design I tried recently.  Who doesn't love a few polkadots!?
Supplies:
So, pretty simple really. Just paint your nails a base colour, once dry you can start dotting them with your nail art pen. I got mine from Primark for a bargain!

I would suggest practicing a little bit on paper before you try on your nails. I found that mine gave the perfect splodge of white by just pressing the tip of the pen down vertically for a second. You want to try to do them so they are all roughly the same size if you can. I can definitely see myself trying this design in lots of different colour ways. I have already tried  grey and black which you can see in this post.
polkadot nail art
Laura xXx


Read More

Monday, 1 April 2013

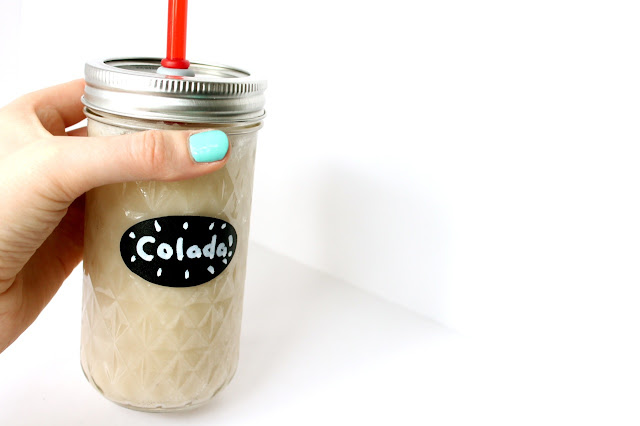
Healthy Smoothies - Pina Colada

pineapple coconut healthy smoothie
Todays healthy smoothie is a delicious Pina Colada! Pineapple, coconut, banana and a little bit of coconut oil. Here are some of the health benefits;

Coconut milk and coconut oil reduce your bad cholesterol and can be a cure for arthritis and joint pains. They are good for your heart and keep your blood sugar level under check. They are also great for your skin!

Pineapple is packed with fibre and vitamin C, it's also known for it's anti-inflammatory benefits.

Bananas are pretty awesome, they can help with depression, morning sickness, heartburn, increase brain power and calm the nervous system.
    pineapple coconut smoothie
    Ingredients:
    • 1 tin sliced pineapple
    • 1/2 cup Coconut milk (or half a can)
    • 1 Banana
    • 1 tablespoon coconut oil
    This one was delicious and really easy to make. Just stick it all in the blender! I'll definitely be making this one again but I think I will try it with fresh pineapple next time.
    pineapple coconut healthy smoothie
    Laura xXx

    Read More
    Related Posts Plugin for WordPress, Blogger...
    Powered by Blogger.

    © 2011 Wrapped Up In Rainbows, AllRightsReserved.

    Designed by ScreenWritersArena