Pages

Wednesday, 26 September 2012

Nail Design - My Little Pony

Nail art
Hoorah! My nail stickers finally arrived! Now I have a full supply of 9 designs! So I thought I would combine two of my current favourite colours and try out the triangle design. So there isn't really much relevance to My Little Pony as the post title suggests, except that the colours I chose really remind me of that classic 80's children's TV show.
Nail design ideas
Nail Polish
 The supplies I used were:

  • Seche Clear
  • Barry M - 318 Peach Melba
  • Rimmel London Pro - 500 Peppermint
  • Seche Vite
  • Nail stickers
It was my first time using the Seche Clear as a base coat and it seemed to work well, but the proof will really be when I take it off. Seche Vite is now my new favourite top coat. I bought it to try out as everyone seemed to be talking about it, and I have to say, the hype is well deserved. It dries super quickly! I'm really looking forward to trying out all the other sticker styles :)

Laura x X x


Sunday, 23 September 2012

DIY Tutorial - No Sew IPhone Stand

Hi everyone, sorry I have been so quiet recently. I have been busy with lots of engagement party planning. Today I am going to show you a new take on a DIY I tried a little while back. You can find my original Iphone Stand Tutorial here. As it seemed to be so popular I thought I would show you a simpler way of making this without any sewing.
DIY iPhone Stand
First off you will need to gather your supplies, you will need:
  • Thick card
  • Glue
  • Pencil
  • Ruler 
  • Knife or scissors
  • Decorative paper of your choice
  • Ribbon or Double sided tape
iPhone Stand Tutorial
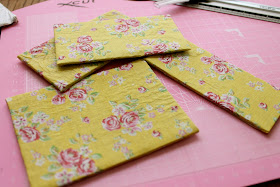
Take your card (this time I used a cardboard box) and cut it into 4 rectangles. Two pieces should measure 11.5cm by 6cm, one 11.5cm by 5cm and the last 11.5cm by 9cm. The Largest piece will form the base.
DIY iPhone Stand Tutorial
Next you want to decorate the pieces of card in your chosen paper. I used a thin, tissue paper, so I glued it to the front using Mod Podge and tucked the edges around the back (below). Then I cut out a square to fit the back side and glued that on too.
iPhone Stand
However you decide to do this you will want to make sure both sides are covered fairly neatly as they will both show. You could even paint it if you don't have any paper you like.
DIY iPhone Stand
Once your card is covered you will want to create the 'hinges' for your stand. You will need 4 pieces of   ribbon, at least the length of all of your pieces of card when they are lined up in together. If you don't have ribbon you can use double sided sticky tape to make your own like I did. Simply find some paper and stick it to the double sided tape, then cut off any excess.
iPhone Stand Tutorial
You are now going to line up your pieces of card as below (largest and smallest at the ends), then glue or stick your ribbon to the edges. Remember to leave a little gap between the pieces of card so that the hinges can work properly. You will need to do this on both sides.
Tutorial for an iPhone stand
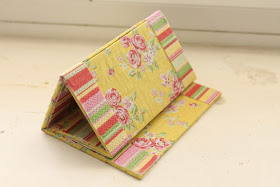
Thats it! You should now be able to fold it up as below and your Iphone will happily sit on its pretty new perch.
DIY iPhone Stand Tutorial

Laura xXx

Tuesday, 11 September 2012

The biggest adventure in Pip the Campervan yet!

I am aware that I have been neglecting my little blog for a while now, but there is good reason I assure you!  Last friday I got engaged!
My engagement ring
It was our 5 year anniversary of being together, and Chris had surprised me with a meal at a swanky restaurant. Afterwards Chris declared that we would be sleeping in the van. Ok, I thought this a little odd, as the van was only in the driveway, but hey ho! Chris went on inside while I got ready for bed in the house, when I opened the van door there was Chris on one knee holding the ring above! I was shocked to say the least, but after several moments of dumbfounded silence I, of course, said yes!

Once I had recovered from the shock I finally got the whole story.  You may remember a few weeks back that I mentioned my favourite antique shop? Well on that very visit I had pointed out a ring that I thought was pretty. Once Chris had made the decision to pop the question he decided he would have to go back to that shop to get that ring (which was an hour and a half drive away), keeping his fingers crossed that it was still there two weeks later!  On his way back he went and asked my Dad's permission - luckily he said yes!

No one else knew! Not even Chris's parents, who, at the point of proposal were tucked up in bed. It was far too exciting news to wait until the next day so we decided we would have to go and wake them up. The next 30 minutes or so was spent sat on the end of their bed drinking Asti! Of course I didn't sleep all night after all of that excitement!

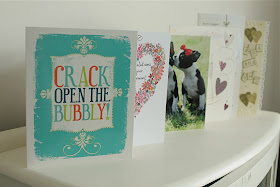
I'm still getting around to telling everyone, but I've had some lovely cards from the people that know so far.
Engagement Cards
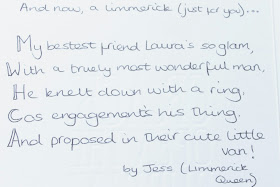
 My friend Jess wrote me a limerick, which pretty much sums up the event perfectly!

Engagement Poem
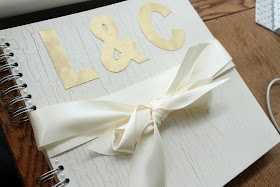
Another friend made me a lovely book for planning in, and dropped it on my doorstep on sunday morning.
Wedding Planning Book
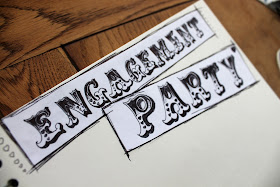
First things first ... 
Engagement Party
You may be seeing lots of wedding themed posts from now on I am afraid!

Laura xXx

Tuesday, 4 September 2012

My Favourite Etsy Shops

I wanted to share some very lovely etsy shops, belonging to some very crafty people I have met thanks to the wonderful media that is twitter. Here are some pictures of items you can buy at their beautiful etsy shops.

Oh Hello indeed! Such pretty designs at OhNoRachio, found on plates, cards and notebooks. Be sure to check out her beautiful banners too!

Stop by at Je Suis Monstre where Katie is selling rather luxurious knitted scarves ready for winter!

I love Georgina's toy dinosaurs, each one is totally unique! Plus, elephants are also available!

Claire makes the sweetest fabric button rings and hair clips as well as lots of other cute jewelry. Perfect for gifts or just for treating yourself.


I love the idea of Katherine's recycled jewelry and clothes. This little robot necklace is pretty awesome in particular!

Have you come across any great etsy shops recently?

Laura xXx